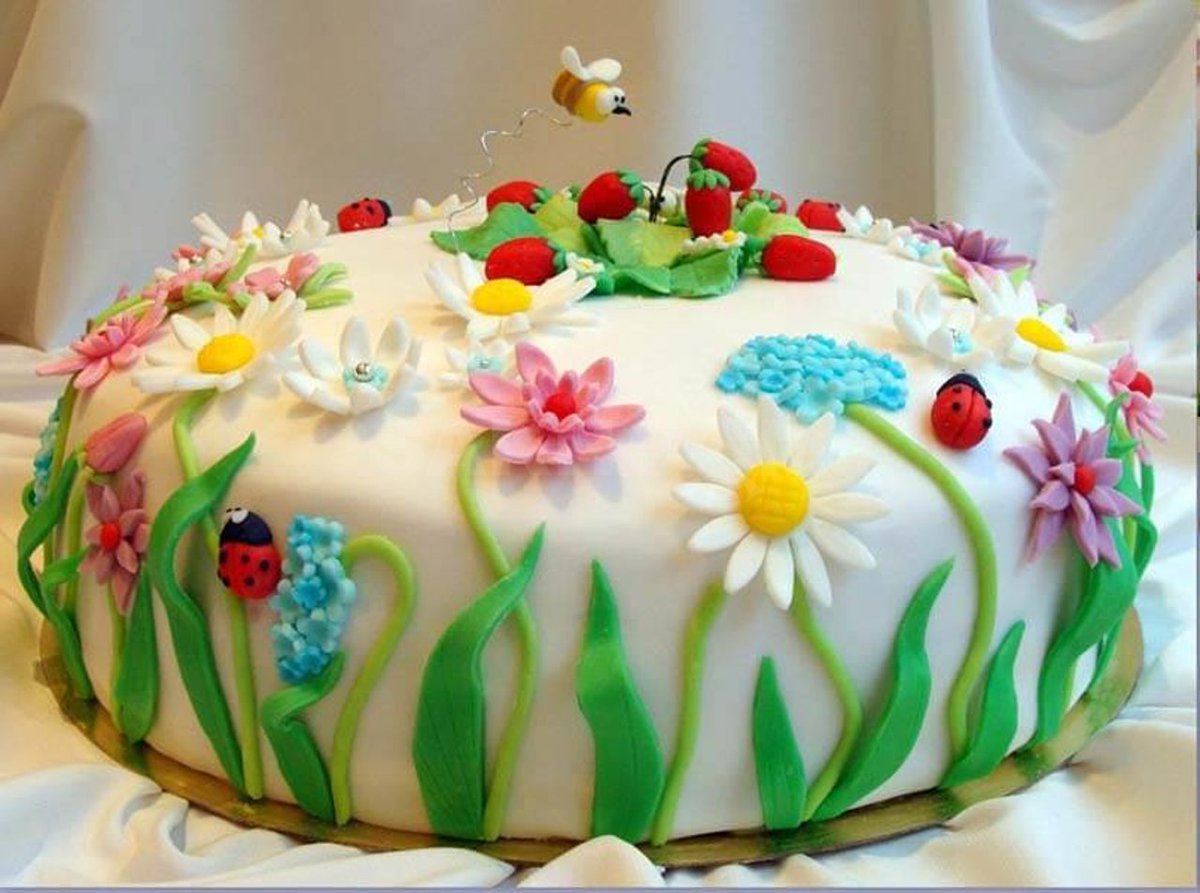
Decoration of cakes with mastic: selection of mastic, tightening of the cake and creating figures from mastic. Photos and step-by-step master classes
Contents
- Jeweling Cake mastic step by step: choice of mastic
- Mastic for decorating a cake with your own hands step by step - tips on creating figures
- Video: sugar mastic on inverted syrup with your own hands
- Mastic for decorating a cake step by step: Hello Kitti Cake
- Video: Cake for girl Hello Kitti
- Cake with a lion cub for a boy - tips on decorating a cake mastic
- Video: Boy's birthday cake
The decoration of the cake with mastic is a creative process, from it you can sculpt edible jewelry, like from children's plasticine. But the mastic for the cake is a somewhat moody material, and in order to work with it, you need to know some secrets that experienced confectioners can talk about. This article will tell you how to make cakes from mastic step by step, how to work with this material and how to make figures from mastic.
Jeweling Cake mastic step by step: choice of mastic
The very first stage of decoration of the cake with mastic is a tightening of the cake. Which mastic is better to buy, is the mastic made by yourself for this, according to recipes from the Internet? What is the recipe for homemade mastic?
The first thing to take into account is that the mastic for the cake is of two types:
- Universal mastic Suitable for tightening the cake, and for modeling figures. It is very soft and stretches easily.
- Mastic for figures - This is a denser mastic. It is harder to knead, it is harder, denser and worse stretching. Such mastic is suitable for creating figures, and is not suitable for tightening the cake. She will go to bed poorly, and possibly crack.
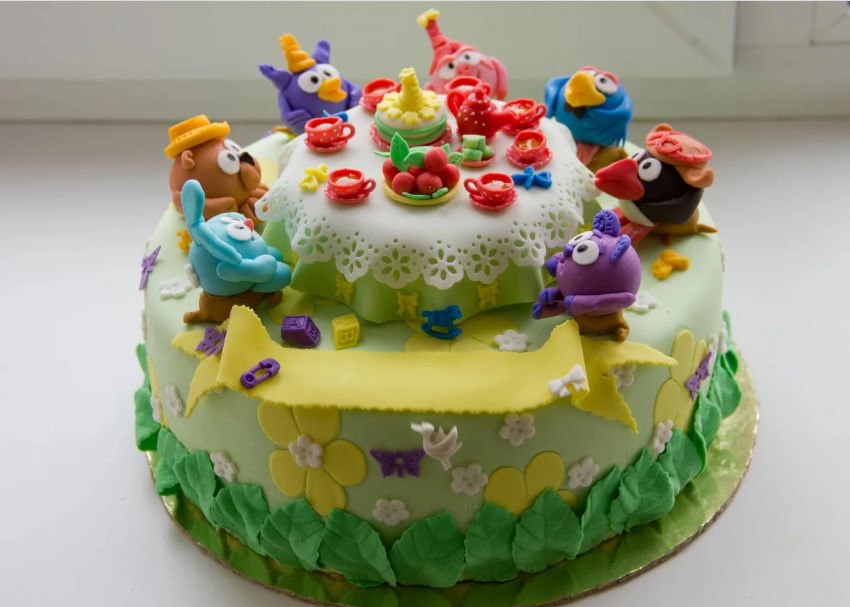
So, if you want to buy ready -made mastic for tightening the cake, then on its packaging it should be indicated that it is suitable for tightening, and not intended only for modeling figures.
Ready mastic for cakes
The finished mastic of the Russian manufacturer Top Decor has proven itself, at a price it is cheaper than imported. Such mastic is sold in packages weighing 600 grams and in large plastic buckets.
The finished mastic contains ingredients that may not really like people who care about their health. These are thickeners and chemical dyes.

Willy-nilly, the question arises, how to make the mastic yourself so that it be harmless? But here the hostess can be disappointed.
If you can do without thickeners and an emulsifier, then without a chemical dye beautiful mastic for a cake will not work.
The fact is that the mastic at home is yellowish. To get beautiful colored shades, she first needs to give white. For this, even at home, they use titanium dioxide. This is white food dye, which, despite the name, is considered very inert, and therefore relatively harmless.
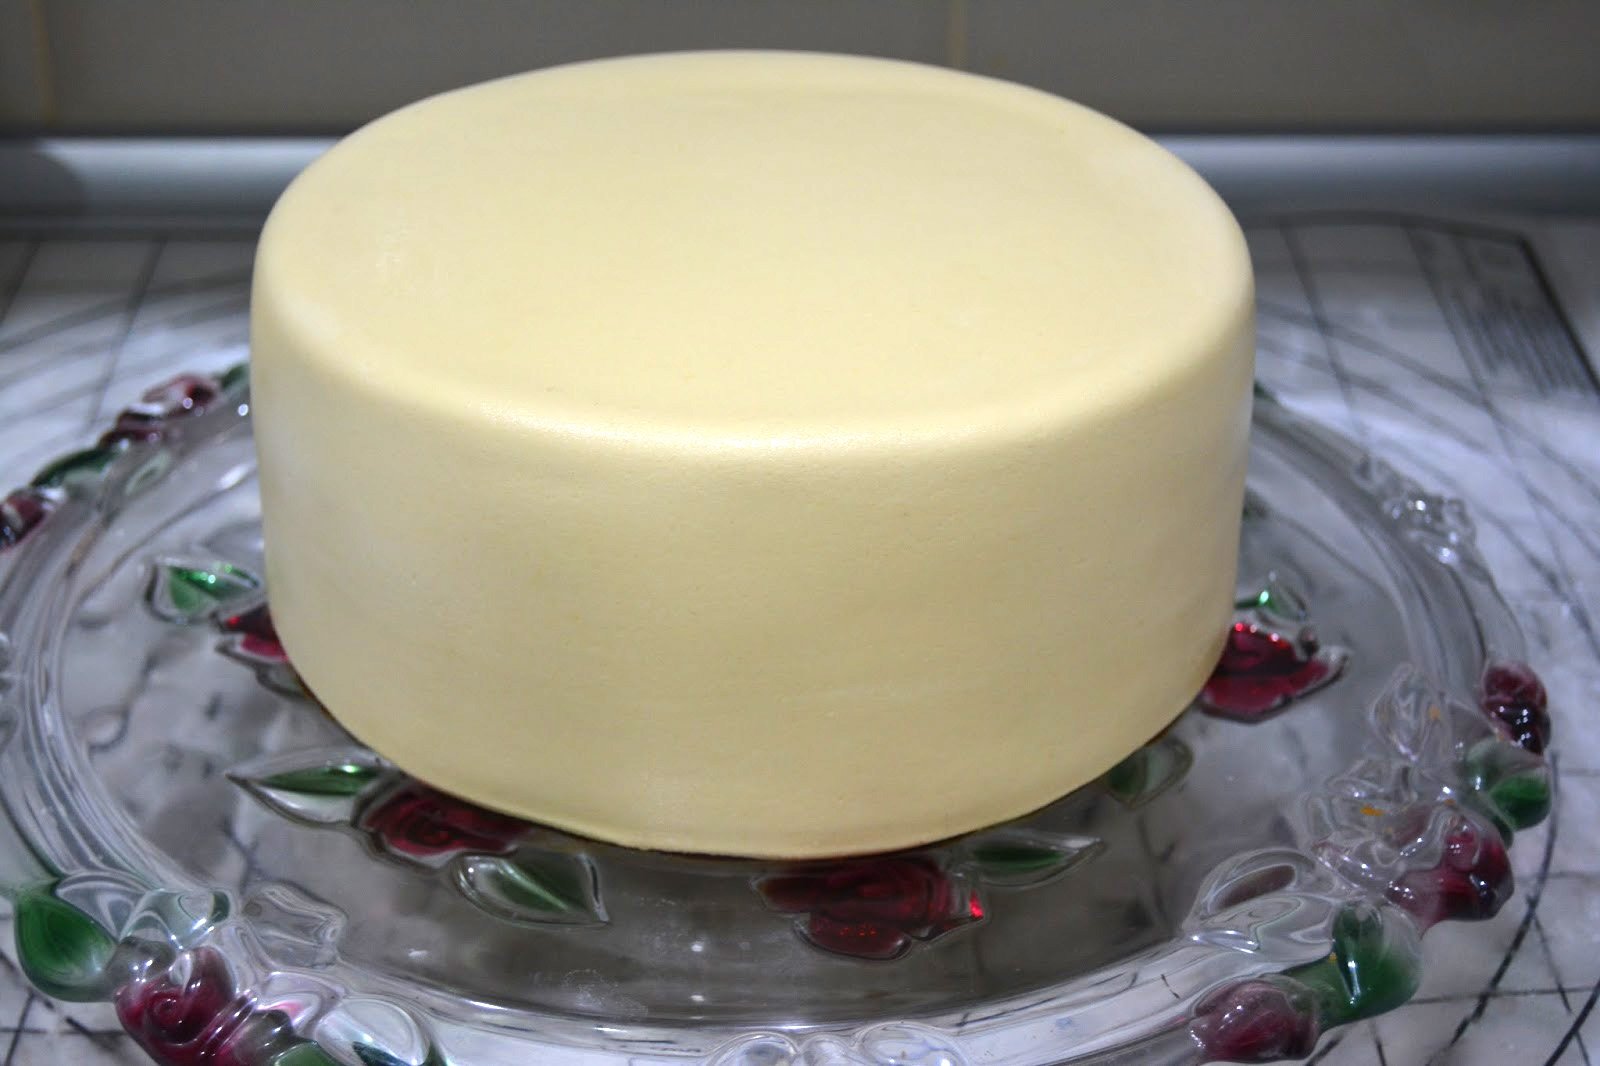
If you use a home yellowish mastic for a cake, then it will be difficult to achieve bright bright shades with it.
For example, the blue color will turn out to be greenish, and the pink color will turn into peach. The next photo is absolutely white mastic, for staining which was used by titanium dioxide.

Mastic for decorating a cake with your own hands step by step - tips on creating figures
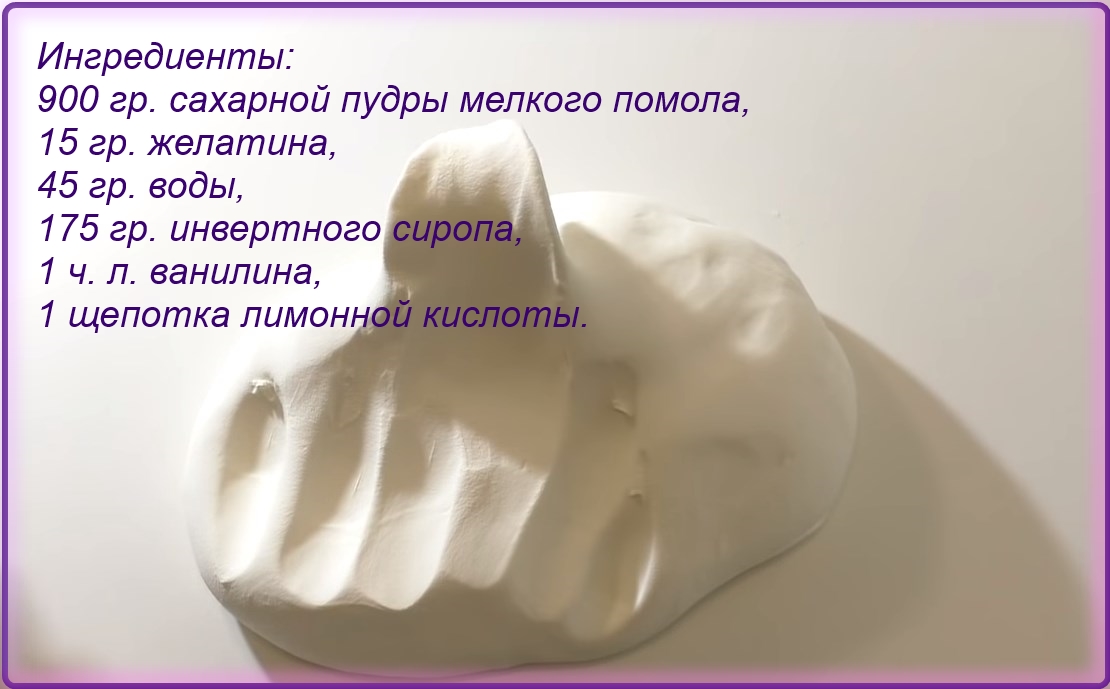
We bring to your attention a recipe that will help make mastic at home step by step. The mastic for cakes will turn out to be soft and plastic. The ingredients for its creation are listed in the next photo.
First you need to dissolve gelatin. Pour it with water, mix and heat it with lowering the plate with gelatin into a large bowl of hot water.
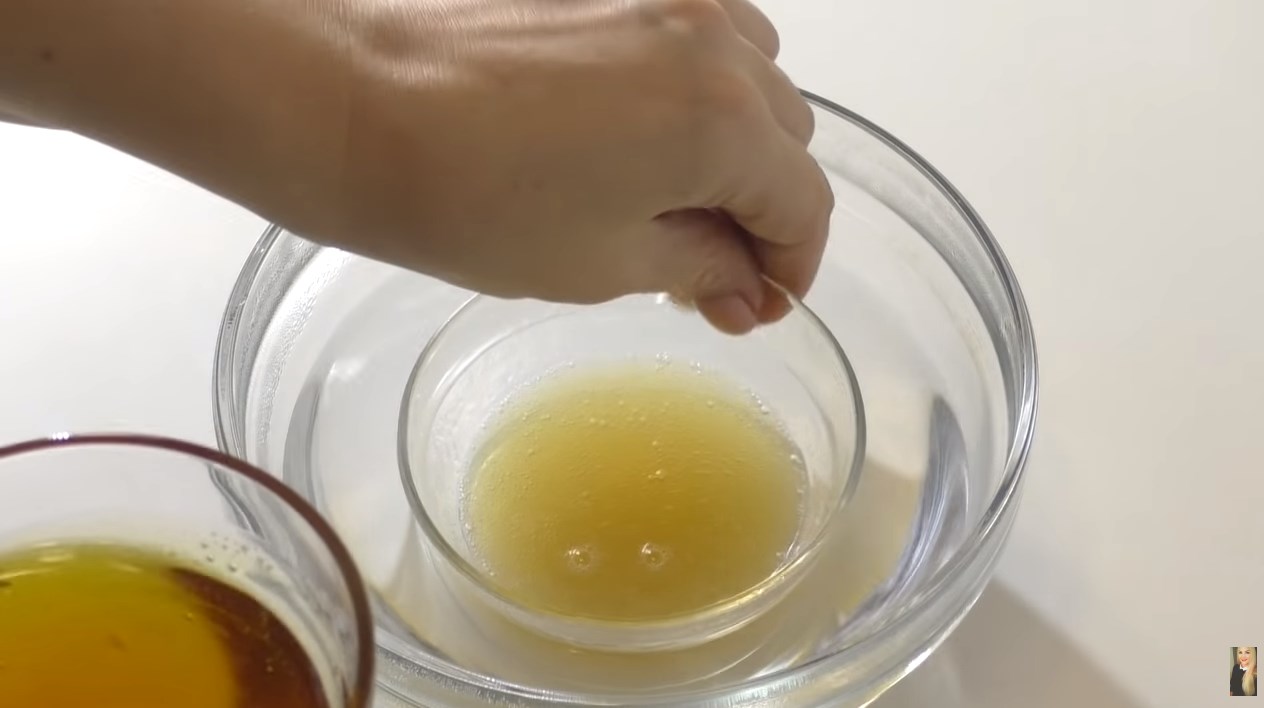
When the gelatin is well dissolved and mixed, the time is heated in the same water and inert syrup.
Instead of inert syrup, you can use natural honey.
Mix bulk ingredients with each other. Pour the powder into a plate, pour citic acid and vanillin into it. Then mix the dry mixture. After that, pour liquid ingredients into it.
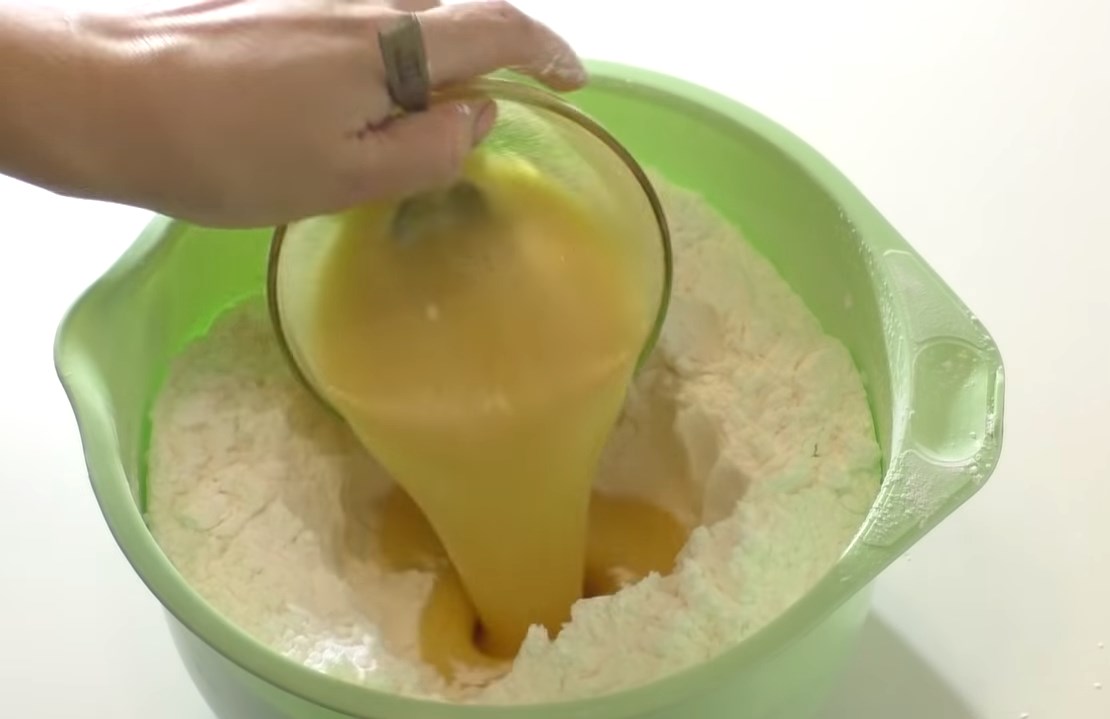
Now it remains to mix the dough well. So that the sugar dough is not linked to the table and hands, sprinkle them very little with corn starch.
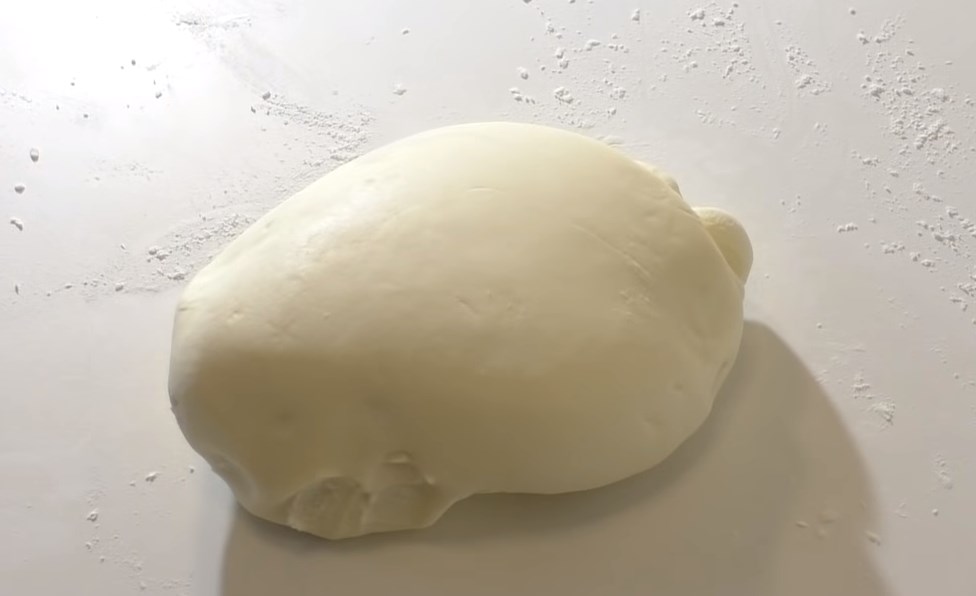
For those who want to know in more detail how to make mastic step by step, the following video.
Video: sugar mastic on inverted syrup with your own hands
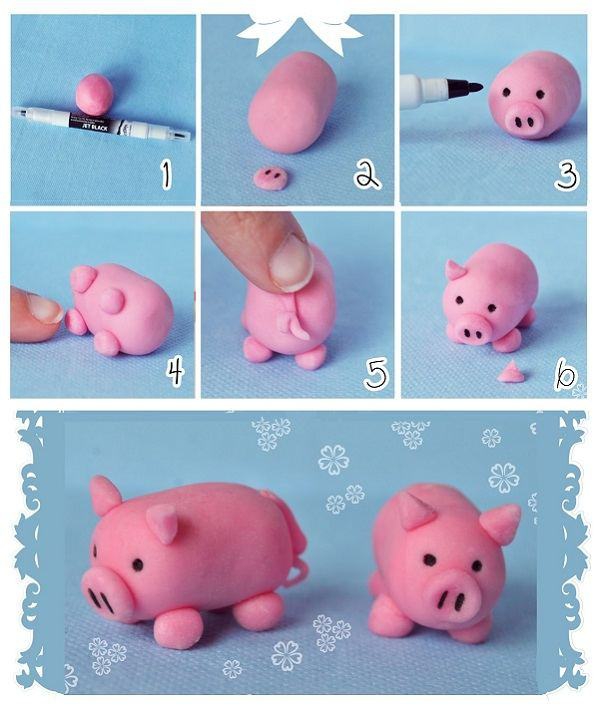
Tips for creating figures from mastic to decorate the cake:

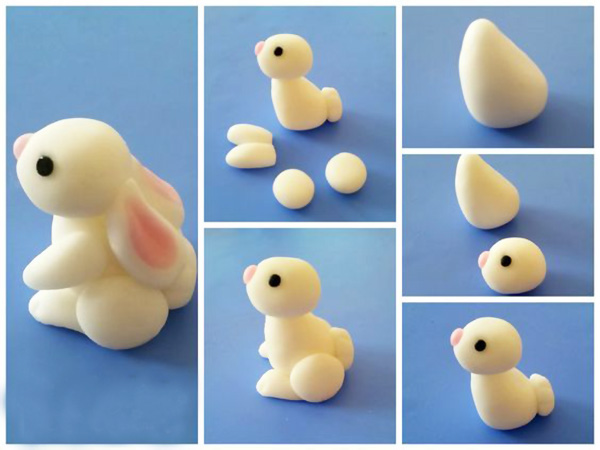
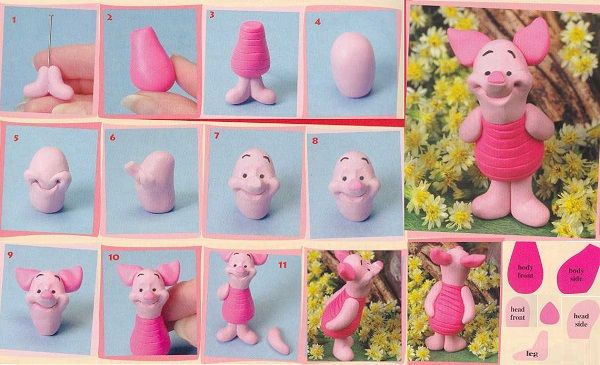
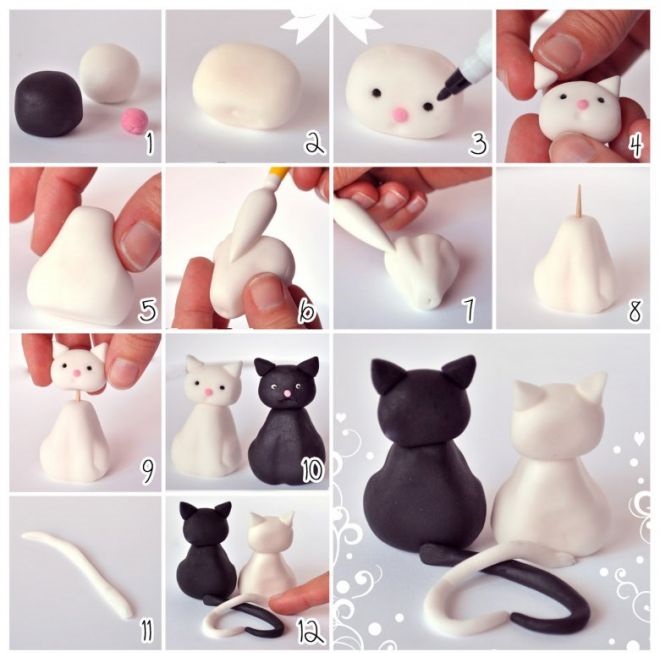
Mastic for decorating a cake step by step: Hello Kitti Cake
To design this cake, quite a lot of materials from the arsenal of professional confectioners were used, this is:
- Sugar paper.
- Mastic and lilac dye.
- Confectionery glue.
- A little pink, black and yellow dyes for a mastic figure.
- A wooden skewer that will hold the kitten.
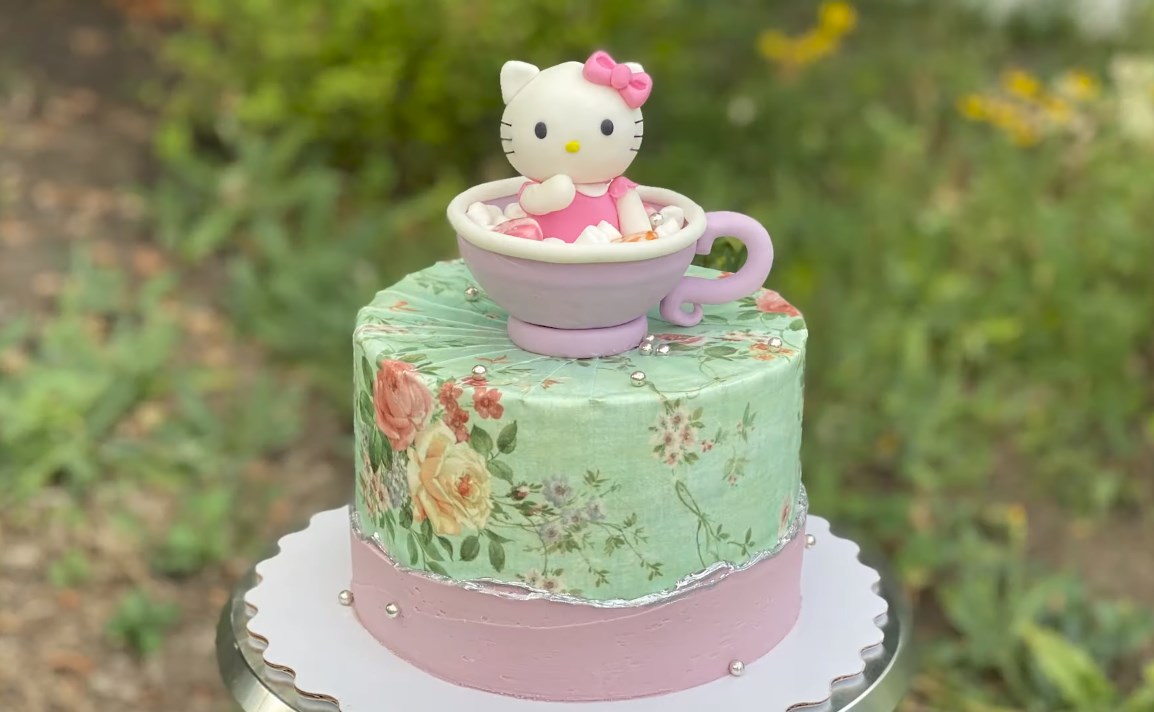
At the first stage, we coat the cake with a thick curd cream. About the sixth part of the cream must be left to make a beautiful side at the top of the cake.
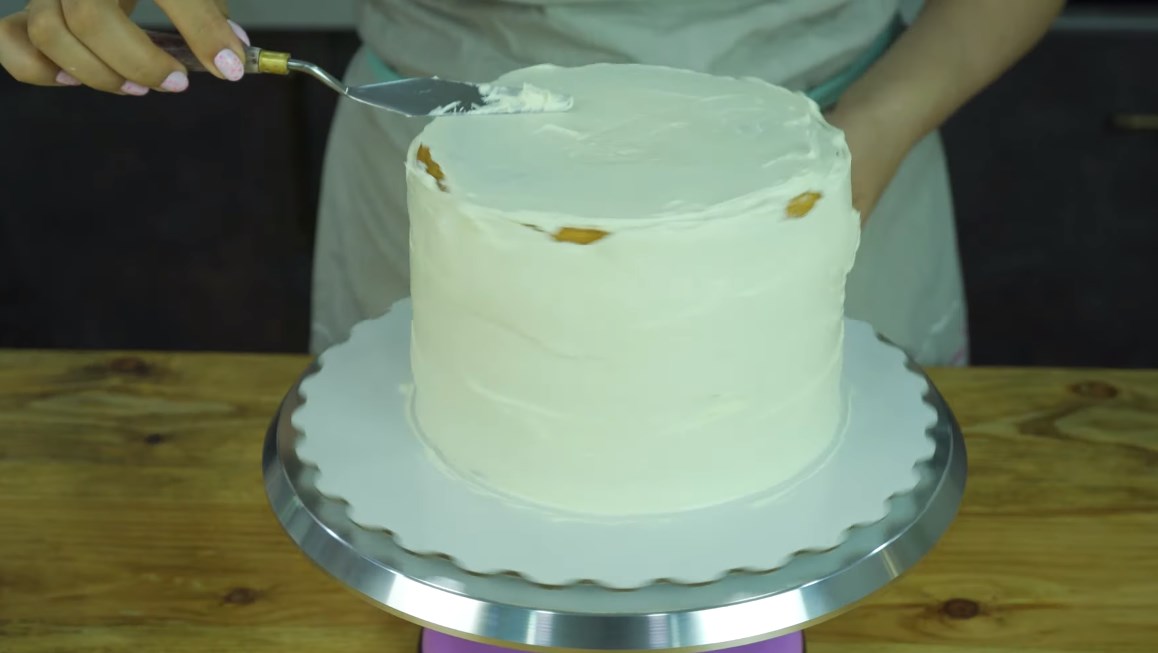
For figures of this master class, finished mastic is used Top product For tightening, vanilla white. You need to add a little lilac dye to mastic to get a delicate lilac color.
It is necessary to separate part of the lilac mastic to make it a cup in which Kitty will sit. Add to mastic confectionery thickener SMS. With it, our cup will dry faster, and it will be better to keep the shape.
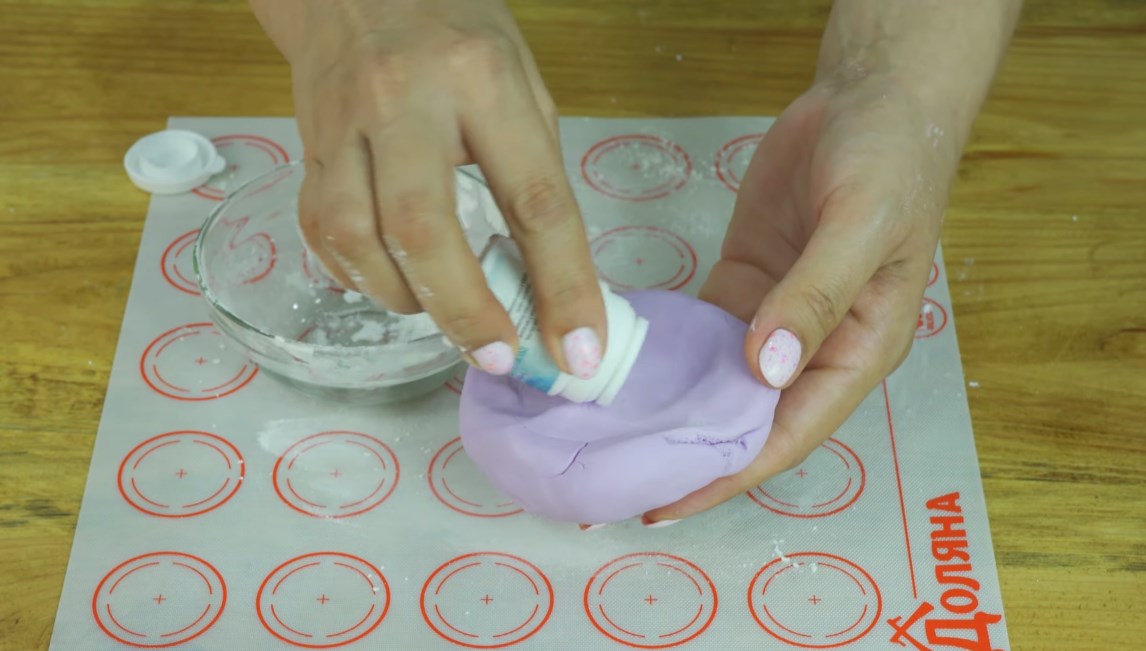
Mastic for decorating a cake step by step - we make a cup for Kitty:
The plate, which will serve as a shape for a cup, is abundantly sprinkled with starch so that the mastic does not stick. Put a piece of lilac mastic with a thickener SMS in a plate sprinkled with starch, and evenly distribute the mastic along the walls. With the thickener of the SMS, our figure will dry about 2 hours, without a thickener the cup would have dry for 6-8 hours.
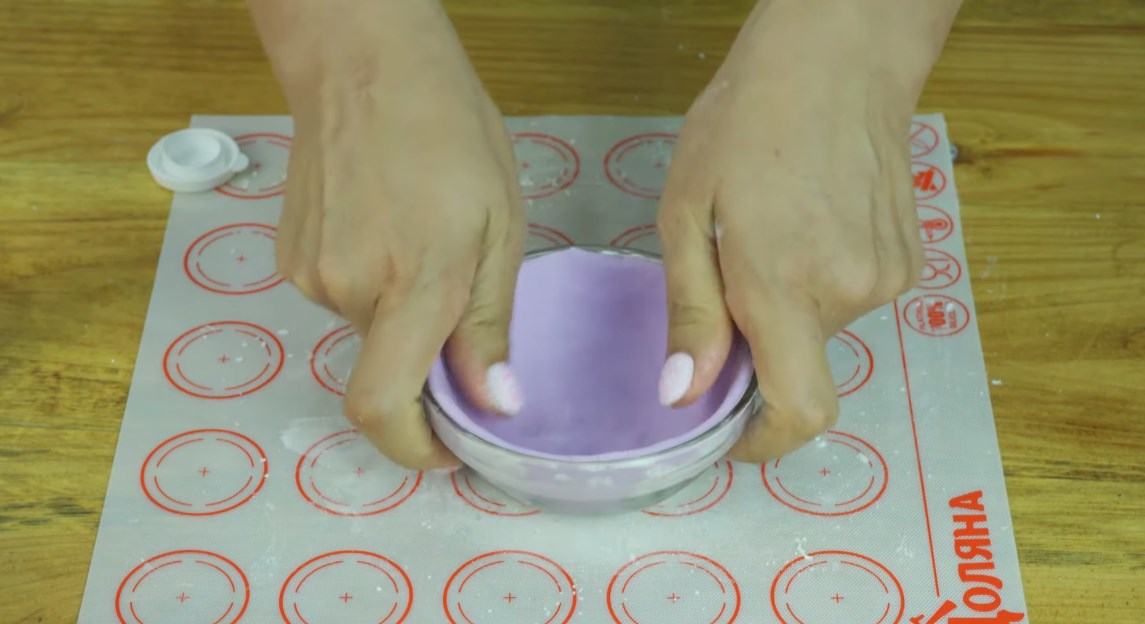
For the bowl, you need to fly out two more figures from mastic: this round stand-renewal and a pen. Take them out of the same mastic with the thickener as the cup, and also leave to harden for 2 hours. When all the details are dried, take out the main part of a glass plate and brush the starch with a brush.
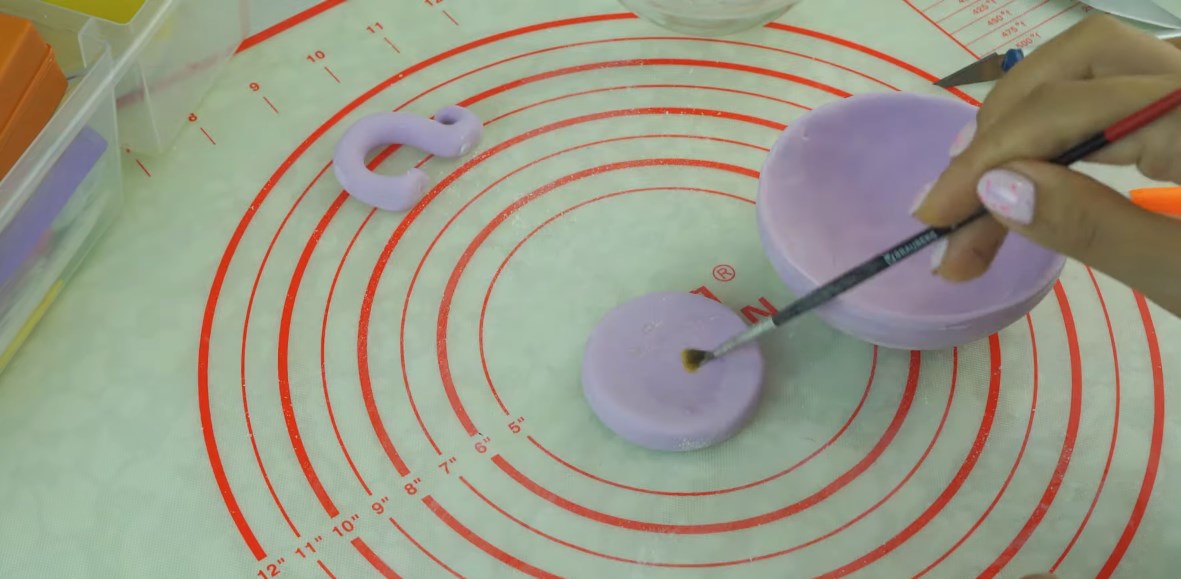
In the bottom of the cup, you need to make a small hole with a skewer, so that then insert a figure from a mastic on a skewer into it.
Details need to glue with confectionery glue. We decorate the upper part of the cup with a strip of white mastic. This strip is also glued with confectionery glue.
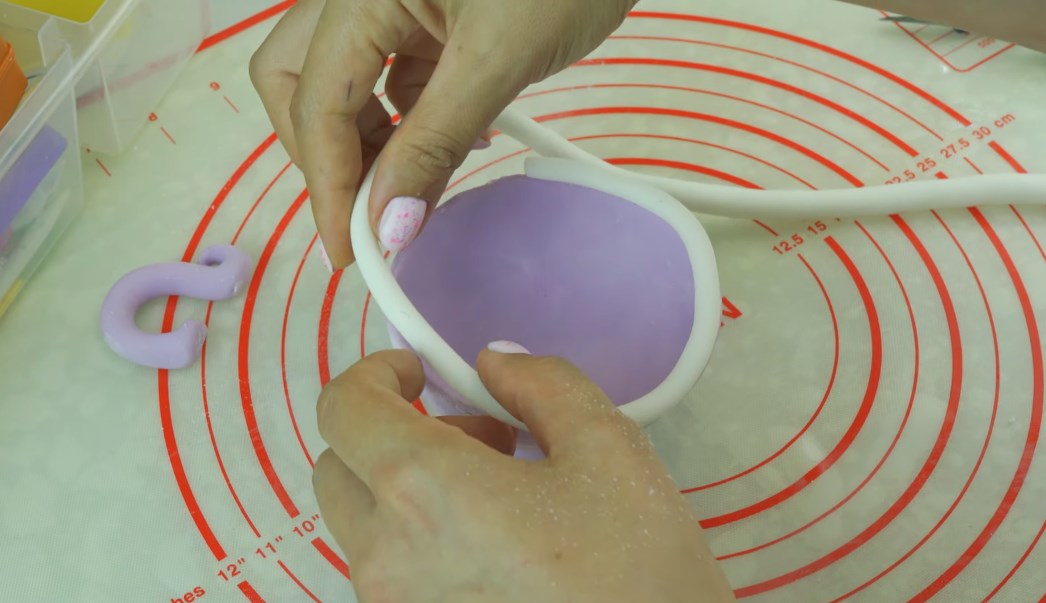
The handle is quite massive, and may not hold on a cup until the glue has dried. Therefore, it needs to be supported by something.
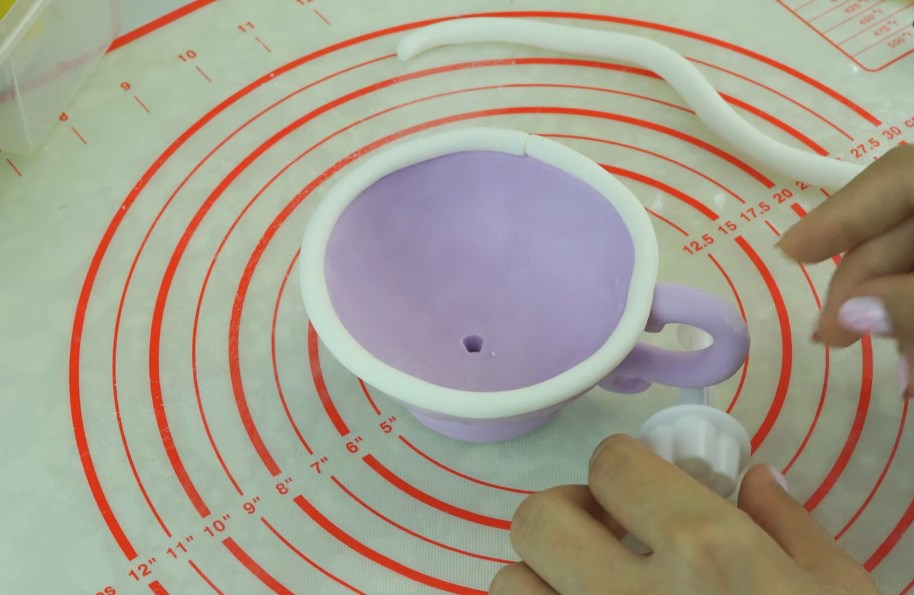
Mastic for decorating a cake step by step - Kitty's figure:
We will form a Kitty figure on a wooden skewer. To connect parts, we use confectionery glue. The first to fly out of the mastic of the cat’s paw and attach them to the skewer. To do this, in those places where the paws will be in contact with a skewer, we smear them with confectionery glue.
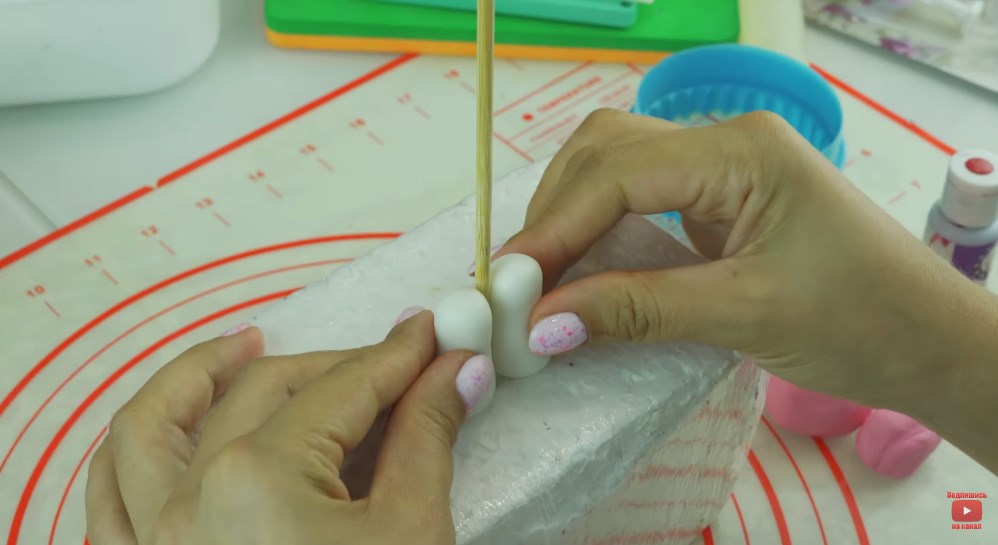
The next you need to fly out and string a pink trunk on a skewer. To the mass for the details of the figures from the mastic, you also need to add the thickening of the SMS.
If you make figures from ordinary mastic for tightening cakes, it is better to add a thickener to it. There is also a mastic designed specifically for the formation of figures, for example, the mastic of Princess. Such a mass is denser and dry faster.
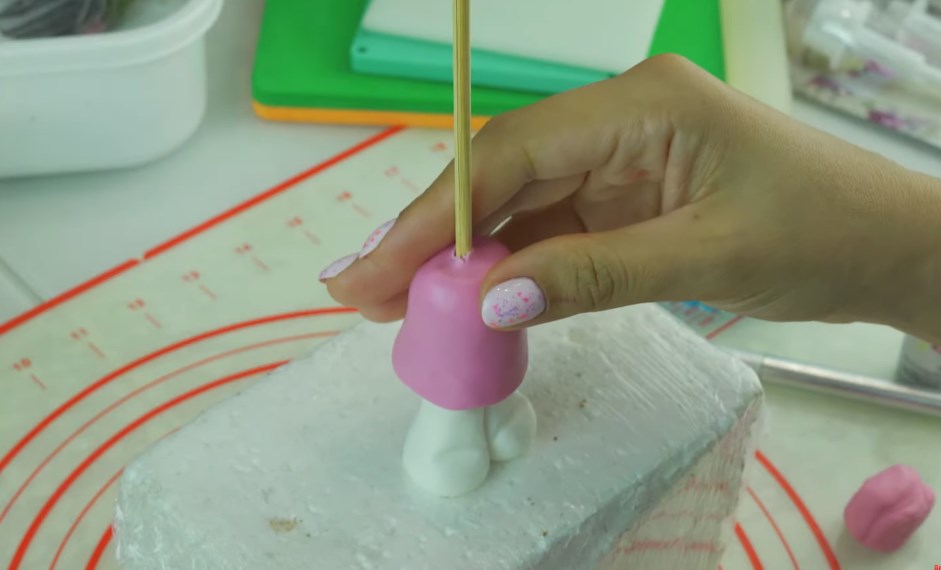
We make the collar and sleeves of the cat using forms for squeezing flowers. Kitty’s head is not entirely round, it is oval. The eyes are located strictly in the middle of the muzzle. We make a wand with a round tip of the recess for the peepions and for the nose.
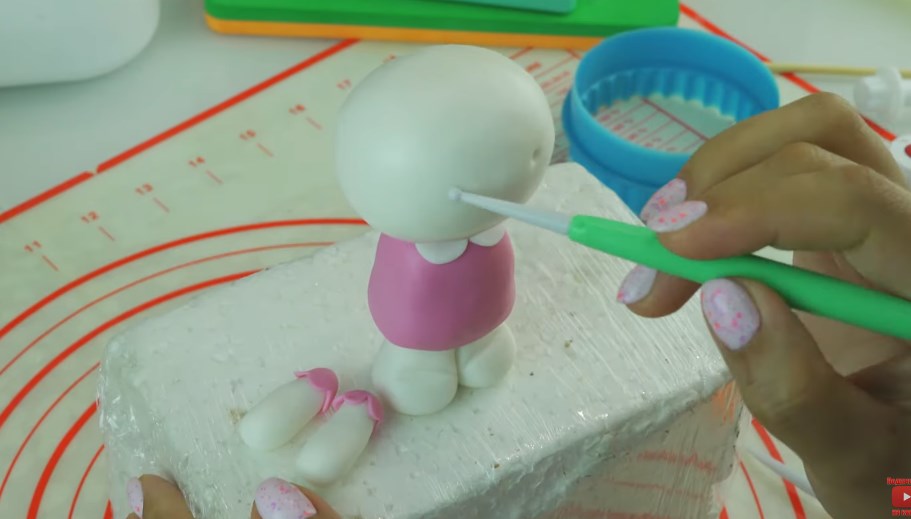
We make eyes from small balls of mastic painted black. A spout will be a ball of yellow mastic.
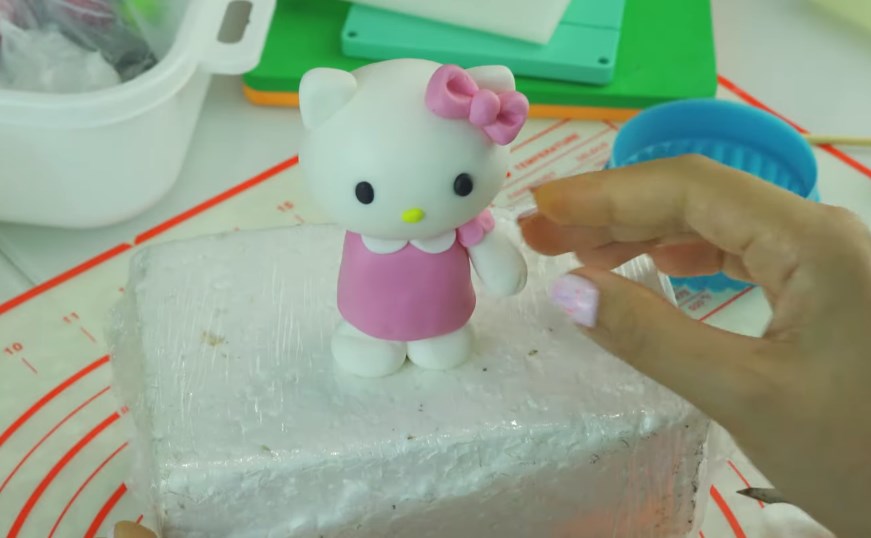
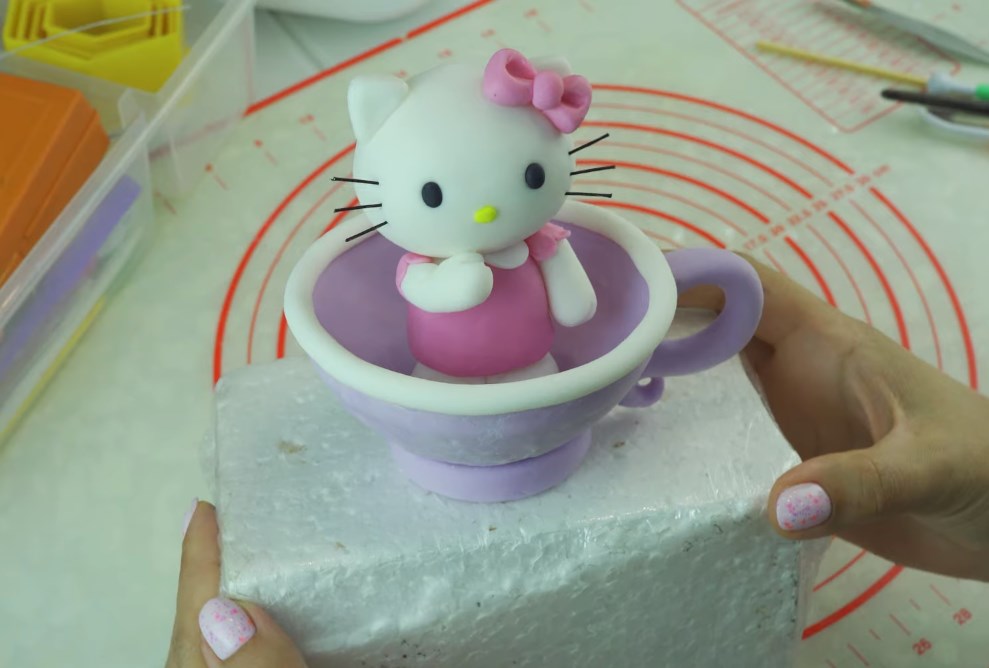
We install Kitty on a skewer in a cup, and on this our figures from mastic are ready! Remove the excess starch from the figure with a brush moistened with vodka.
We tighten the cake with sugar paper with a beautiful pattern. To make the paper beautifully, in the upper part, cut it with scissors into strips about 2 cm wide.
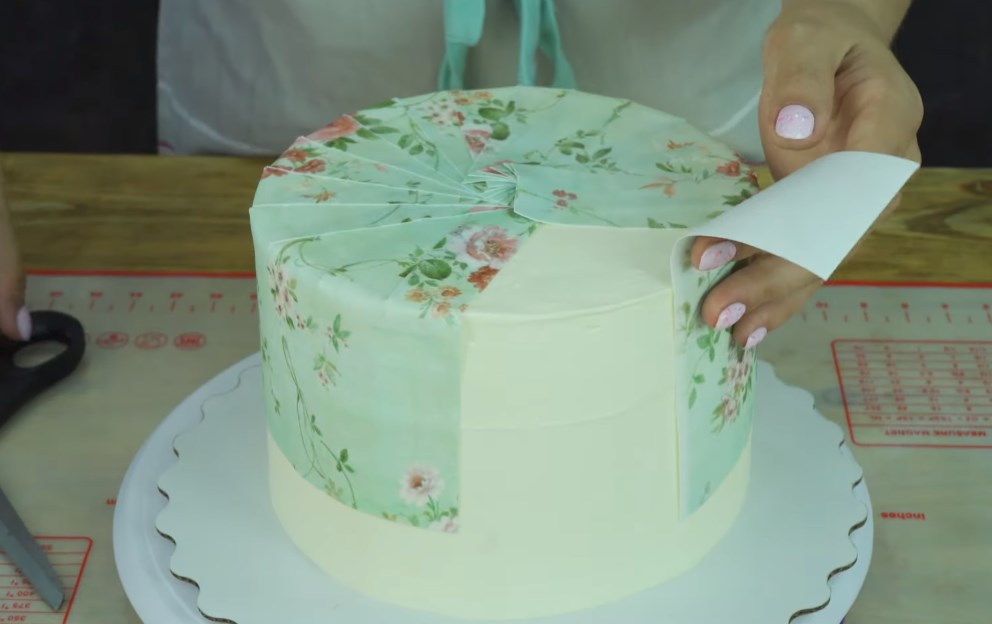
The lower part of the cake is coated with cream. And we put a cup of Kitty on his top. For those who want to learn more about how to decorate the cake with mastic, the next video.
Video: Cake for girl Hello Kitti
Cake with a lion cub for a boy - tips on decorating a cake mastic
The decoration of the cake mastic in this master class is divided into several stages:
- It is necessary to cover with mastic the cake itself.
- Make a lion cubic figure from a mastic.
- And transfer the pattern to the side surfaces of the cake with gel food dyes.
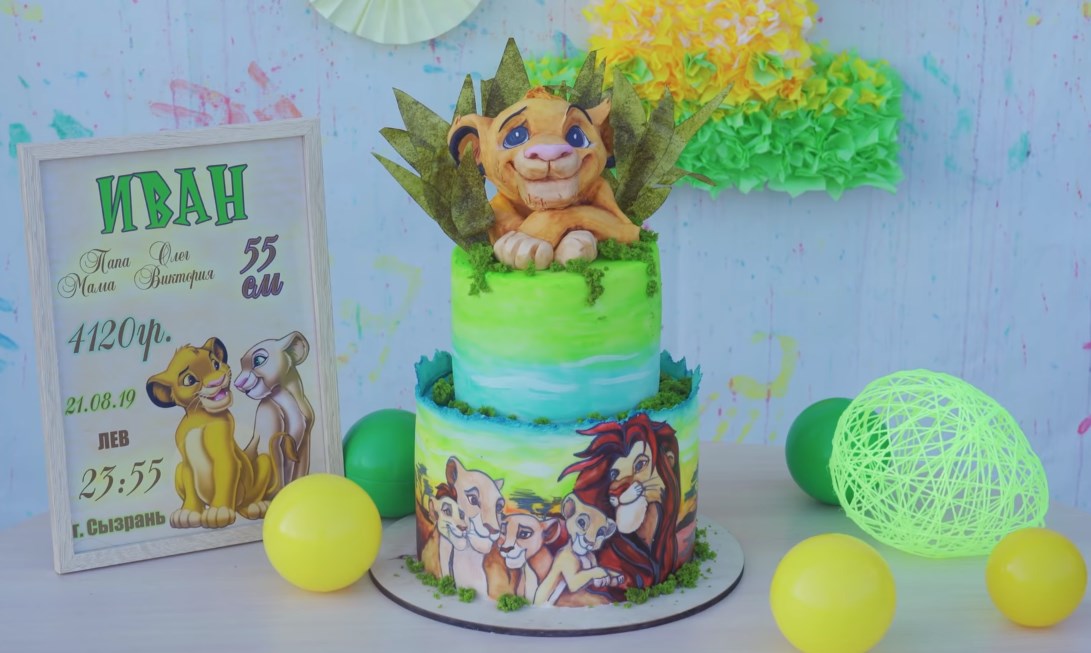
Mastic for decorating the cake step by step - tightness of the cake:
This cake is two -tier and the method of tightening with mastic will not be quite traditional. The upper tier of the cake we, as usual, fit with mastic in one layer.
Take the mastic for tightening, sprinkle the working surface with starch, and roll out the mass with a uniform layer with a rolling pin. The thickness of the mastic should be approximately 2 mm. No need to roll out the mastic too subtle, because then it can break.
We wind the mastic on a rolling pin and carefully put it on the cake. Smooth it on top with an iron. With your hands, gently crush on the sides. Cut off the excess from the bottom with a knife. If the bubbles turned out, we pierce them with a needle and invite them.
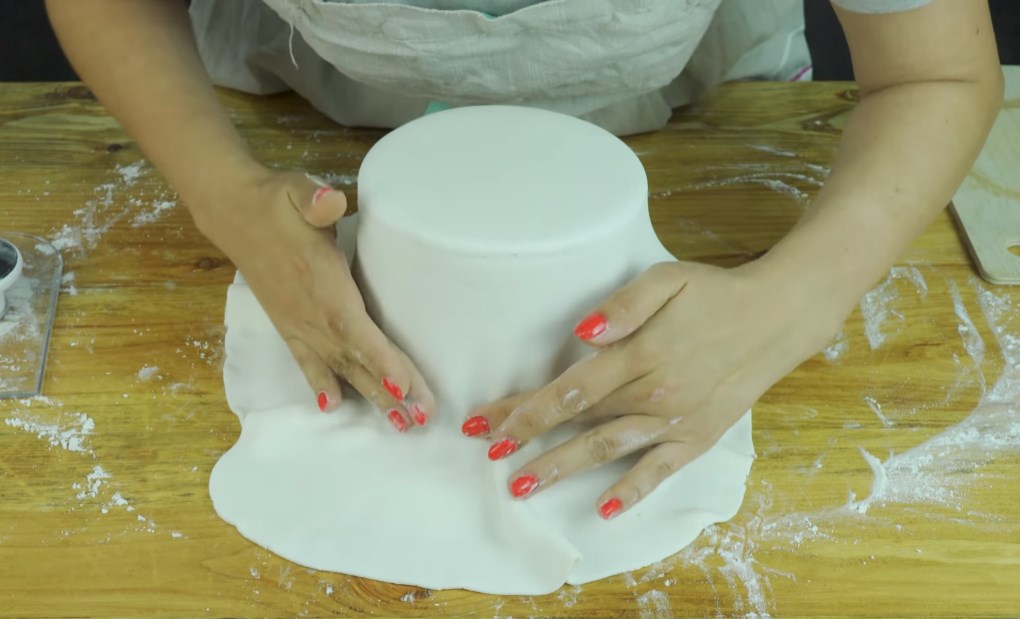
For the lower tier, the tightness of the mastic will not be quite traditional. First, you need to put a layer of mastic only on the upper part of the cake. After that, we turn the cake and cut the mastic, so that it remains only on the upper part of the cakes.
Be sure to put the cake in the refrigerator for about 2 hours before decorating it. Otherwise, the cream will flow, but you will not be able to gently decorate it in this way.
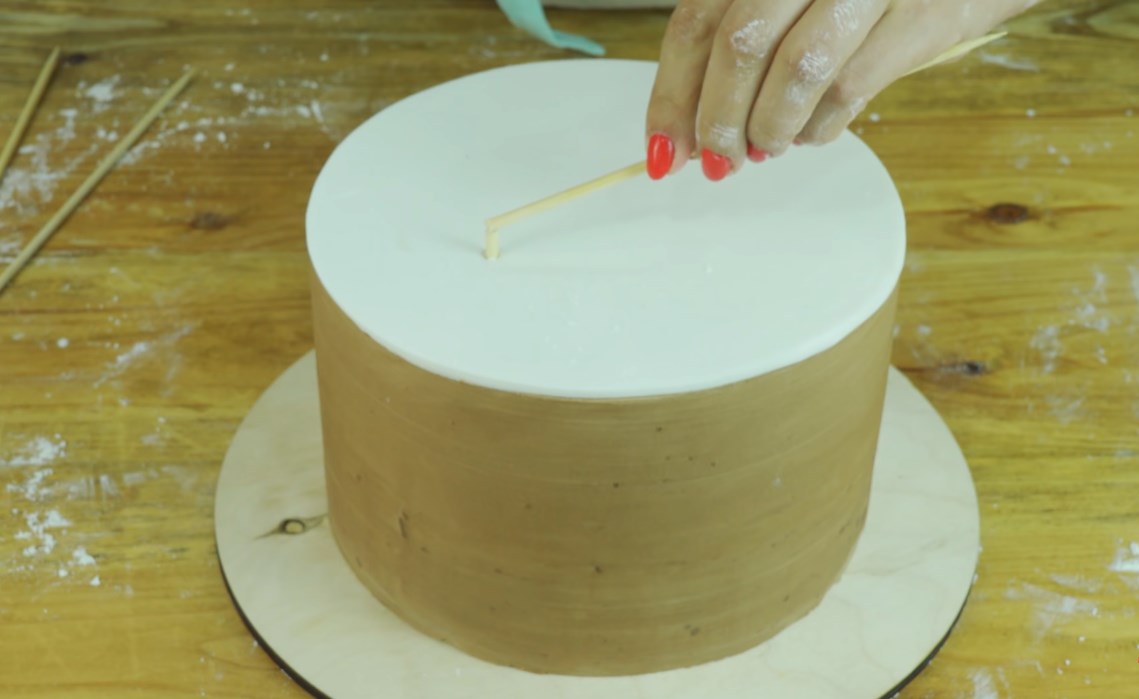
You need to insert wooden skewers into the lower tier. Four short skewers should be located a square, and pierce the lower part of the cake completely. The upper skewer should not go beyond the upper edge of the cake from the mastic.
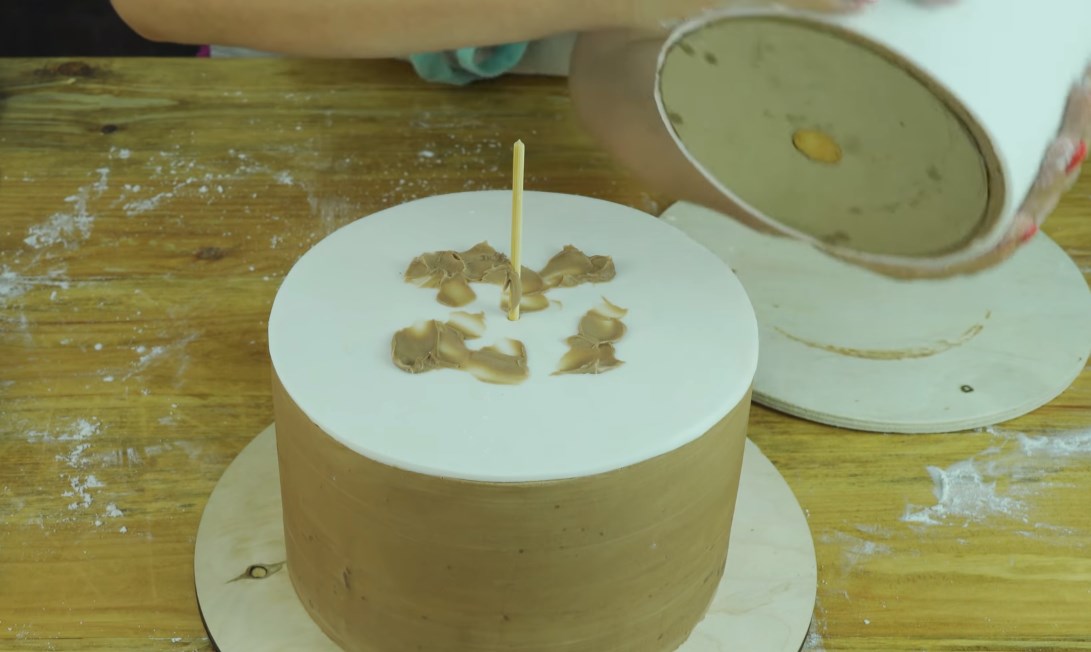
At the bottom of the upper tier, a cardboard substrate with a hole for a skewer in the middle. The junction is additionally coated with cream. In order to tighten the side surface of the cake, roll out the mastic and trim one edge with a knife.
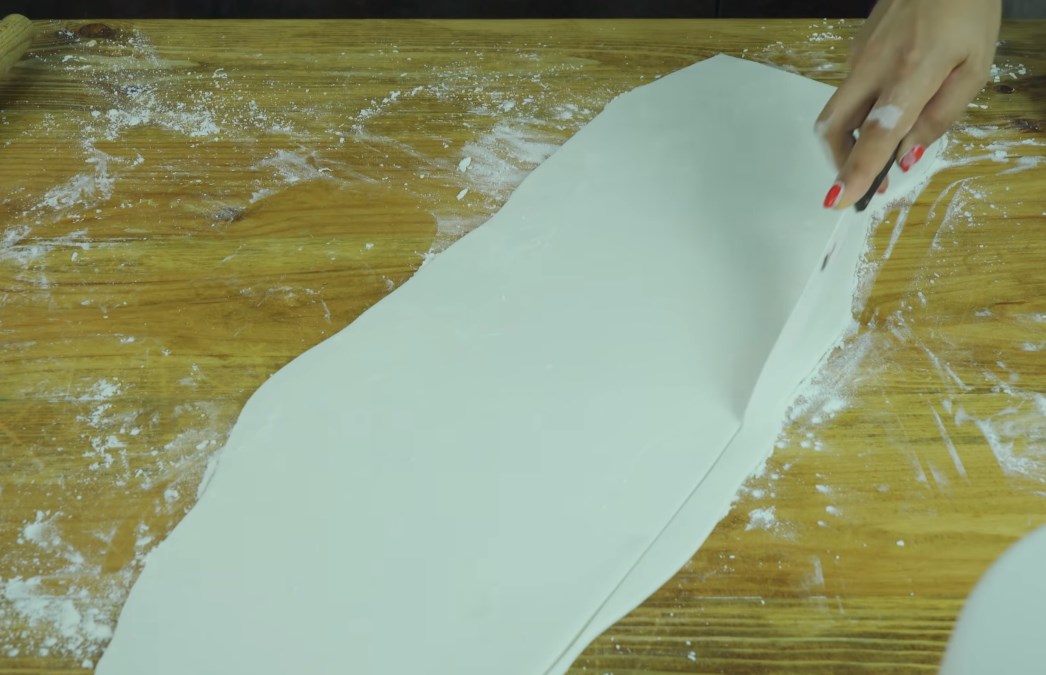
After that, we tighten the cake with this piece of mastic so that the uneven edge is at the top. We create additional irregularities on the protruding edge of the mastic, tearing its pieces with our hands.
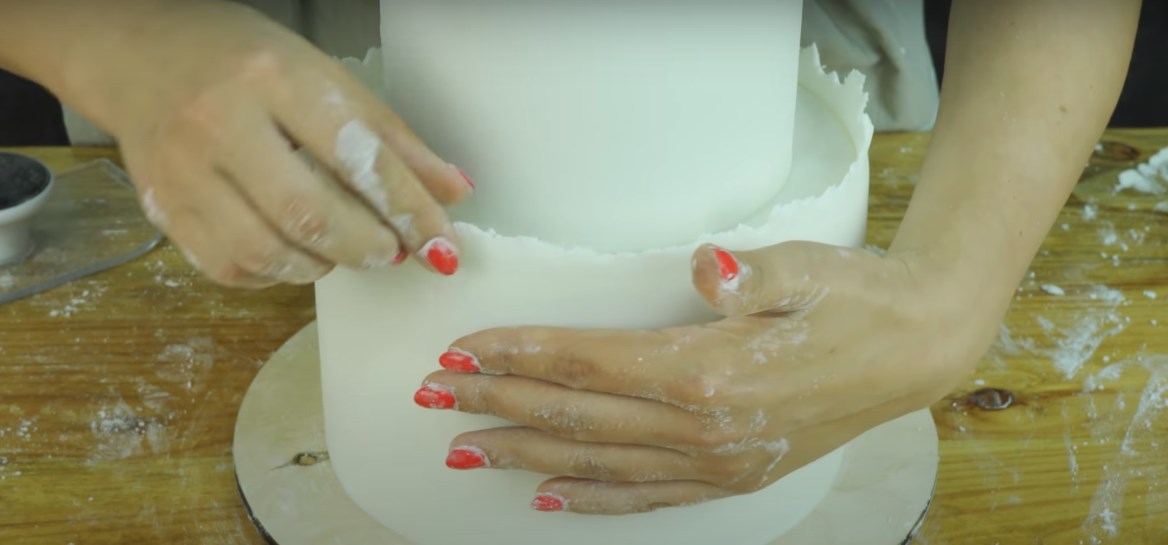
Mastic step by step - Figure of the lion cub:
Inside the lion cubic figure will be a sweet mixture of marshmallow and air rice. So that the sweet dough does not stick so much to your hands, add a little butter to it. Form a figure from the mass, reminiscent of the shape of a lion cub and tighten it with white mastic.
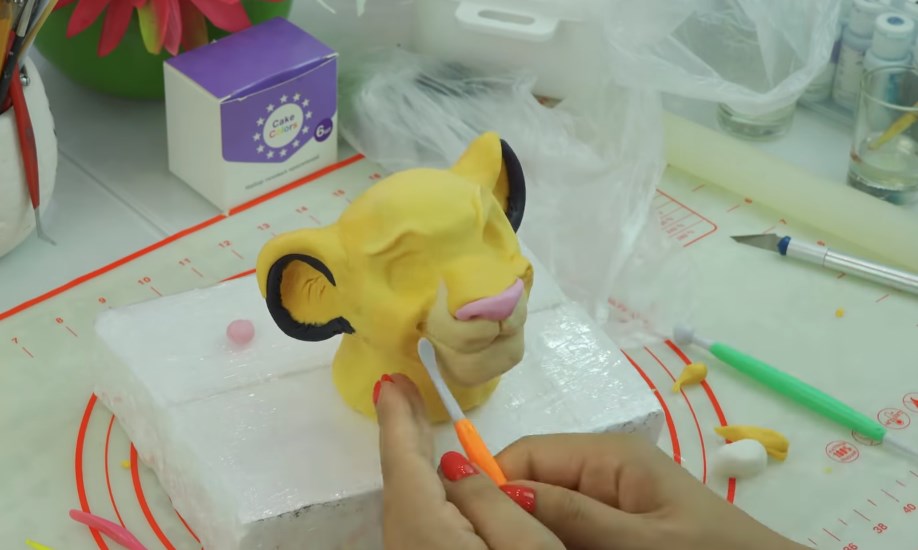
After that, you need to form the head of the lion cub with your hands so that it comes out as detailed as possible. Add to the head a nose of pink mastic and ears. It will turn out to decorate mastic with gel dyes diluted with vodka.
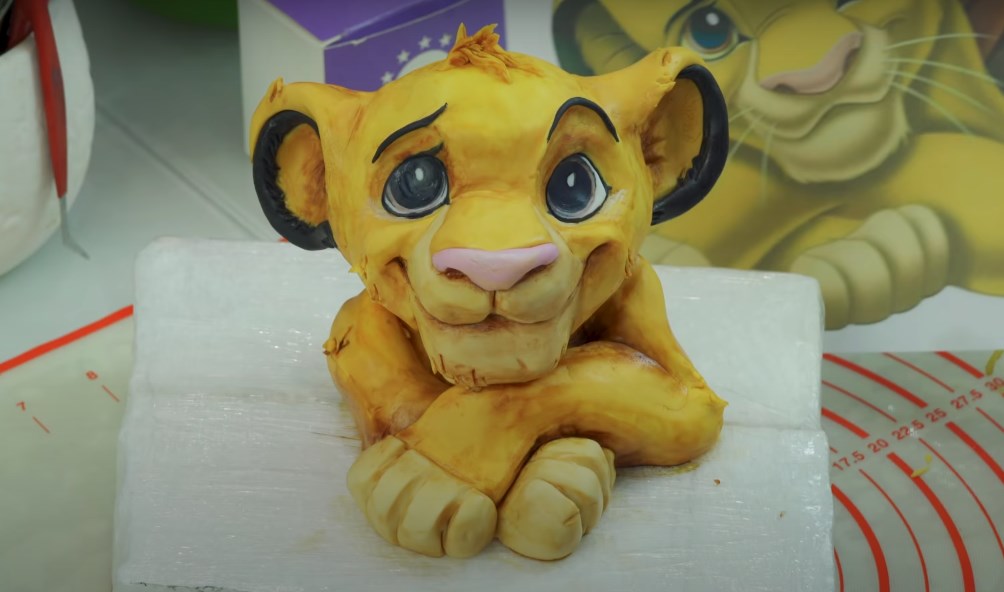
Green leaves for the top of the cake are made of waffle paper. They need to be painted with gel dye, strung on wires and dried in an oven or microwave with a grill at low temperature in convection mode.
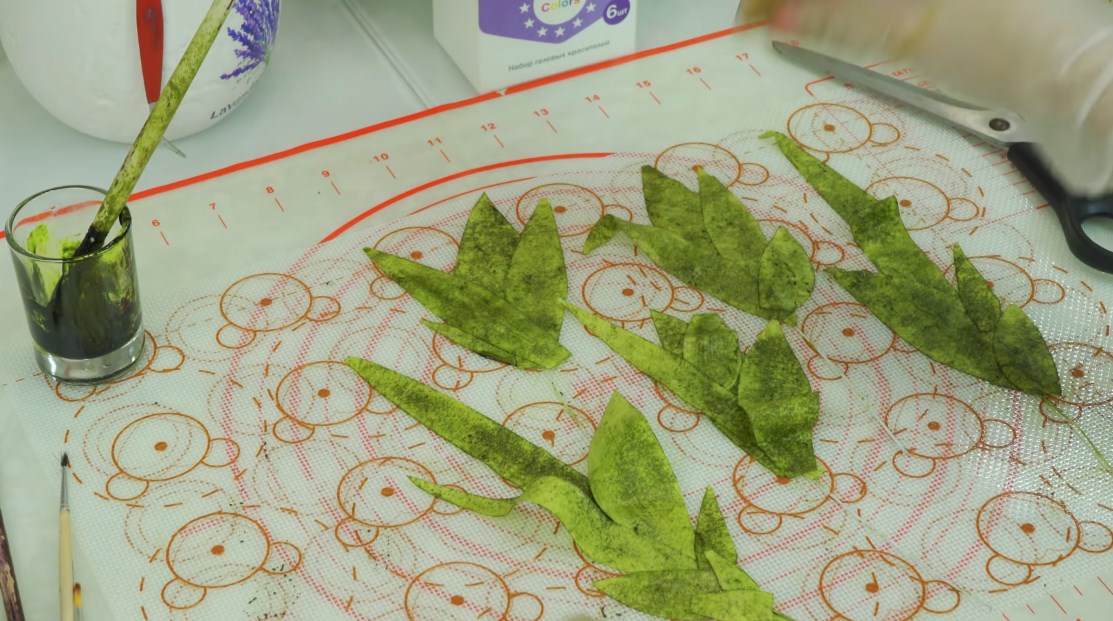
Green moss At the top of the cake is a biscuit painted with green food dye. We transfer the pattern to the side surface of the cake. To do this, we obscure the back of the sheet with a picture with a simple pencil. After that, we attach a sheet with a picture to the mastic surface of the cake, and circle all the contours with a handle. The outlines of the picture will remain on mastic.
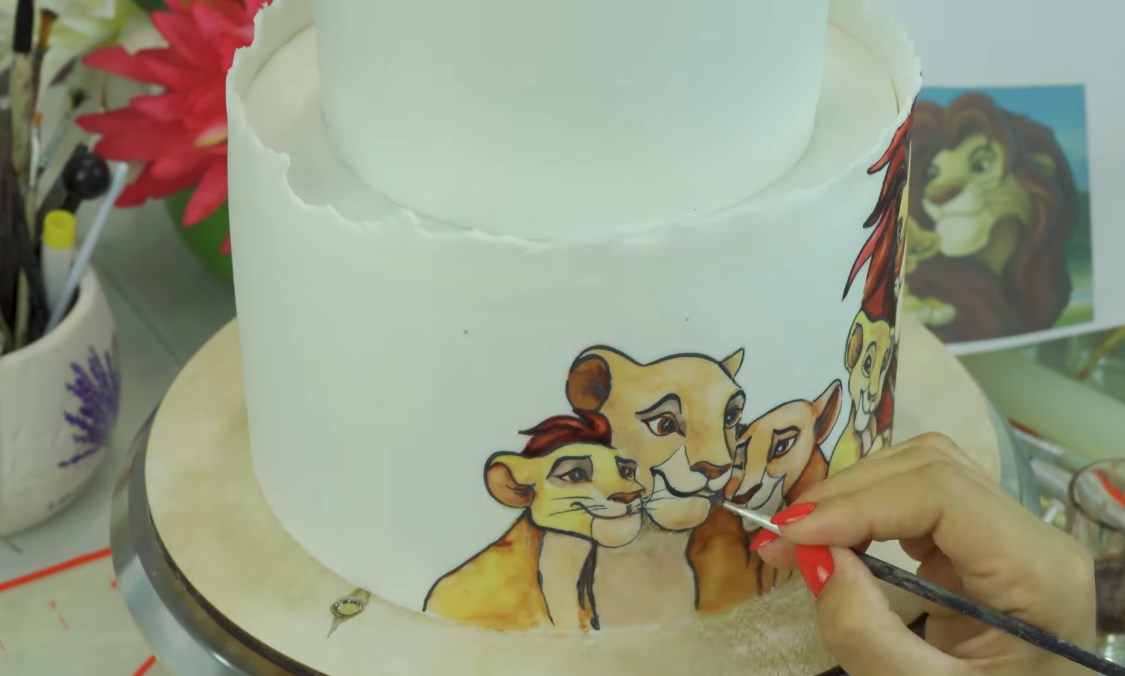
Picture And all the lateral surfaces of the cake We decorate with gel dyes diluted vodka. If you want the color to lie down denser, mix the color dye with white. If you do not have a white gel dye, a dry dye, also diluted with vodka to a gruel -shaped state.
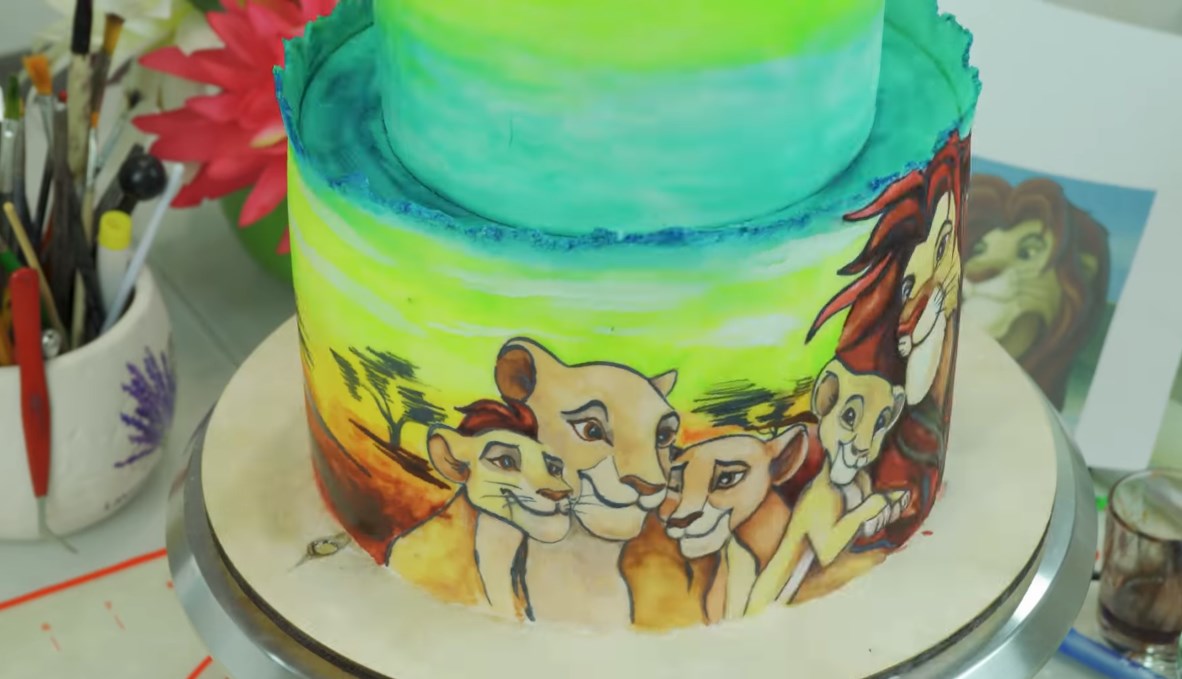
For those who want to know more about how to make such a stamping cake, the following video.

