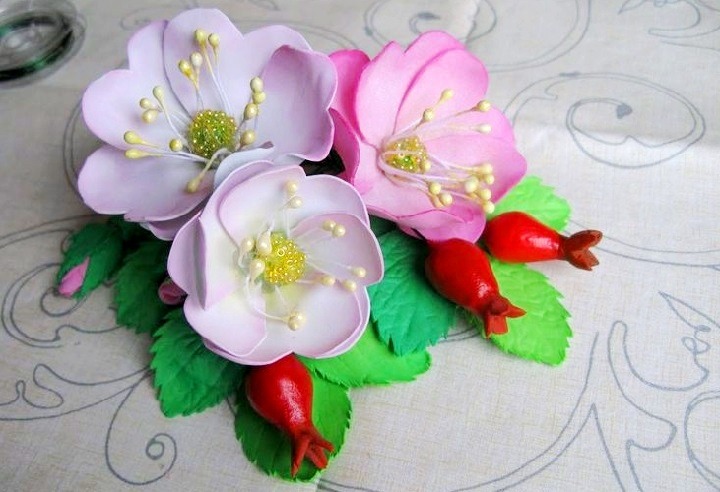
Our article will appeal to needlewomen who like to create beauty with their own hands. In this material you will find advice on how to make flowers from Foamiran.
Contents
- Foamiran flowers for beginners step by step
- Foamir-light flower quickly?
- Rosty flowers from Foamiran - schemes for making crafts, ideas for creativity
- Bouquet of flowers from Foamian - step -by -step tips for assembling crafts
- White flower from foamiran - magnificent chamomile
- Beautiful flowers from Foamiran - Lilia
- Flowers from Foamiran - Roses
- Simple flowers from foamiran - chrysanthemum, poppies
- Flowers from Foamiran on the wall - the color of the apple tree
- Large flowers from Foamiran - Summer sunflower
- Small flowers from Foamiran
- Foamir flowers for rubber bands, hairpins, rims
- Flowers from Foamiran: Ideas
- Video: Very beautiful flowers from Foamiran
- Video: Realistic Rose from Foamiran
- Video: Astra from Foamian is easy and simple
- Video: Rosty flower. Step -by -step assembly instructions
- Video: Flowers from Foamian - Herbera: How to do it with your own hands?
Foamarin is a plastic, easy material in work. His suppleness made him ideal material for needlework. Using foamiran, you can make a lot of interesting crafts, with which you can subsequently make an original decor for your own housing, elements for beautiful hairpins, or make jewelry for family celebration with your own hands. Our article will teach you how to make bright and realistic flowers from Foamiran.
IMPORTANT:Consider the fact that you will have to give a more rounded shapepetals, which means that you will need to warm your blanks. It is best to do this using an iron or lighter, or a rectifier for curls. Also, keep in mind that your petals “Moment” glue best of all, you can also use an adhesive gun. And of course, spend money on special Molds, with the help of which you can easily give the desired form a workpiece, and on a figured hole punch.
Foamiran flowers for beginners step by step
If you are just starting your acquaintance with needlework, then give preference to the most simple crafts. The simpler the master class, the better. We will teach you how to make the simplest flower as possible, but at the same time it will look very nice.
Flowers from Foamiran for beginners step by step:
- We take the decorative material of the desired color. We cut it into strips-depending on the splendor of the finished craft, you may need 12-16 strips.
- Next, take glue, smear the edges of the strip and glue them with each other. You should get a “droplet”. In this way we glue all the strips and let the glue dry (See photo 2, 3).
- If you wish, you can immediately make petals for colors of different shades, especially if you later plan to make a bouquet.
- When the blanks dry, we collect our bud. To do this, we take our “droplets” and glue them among us (See photo 4, 5).
- While the workpiece dries, we begin to make the core. Cut the yellow circle and already cover it with the errors of the bud (See photo 7, 8).
- We fix the finished bud on a cocktail tube, and our craft is ready.


Foamir-light flower quickly?
- A unique lamp is a dream of many people, because almost every person wants to have a thing in his house, which is done in a single copy. If you also dream of such a decor for the interior, then try to make an exclusive lamp.
- Below we will introduce you to the master class manufacturing flower-lighting flower from Foamiran. All that you will need for its manufacture is a ready -made standard lamp with a removable ceiling, decorative material, and glue.
- In this case, you will not have to spend money on wires, a switch and isolating materials. All you need to do, cut the petals from decorative material, and gently glue the ceiling with them. How to do this correctly, see the master class below.
So:
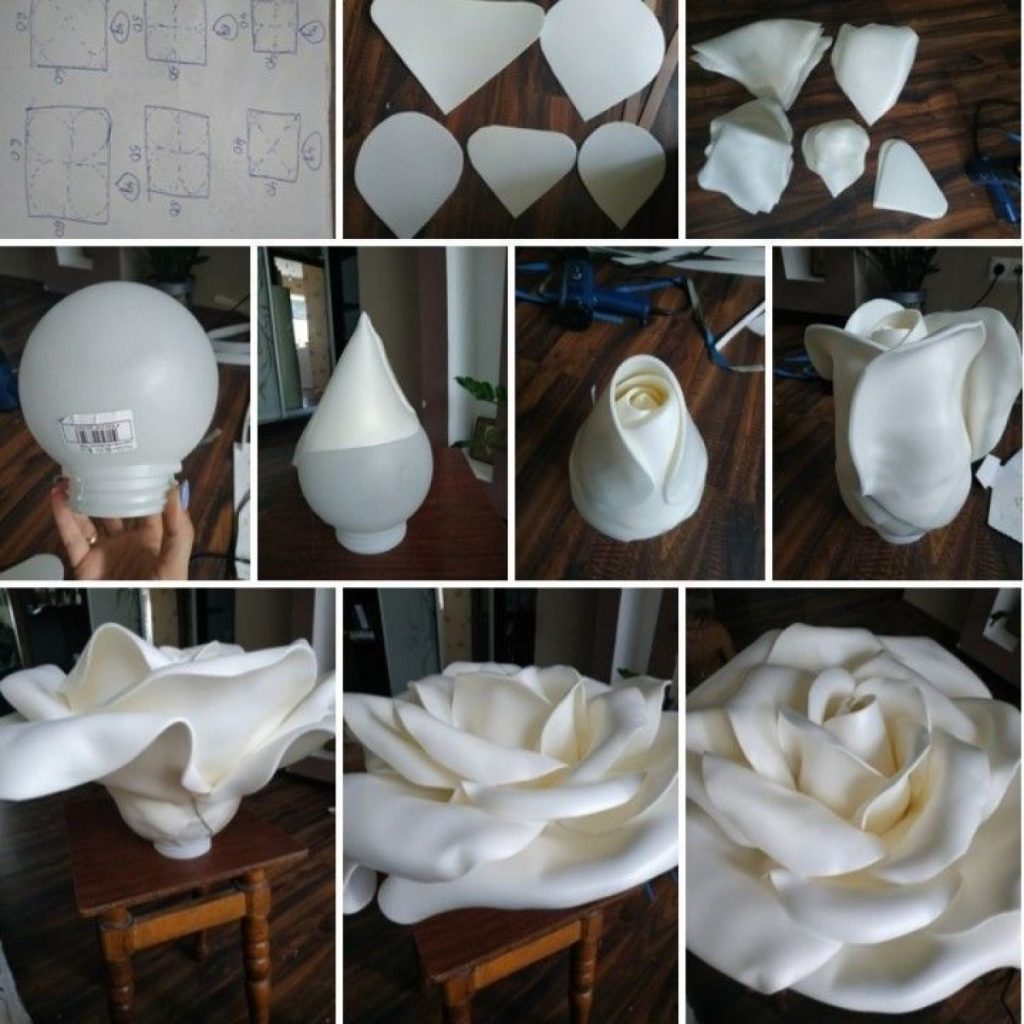
Rosty flowers from Foamiran - schemes for making crafts, ideas for creativity
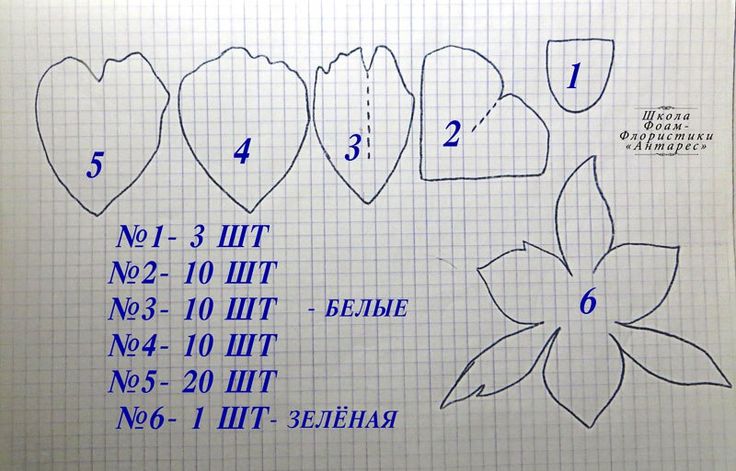
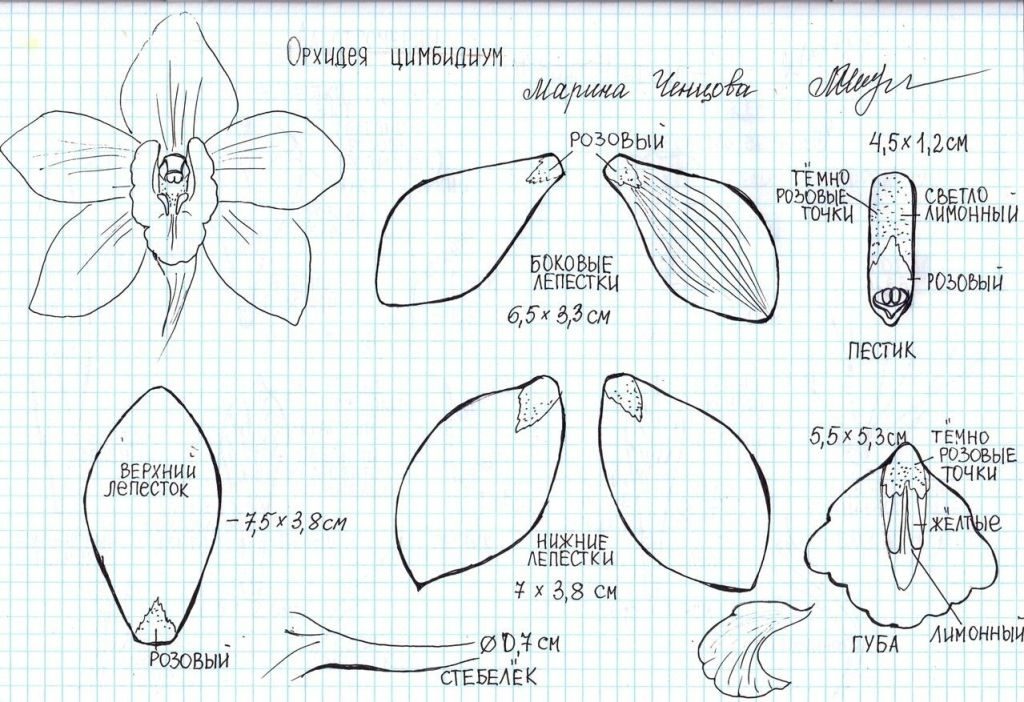
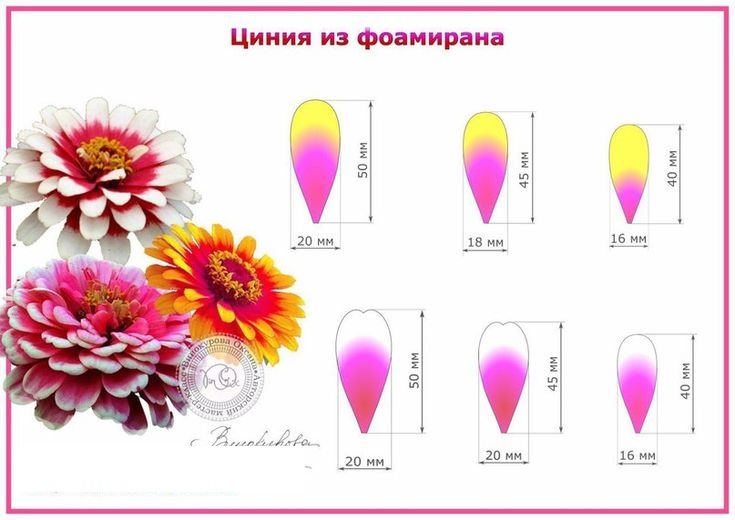
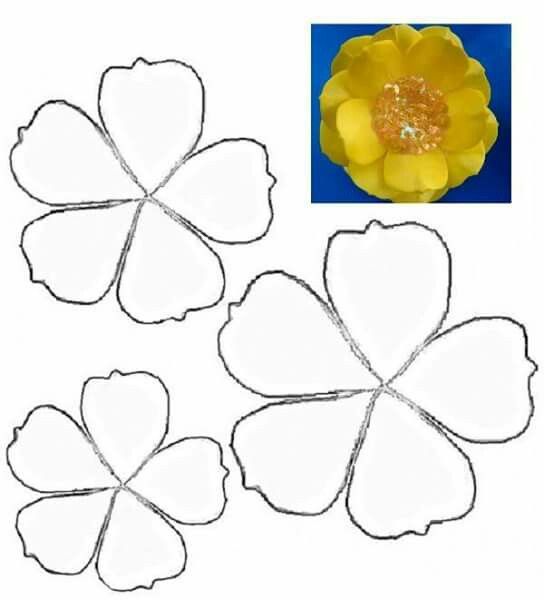
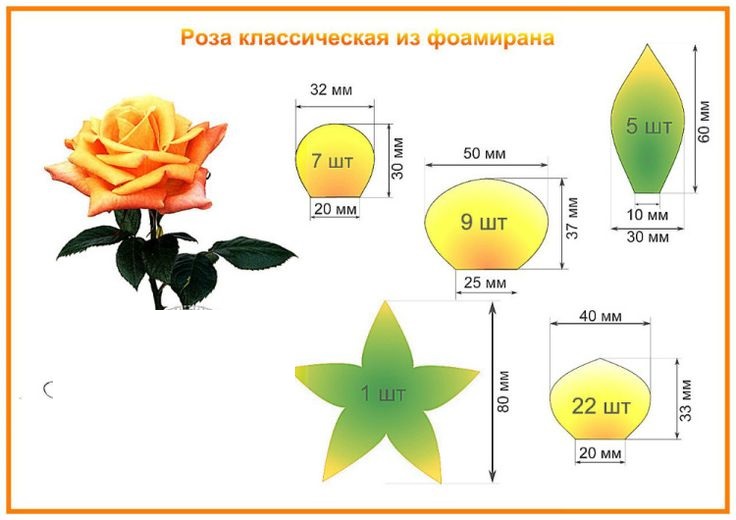
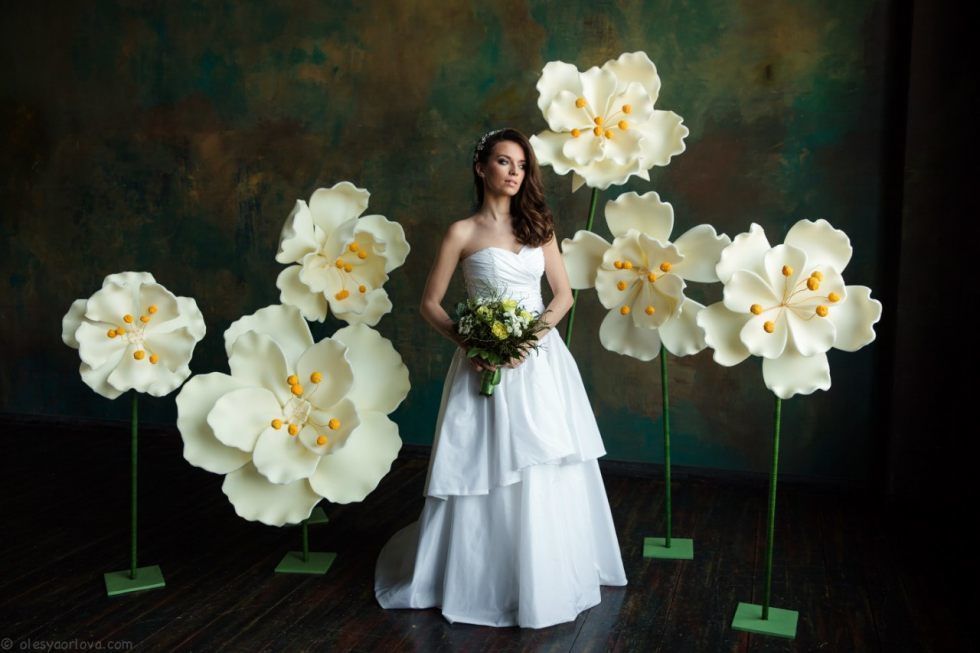
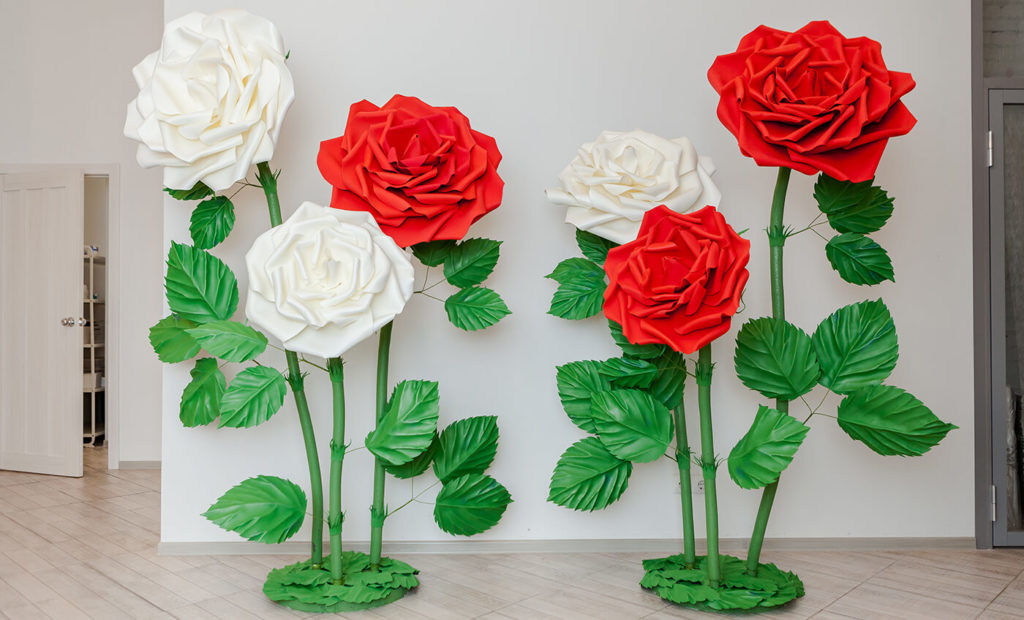
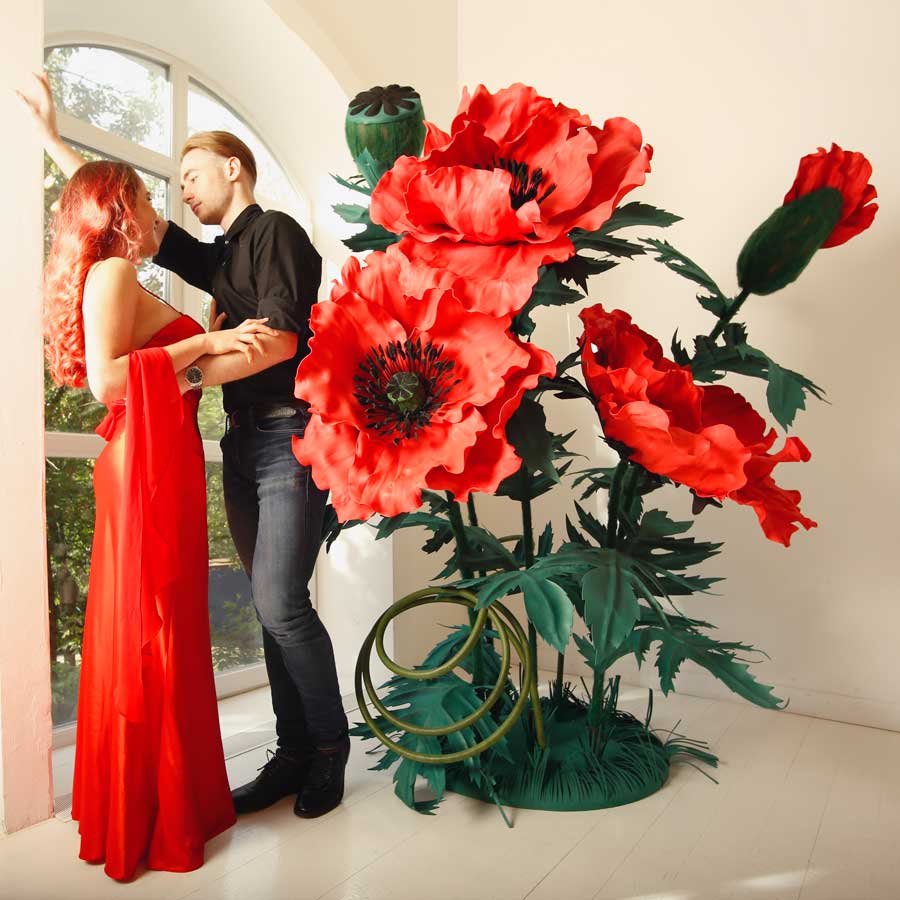
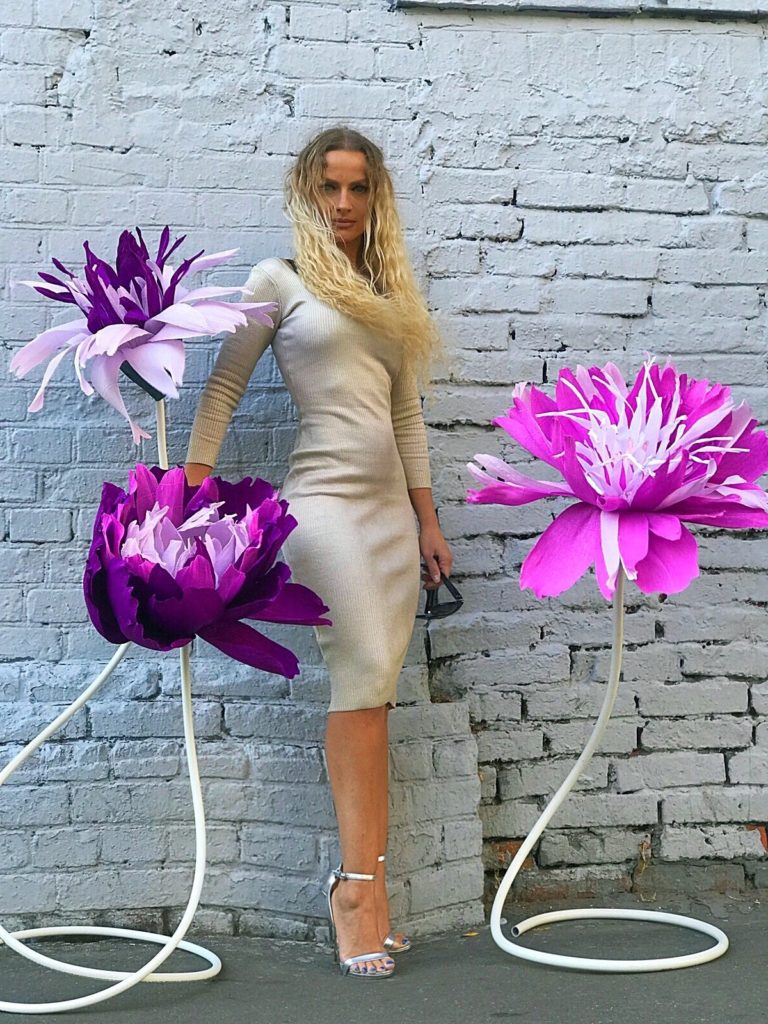
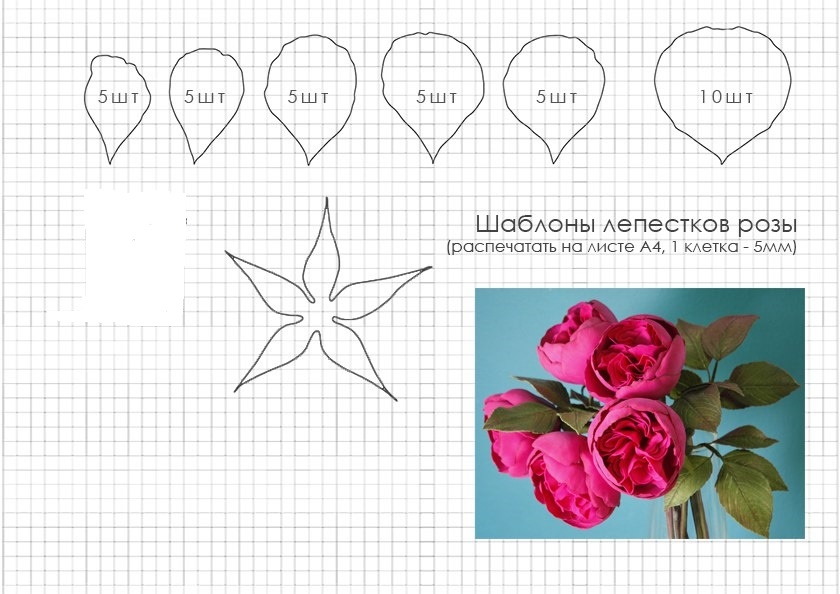
Loose flowers from Foamiran are made in such a way as any others. The only thing that distinguishes them from other such crafts is the size of the bud. It is quite large in growth flowers. Therefore, when creating blanks for the petals, be sure to think in advance their size, and when printing the template, immediately indicate the desired scale. Also, do not forget to think in advance what you will fasten the bud. In this case, it will not be possible to use cocktail tubes, decorative wire. Ideally, you better spend money on a flexible tube with a thin diameter.
An example of creating a bud:
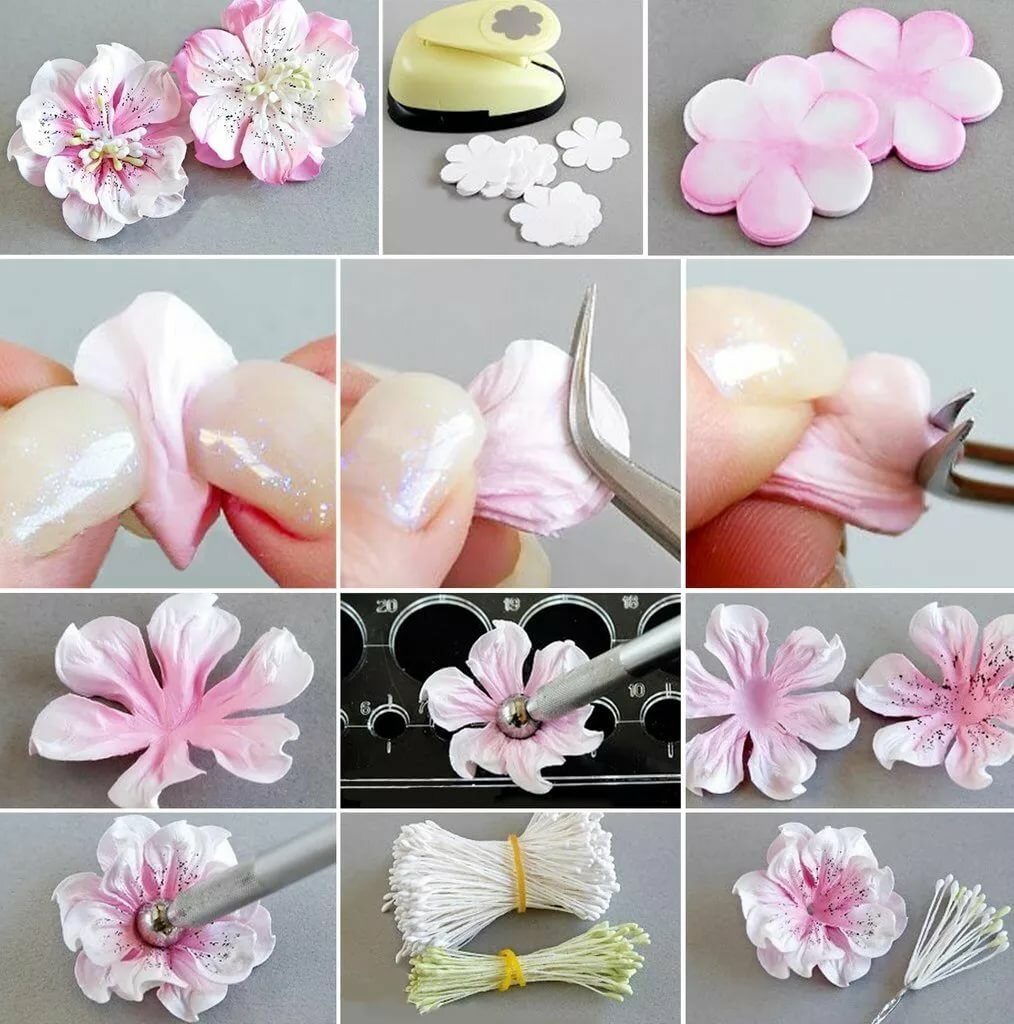
Schemes for making crafts:
Ideas for creativity:

Bouquet of flowers from Foamian - step -by -step tips for assembling crafts
As you probably already understood, decorative floristry can be used for any purpose, and therefore, if you wish, you can even make an original bouquet that will not be guilty a couple of days after presenting to a person, but will delight your eyes for a long time. In this section of our article, you will find step -by -step advice on assembling such a craft.
Bouquet of flowers from Foamiran:
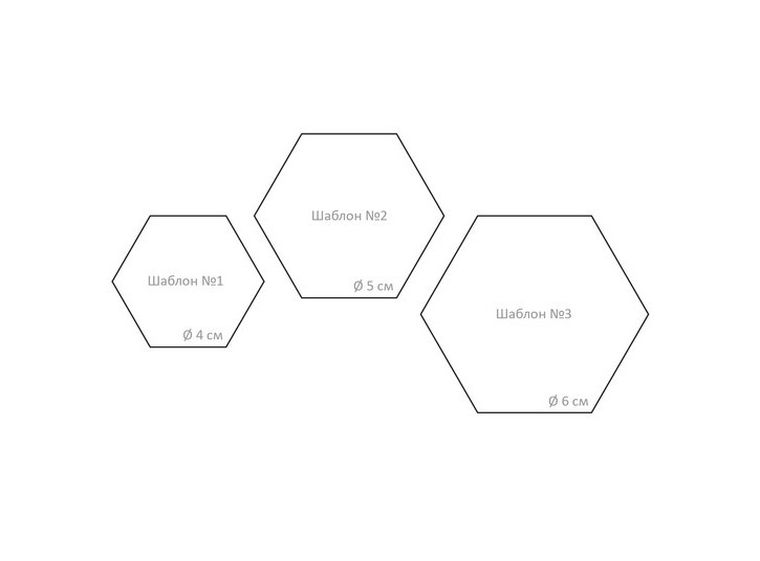
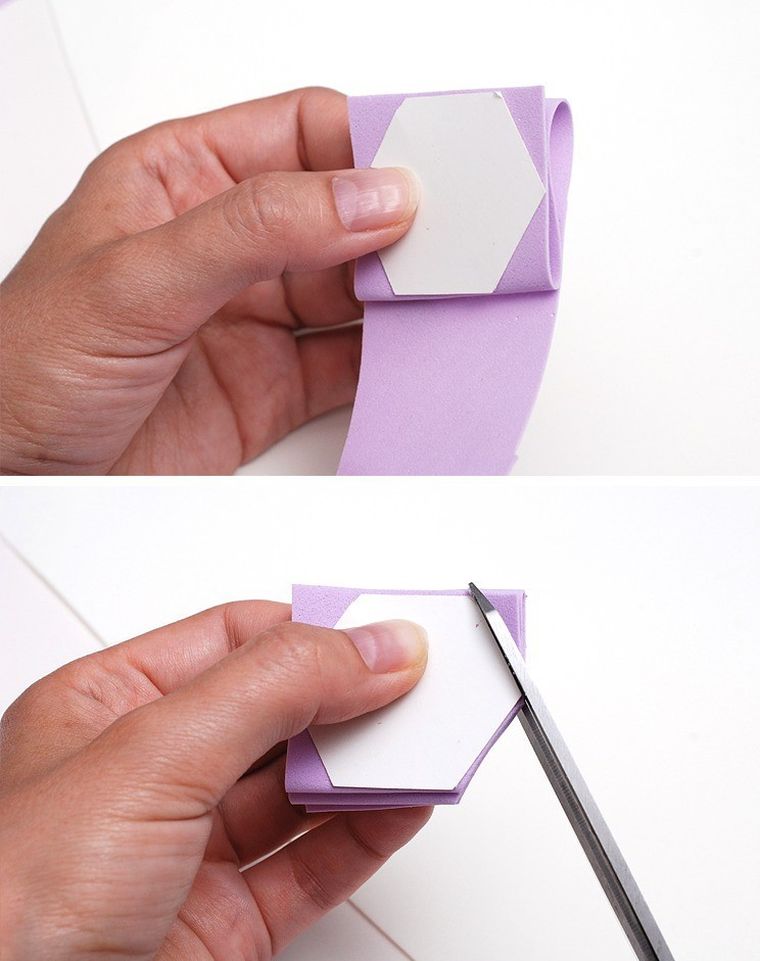
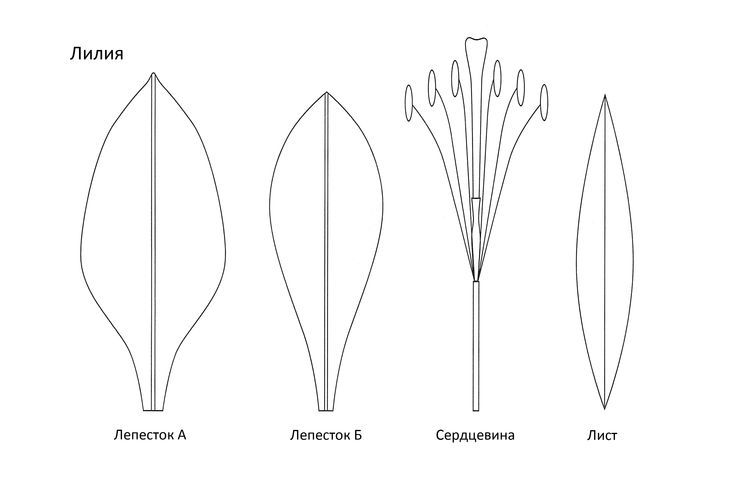
Print a template or draw it by hand. Attach the template to the decorative material and carefully cut it out. Make the right number of blanks.
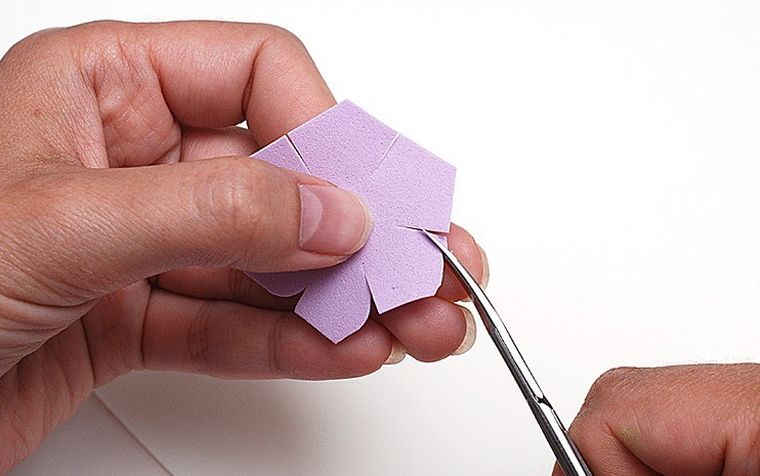
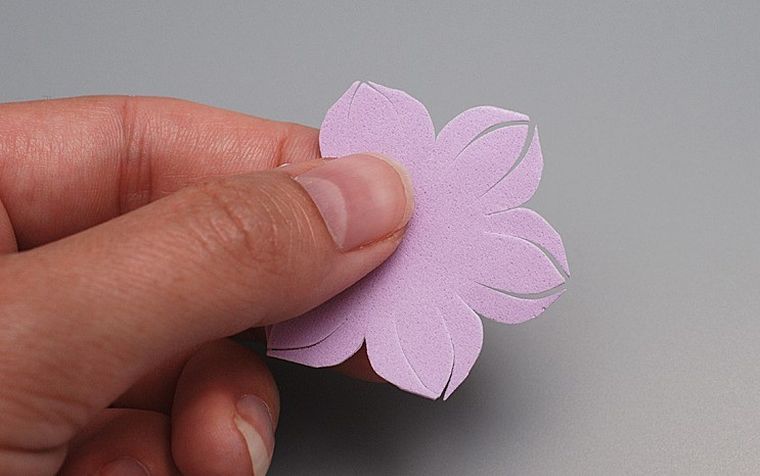
Arm yourself with scissors and begin to take shape to future petals. As a result, you should get a workpiece as in the photo.
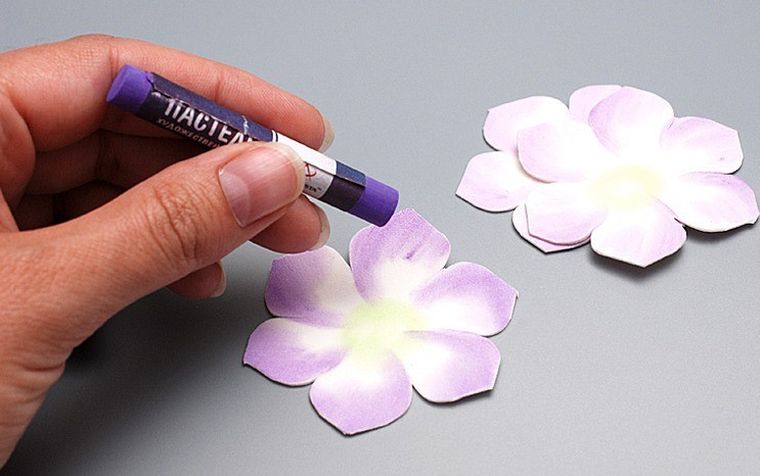
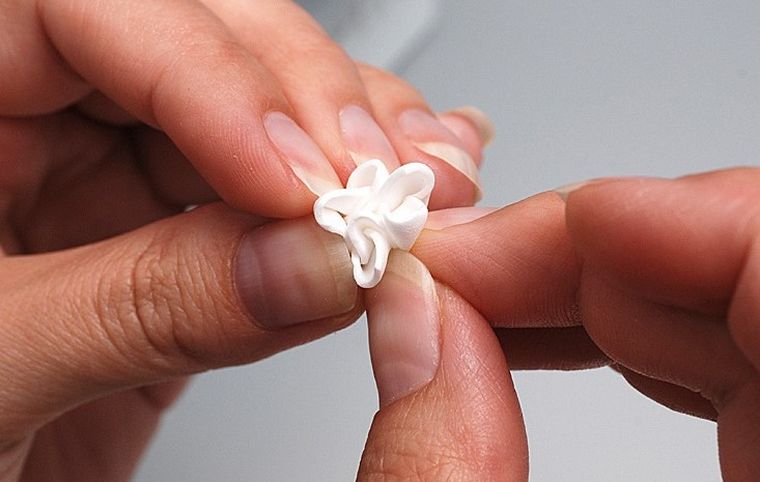
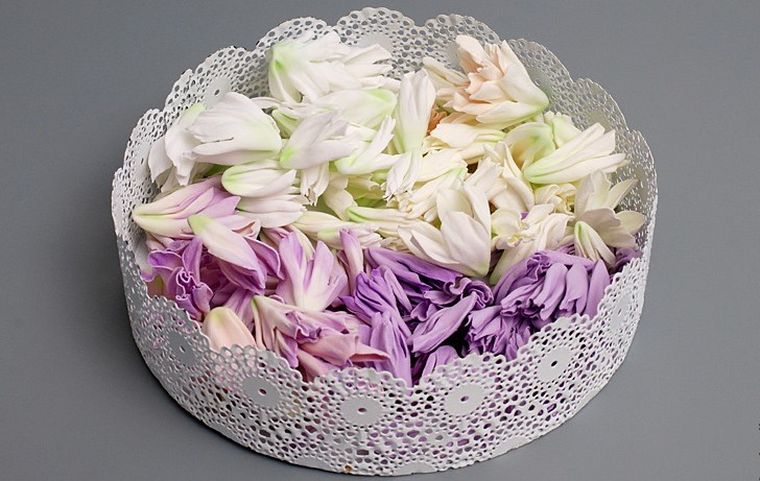
The blanks are slightly heated and make them thinner as carefully as possible. To do this, go through them with your fingers. Immediately after that, pick up the petals.
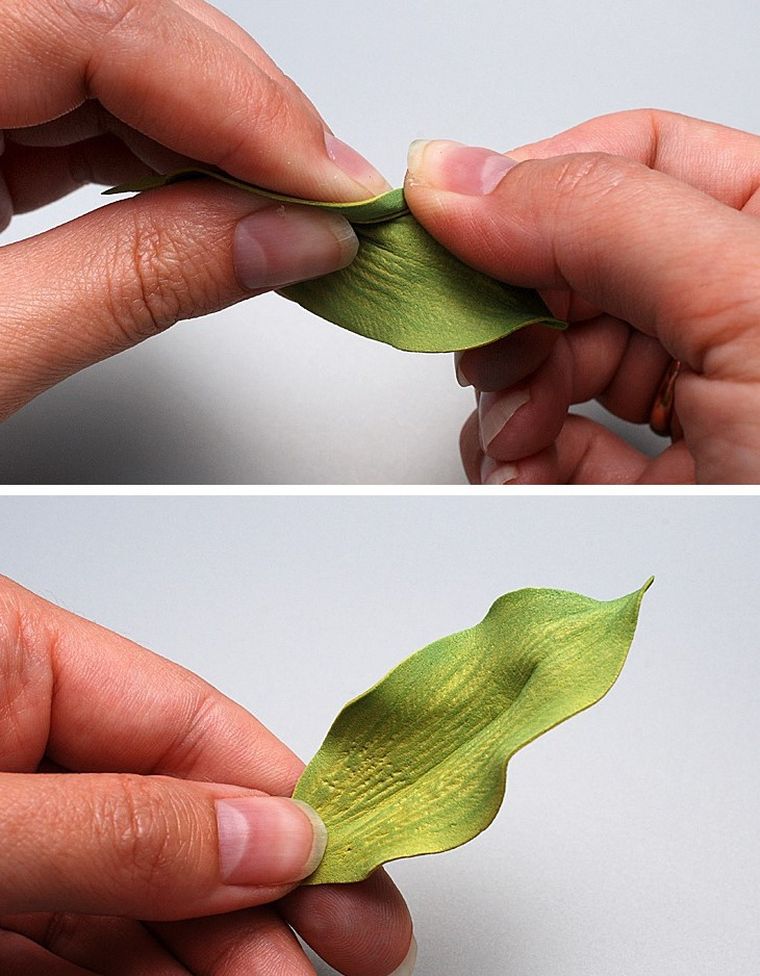
From the green material we make leaves. Twist them slightly, making them wavy. This is necessary so that the leaves look as realistic as possible.
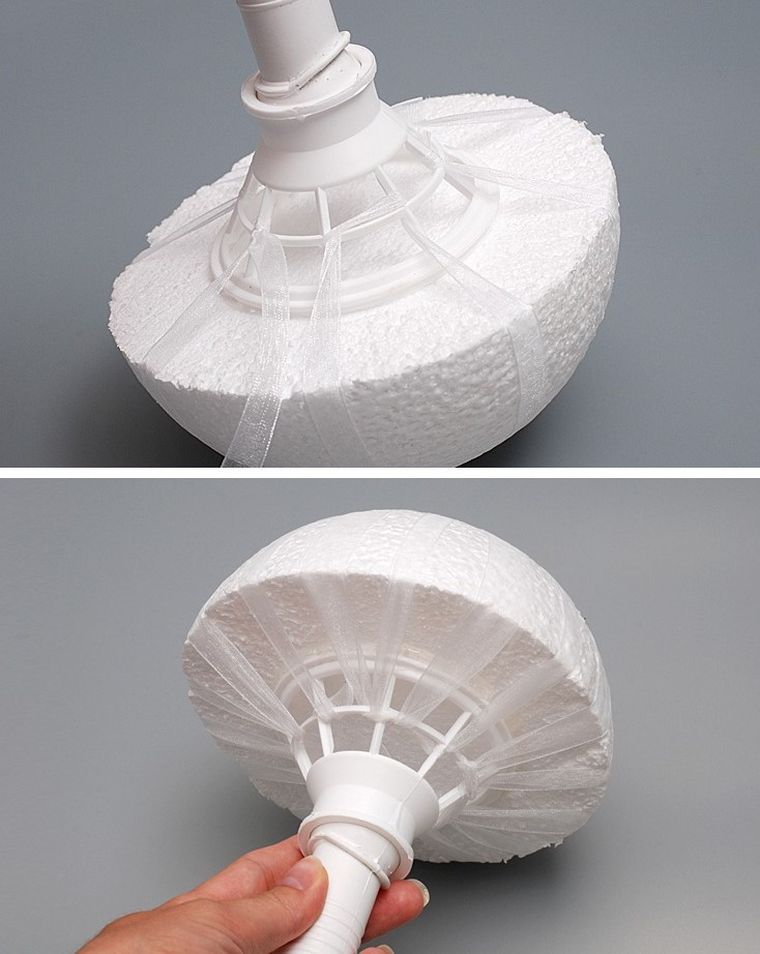
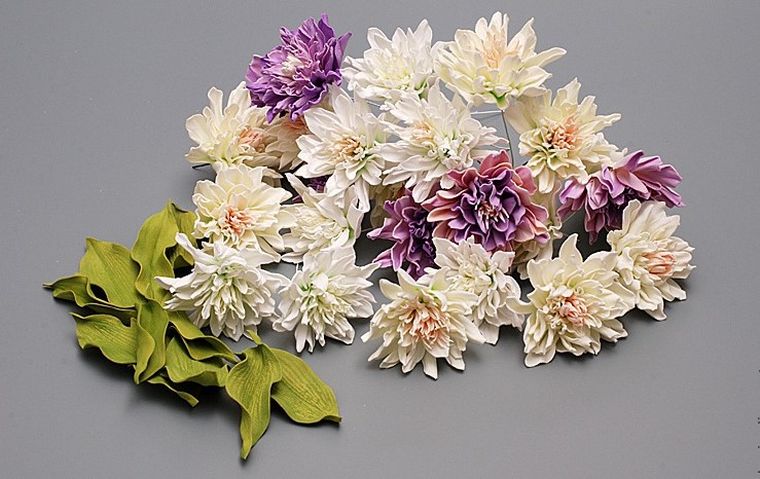
If you do not want to bother, buy a portbooker, and already fix your blanks on it. There should be at least 35 buds and 15 leaves.
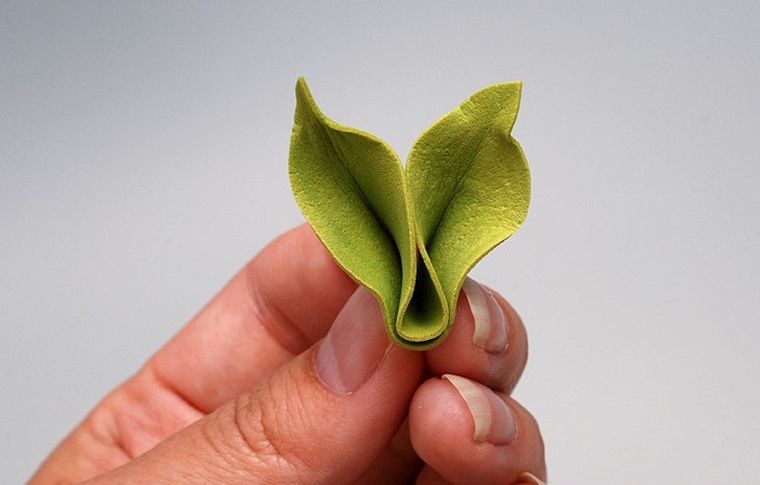
Collect all the leaflets as shown in the photo. This must be done so that they organically look among the colors.
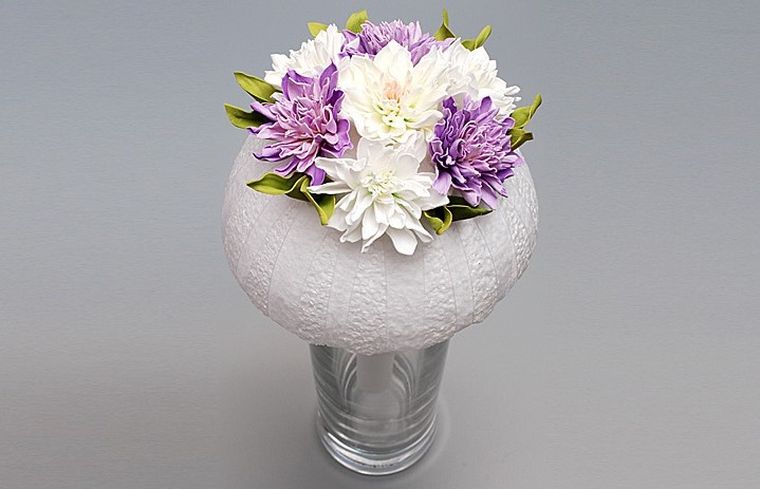
Start fixing the buds mixed with the leaves on the portbooker.
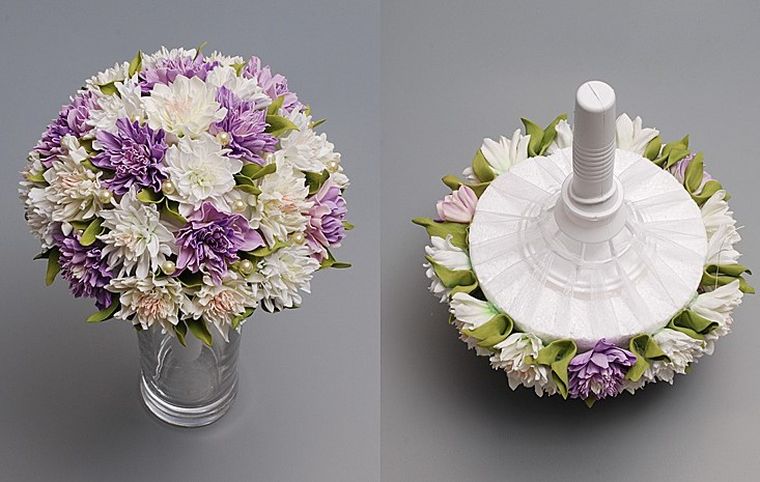
This is what you should do in the end.
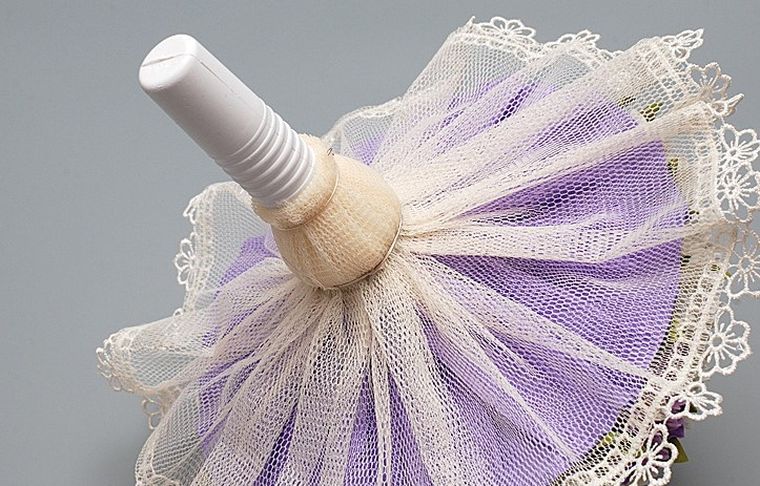
If the finished bouquet does not stand in a vase, it is advisable to cover its lower part with tulle. This will help to make it more presentable.
White flower from foamiran - magnificent chamomile
Chamomile is a very beautiful flower that is very easy to do. In our master class, white decorative material is used, but you can use another color if you wish.
White flower from Foamiran - magnificent chamomile:


Beautiful flowers from Foamiran - Lilia
IMPORTANT: When making this beautiful craft, remember that after applying glue to the material, it is extremely important to wait for time while it grabs. For perfect fixation, it will take at least 12 hours. If you do not want to wait, you can sew individual elements with a needle and thread. Just keep in mind that your creation eventually looks most presentable as possible, the stitches must be done very neat, literally a couple of millimeters.
Beautiful flowers from Foamiran - Lilia:


Flowers from Foamiran - Roses


Initially, you will need to cut small blanks from decorative material - rectangles. We fold the finished rectangles in half, and armed with scissors, round their edges. As a result, we should get at least 25 blanks.

At this stage, you can start forming our petals. To do this, we warm each blank and carefully stretch - this must be done to thin the material. Until the workpiece has completely cooled down, slightly twist its ends, and clamp the lower part with tweezers, forming a fold.

We proceed to the formation of the bud. First of all, we make the central part. To do this, crush a piece of foil with our hands, and give it an oval shape. The resulting workpiece is fixed with glue on the wire. After the glue grabs, you can begin to fix the petals in layers.

When the bud is ready, we proceed to the manufacture of the lower green leaves. To do this, cut off the strip, fold it, and give the desired shape. Do figured only those sides where there are no bends.
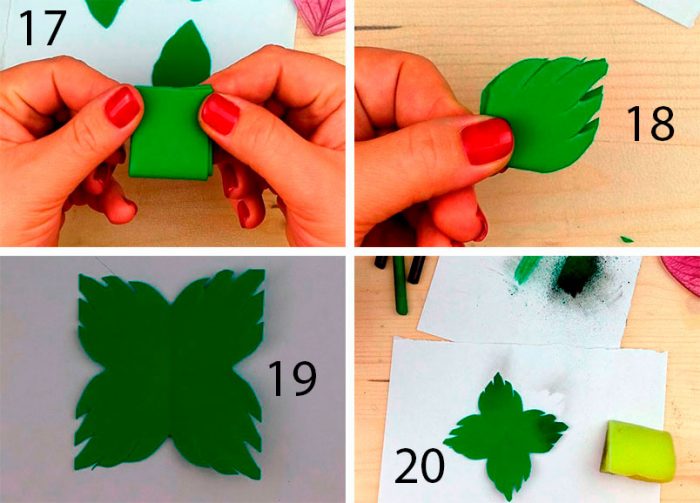

If you want to get the most realistic leaf, then its edges must be darkened. This can be done using ordinary pencils. You will need to scrape a little the neck - black and green. Pour the resulting chips on a sheet of paper and mix thoroughly. The mass that you eventually succeed, rub in the ends of the green leaves. After that, it remains only to warm up the workpiece and with the help of hands to make it more realistic - to thin the ends, twist the edges. At the final stage, we connect the bud and leaves, and you can enjoy beauty.
Simple flowers from foamiran - chrysanthemum, poppies
If you are one of those people who love simple ideas for needlework, then the next way to create crafts will appeal to you.

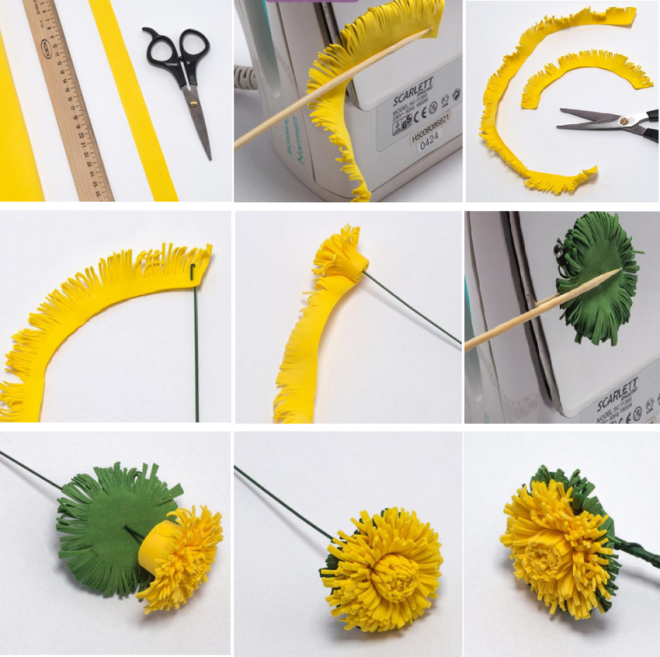
Simple flowers from Foamiran - Chrysanthemum:

We cut off a piece of material - it should be a rectangle. Lubricate one edge of the workpiece with glue and gently glue the material. When the glue dries, take the scissors and cut out the fringe (See photo 4).

After cutting, you can start forming a bud. To do this, twist our workpiece (see photo 5), Periodically lubricating the layers with glue. We fix the dried bud on a decorative wire, and our flower is ready.
And now another master class, a little more complicated for the previous one, but in the end you will get a bright poppy:

Flowers from Foamiran on the wall - the color of the apple tree
If you need to decorate the wall in an apartment or even in an office room, then try to make the color of the apple tree. Having spent quite a bit of your time, you can enjoy the spring atmosphere all year round.
Flowers from Foamiran on the wall - the color of the apple tree:
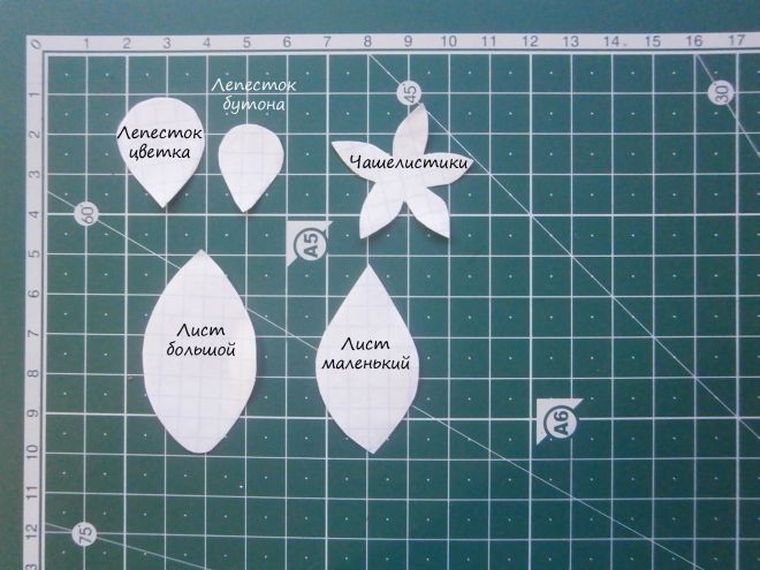
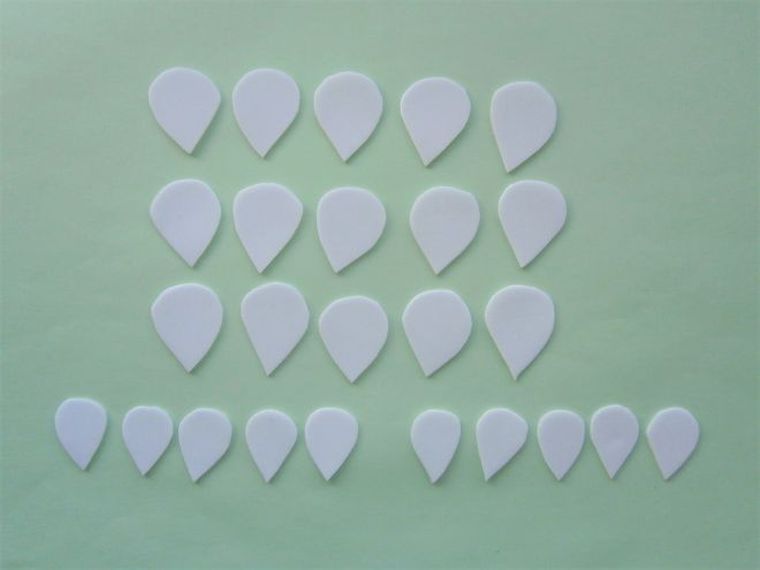
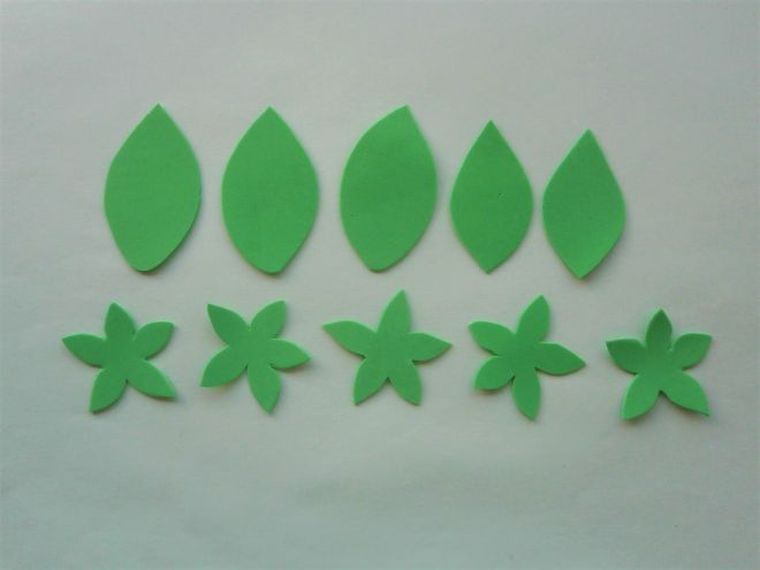
In any convenient way you make templates using which you will make petals for buds and leafs for cups.
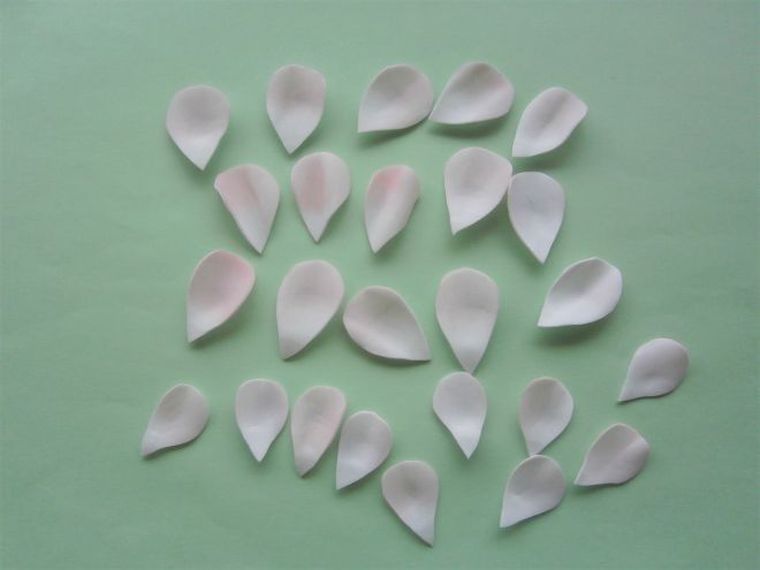
The blanks for the petals are stained with a pale pink color, some parts can be made brighter. But if you like white flowers, this stage can be skipped.
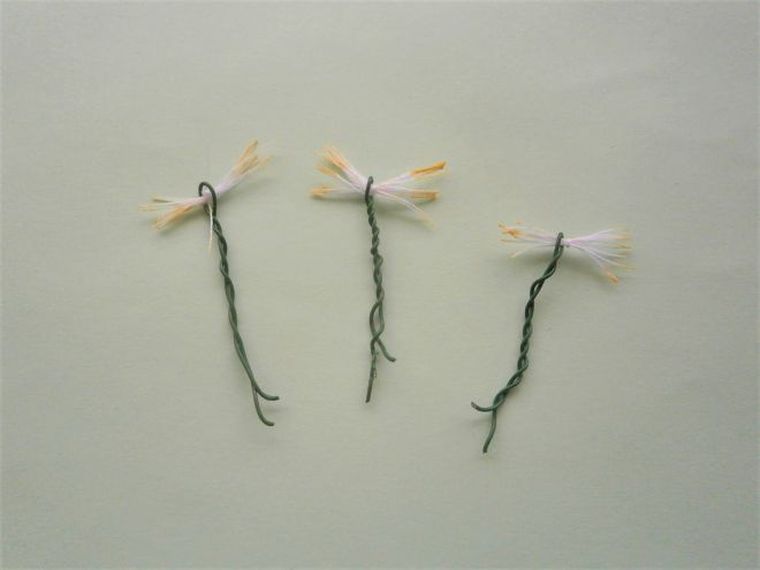
From decorative wire and threads we make stamens. The tips of the stamens are also better tinted with yellow.
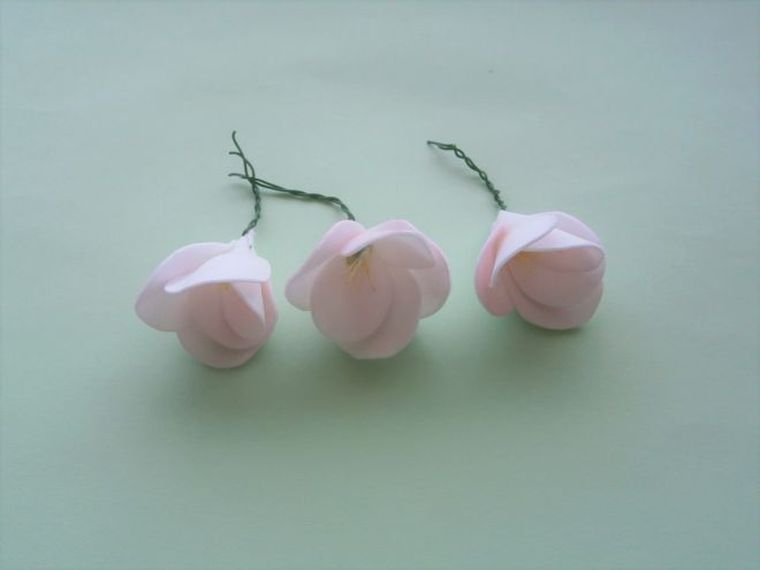
On one stamens, we fix 5 prepared petals, and the flower is ready, you can start making small buds.
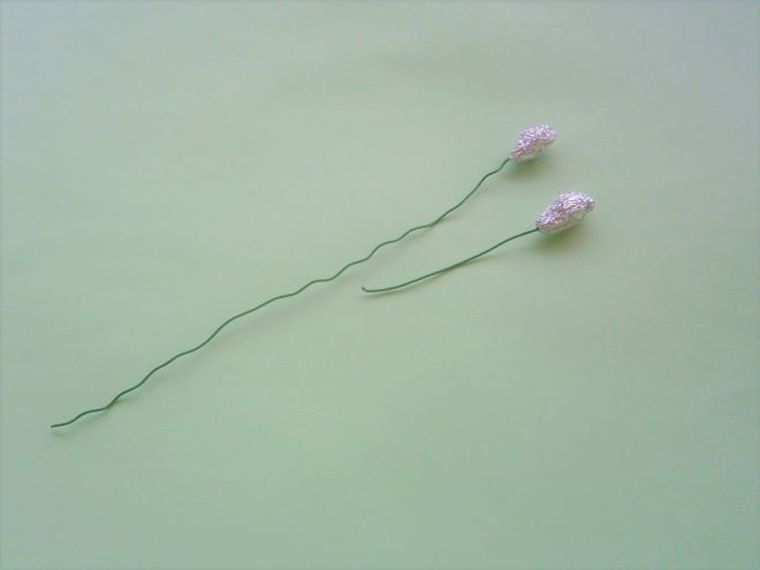
We take foil, preferably as thin as possible, it is easier to work with it. Remember it into an oblong ball and fix it on the wire.
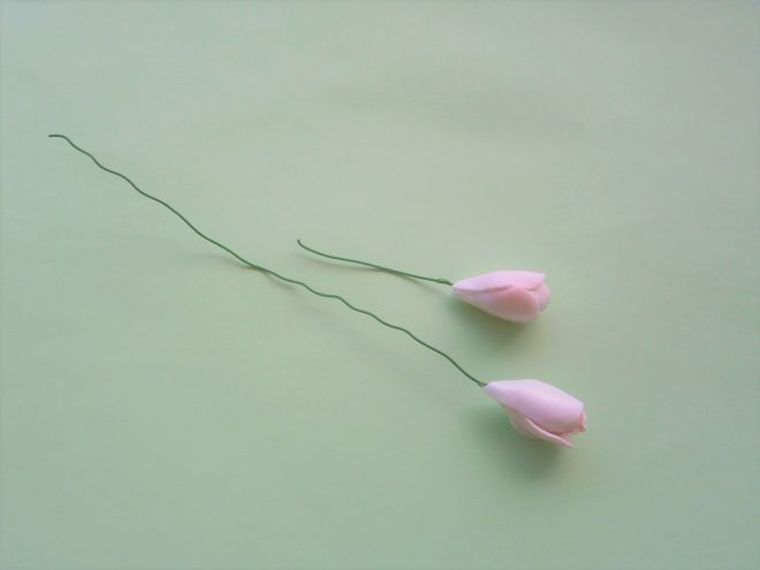
We close the foil with a couple of petals and move on to the final assembly.
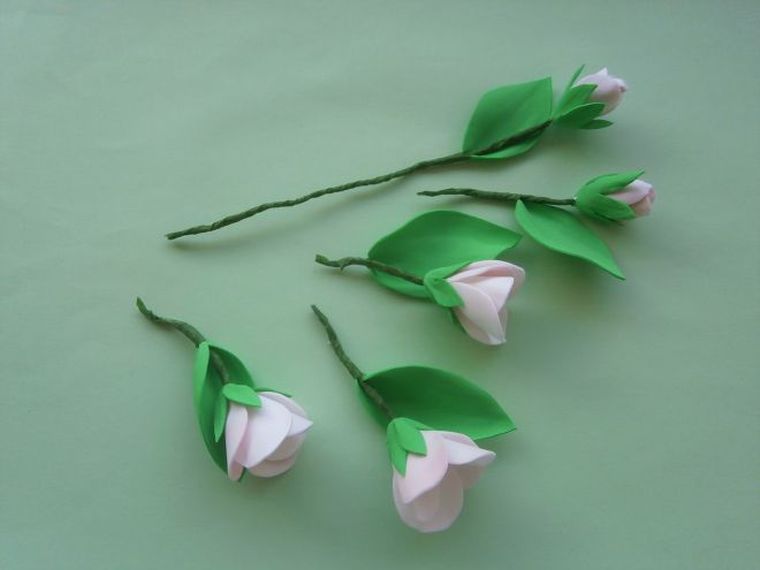
We take in advance preparation of green leaves, warm them up, give a rounded shape where we need to thinner, and fix it on a wire with buds. Ready -made flowers can be connected to bouquets, or, for greater realism, fix them on a beautiful dry branch.
Large flowers from Foamiran - Summer sunflower
If you like large flowers, then the summer sunflower is exactly what your home should decorate. You can make such a flower any size, but if you are for realism, then make the bud in greater. Just keep in mind that such a “handsome” will need to be fixed on a strong basis.
Large flowers from Foamiran:

Small flowers from Foamiran
IMPORTANT: Such a flower can have absolutely any color, so if you wish, you can do not blue, but, for example, a white bud. And if you are not afraid of the creativity, then you can transform the chamomile into a flower flower. For this, you will need to make the petals of all the colors of the rainbow.
Small flowers from Foamiran:

Foamir flowers for rubber bands, hairpins, rims
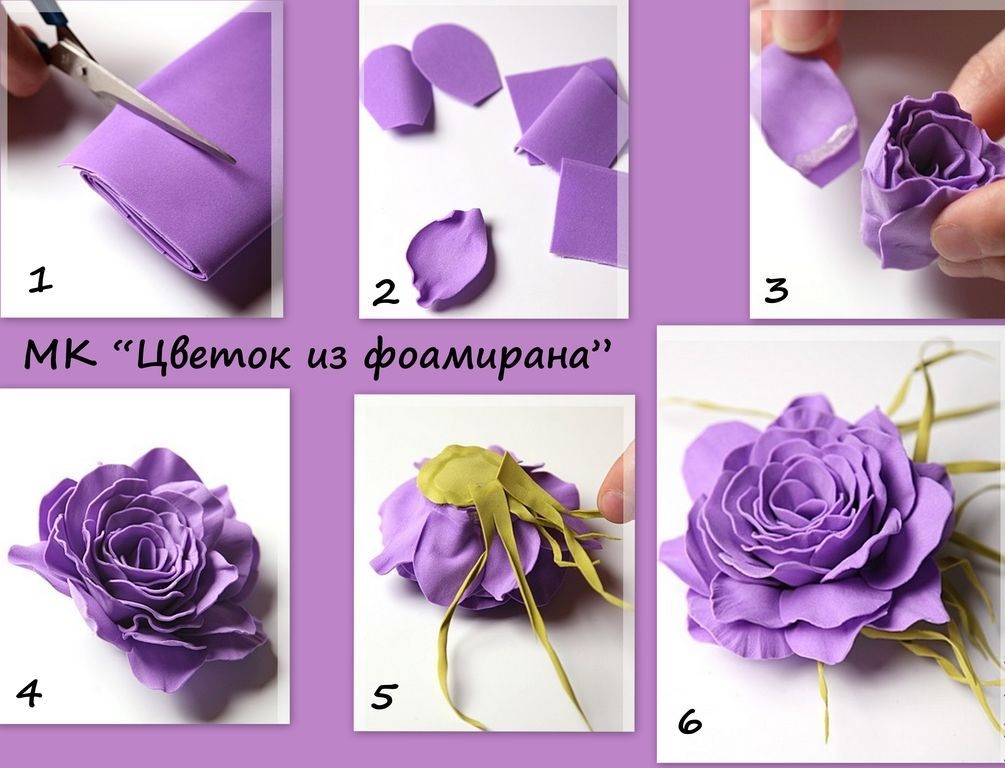
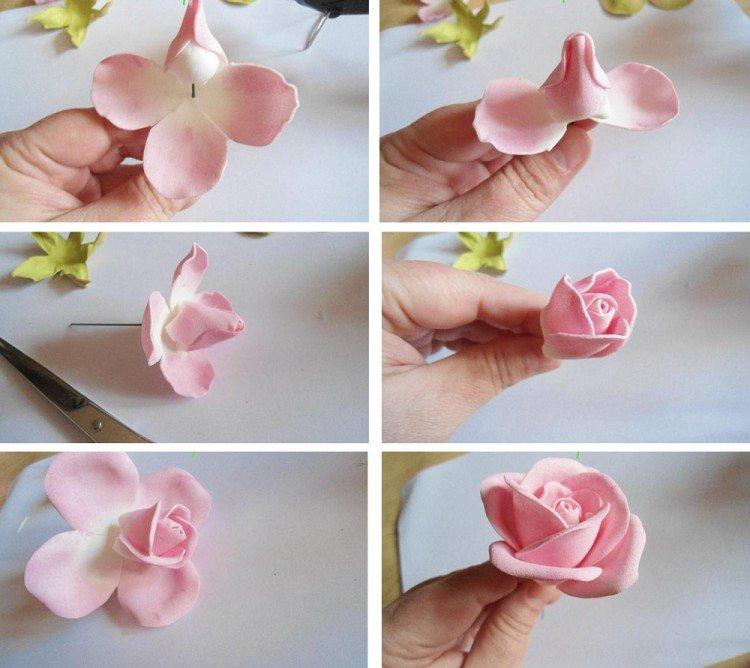
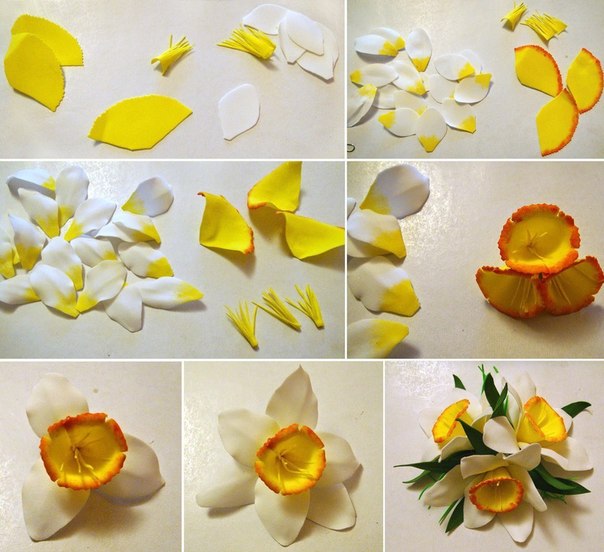
If you decide to make original hair jewelry with your own hands, then crafts from Foamian will definitely help you. Just keep in mind that in this case you will need to make small buds. Look for ideas below.
Flowers from foamiran for rubber bands, hairpins, rims:

Flowers from Foamiran: Ideas
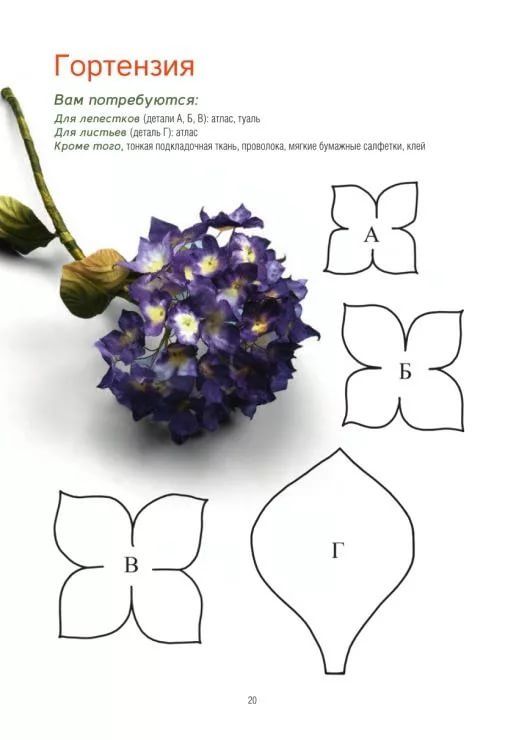
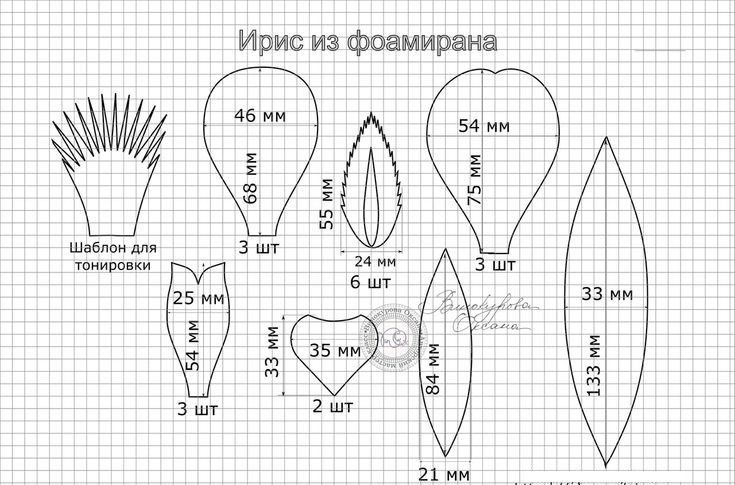
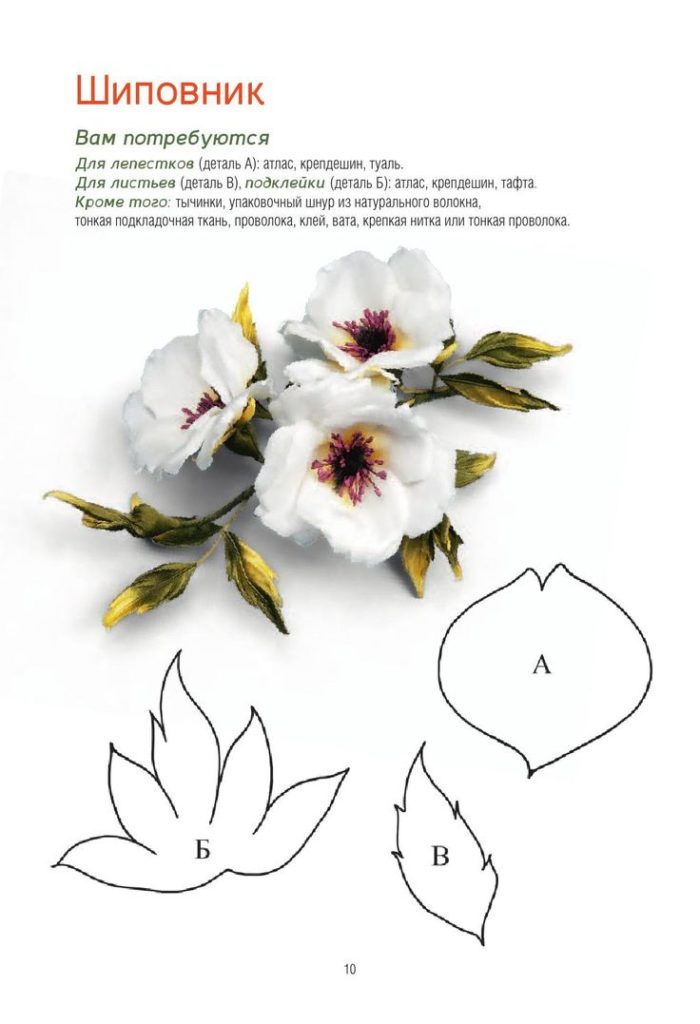
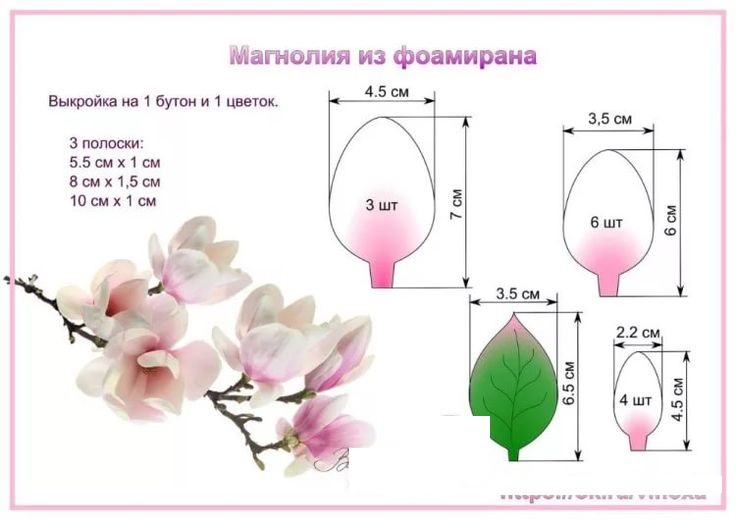
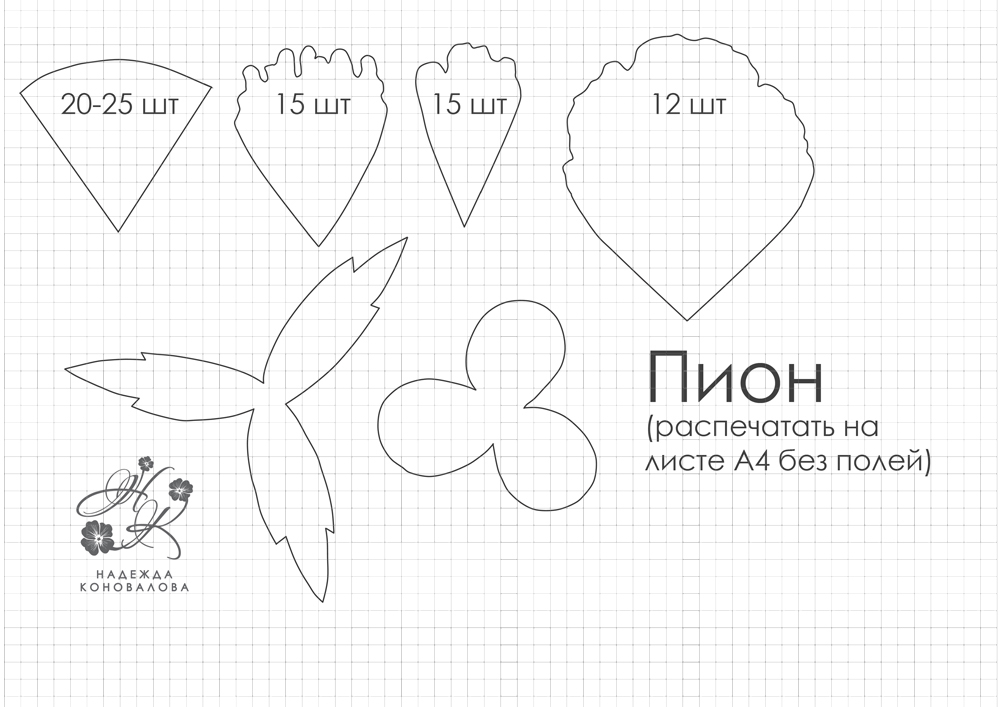
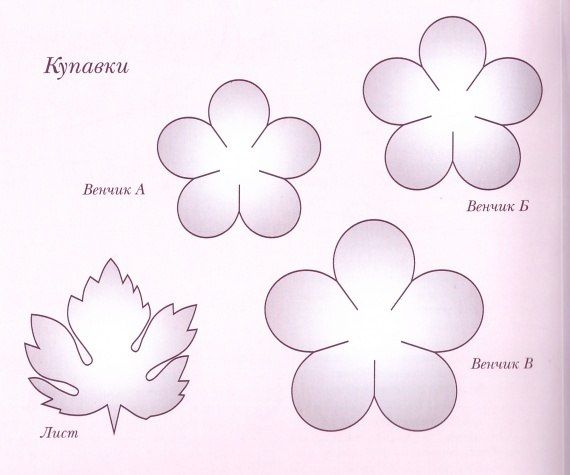
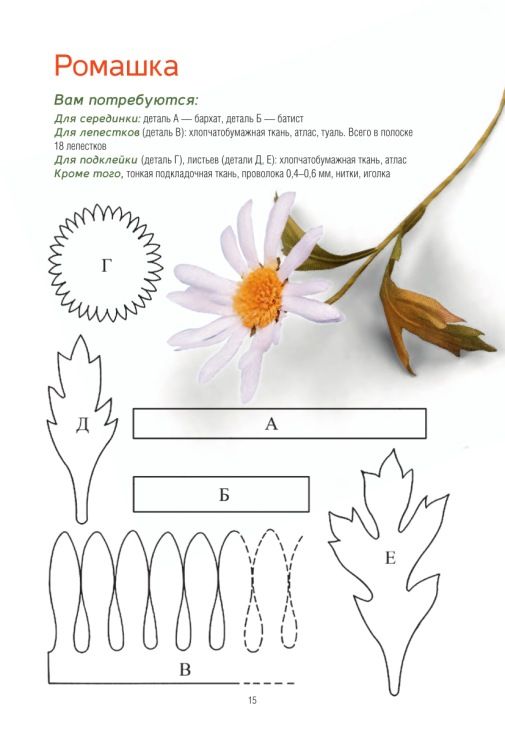
Focaman flowers templates - ideas:
Video: Very beautiful flowers from Foamiran
Video: Realistic Rose from Foamiran
Video: Astra from Foamian is easy and simple
Video: Rosty flower. Step -by -step assembly instructions
Video: Flowers from Foamian - Herbera: How to do it with your own hands?
On our site you can find many more interesting articles on the topic of needlework:

