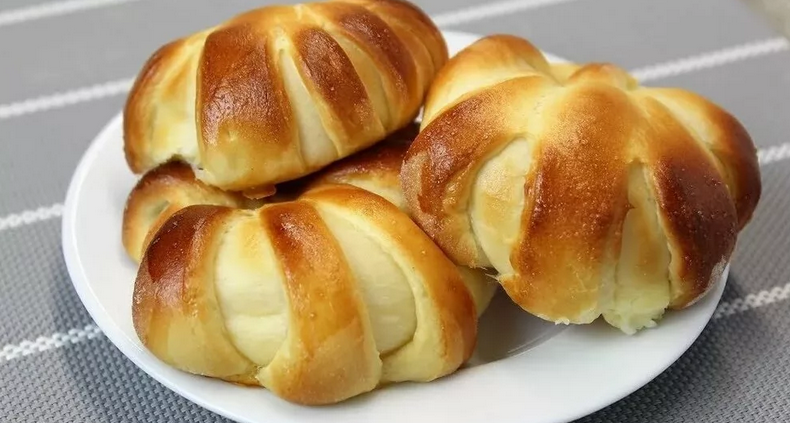
If you do not know how to sculpt pies, read the article. It has many useful tips and wrapping methods so that the baking turns out beautiful and appetizing.
Contents
- Recipe for the most delicious yeast dough for pies: Instructions
- We sculpt pies correctly: tips for working with the test
- Tips for modeling pies: Why are pies open when baking?
- How beautifully and correctly sculpt pies from yeast dough for baking in the oven - triangular, squares, round, oval, figured forms: instructions step by step with photo, video
- Video: How to make pies beautifully?
- How beautifully to sculpt pies from a non -cheerful dough: instructions step by step with a photo, video
- Video: How to fly the pies beautifully and firmly?
- How to sculpt pies with liquid, sweet filling so that they do not open - cherry, jam, jam: tips
- How to sculpt pies for frying in a pan - with cabbage, potatoes, meat, apples: Instructions
- Video: Pies
- Ways to pinch the pies so that they turn out to be beautiful
- Video: France. Cooking. Two ways of beautiful sculpting pies
- Puff pies - how beautiful and correctly sculpt: Instruction
- Video: 10 options for layers! Baking from puff pastry, formation of layers
- How to lubricate the baking cakes in the oven so that they turn out beautiful?
- Options for filling for pies for frying in a pan and for baking in the oven: Ideas
- Video: simple pies with meat - Emma's grandmother recipe
For a long time, the preparation of yeast dough was a whole art, so it was treated as neatly as possible. The recipes passed from the older generation to the younger, however, in fact, there is nothing difficult to make a good yeast test.
There are also recipes on our site that will help you bake a delicious floodplain pie with cabbage. Try it, this is fast, and it turns out very appetizing.
In this article we will tell you how to cook the dough and make pies so that any housewife envies your skill. Read further.
Recipe for the most delicious yeast dough for pies: Instructions
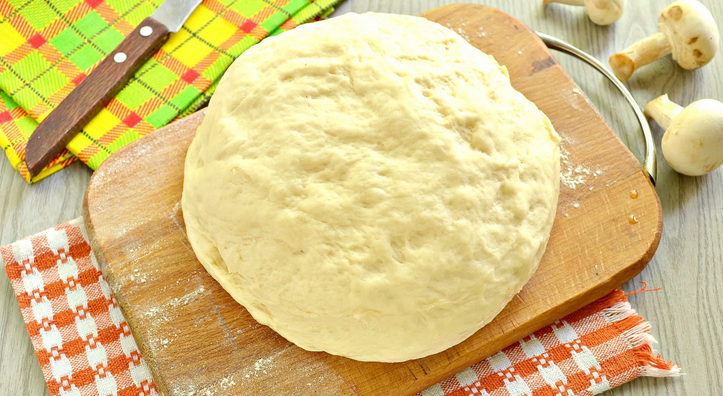
The taste of pies largely depend on how you mix the dough. There are a lot of yeast dough recipes for which a large number of expensive products are required. We recommend that we familiarize yourself with the simplest recipe, according to which many housewives are preparing the dough. Here are the instructions on how to make the most delicious yeast dough for pies:
Ingredients:

Preparation:
- First put the water on the gas and add a couple of tablespoons of the plant. oils. Wait for water to boil with butter. When the bubbles appear, and the ingredients almost stirred, turn off the gas. Set aside the bowl to the side, let the mixture cool.
- After an hour, lower your finger into a bowl, if it is tolerant for the hand and the mixture has become warm, then we dissolve the yeast - stir with sugar and salt. Let us stand for 5 minutes.
- Sift the flour (2/3 of the parts) and add warm water, mix. You can add warm milk if there is in the house.
- We add yeast to flour, half a teaspoon of soda, and stir all these ingredients well. Thanks to the soda, the dough turns out to be more tender and finished products do not freeze for a long time.
- We put in a warm place for about 20 minutes.
- Stir, add 50 g of oil and one egg, interfere with again and put in heat.
- In 20 minutes. Add the remaining flour and mix.
- Add 80 g of oil and knead one more time.
- You can start modeling pies!
According to this recipe, the dough goes an air and pleasant to the touch. It is impeccable for the manufacture of unsweetened pies. Remember that the dough should not stick to your hands and be too thick or liquid. To make it convenient to work with it, lubricate your hands with any fat, for example, Rush. oil.
We sculpt pies correctly: tips for working with the test
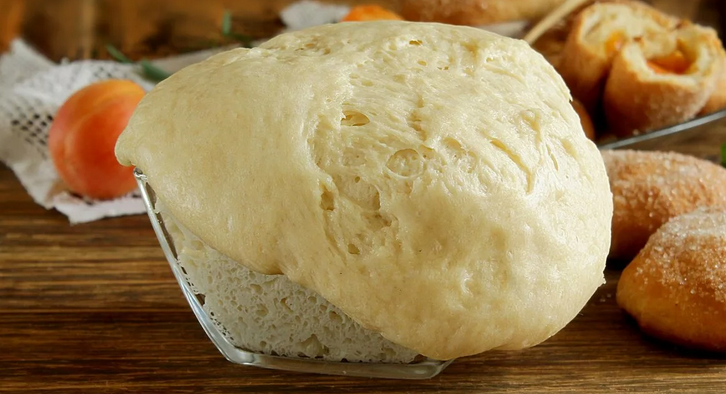
An important condition for excellent pies is a magnificent, air, well -suitable test workpiece. To do this, be sure to sift flour. Various impurities are removed from it, and it is saturated with oxygen. Here are advice for working with a test workpiece so that you can blind beautiful and tasty pies:
- A draft or wind helps to form a crust on baking. You need to work with the dough by closing the window.
- The products from which the dough is prepared must be heated to room temperature so that the dough rises well and it is convenient to work with it.
- Water for dough should be warm (approximately 30 degrees). At another temperature, yeast minimizes their activity.
- Dry your hands well before you crush the workpiece.
- Melted butter contributes to a deterioration in the quality and structure of the test, so it is advisable to use the unscrupulous product.
- Carefully check the yeast before cooking pies. They should be fresh, have a pleasant smell. To check the freshness and quality of yeast, prepare a little dough and sprinkle it with flour. If, after half an hour, cracks do not appear on flour, this is a bad sign.
- Do not rash a lot of sugar in the workpiece. When baking in the oven, such pies quickly burn. The activity of yeast is also worsening, the dough rises poorly, it turns out not so magnificent.
- To make the cooked pies more crumbly and resemble sandy, do not break the entire egg in the dough, but put only the yolk.
- High pies must be baked at low temperature so that they are well and evenly baked inside.
- Roll out the workpiece for pies as thin as possible so that the taste of the layer is better felt.
- To make the bottom of the pies dry, sprinkle it with starch, and then put the filling.
- Do not let the test workpiece stop stopping, so its quality will deteriorate.
- If you grease the pies with egg proteins, then the crust will turn out to be brilliant and ruddy.
- Pies in which there are fewer liquid and more fat are more friable.
- If you add too much soda, the dough comes out dark, having a repulsive smell.
- To roll out the thin dough, wrap the rolling pin in the towel.
- It is easier to roll out too wet dough, putting a parchment sheet under the rolling pin.
- Run the berries of raisins in flour or starch, before filling it into the workpiece - so it will be distributed faster and more uniform.
- Add salt to flour only when the academic is finished wandering.
- If the workpiece is ready, but you do not have the opportunity to put the pies bake, cover it with paper abundantly moistened in water, shaking the workpiece after shaking.
- If the pies does not go out to be removed from the sheet, separate them with a thread.
Thanks to these tips, the pastries will turn out to be very tasty. But that's not all, read on.
Tips for modeling pies: Why are pies open when baking?
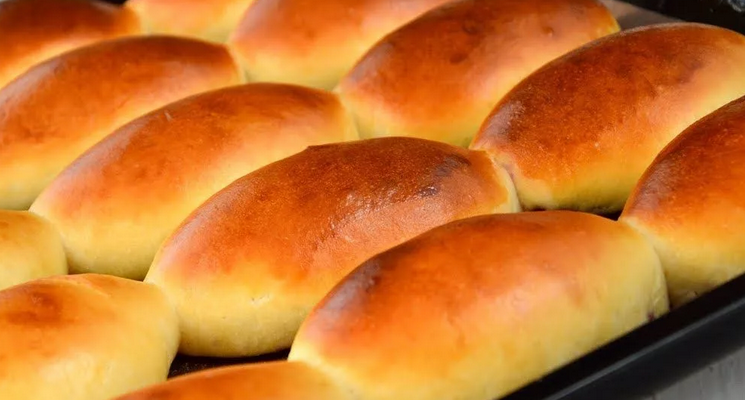
The pies are revealed during baking for two reasons:
- The dough of the seam of the pies is weak
- Too a lot of filling in the pies
Tips for modeling pies:
- Try to fix the junction of the pie tortillas tightly.
- Do not put the products bake in the oven immediately. They are required to stand and rise for a certain time (about 5-10 minutes).
- Put the products with a seam down - due to the fact that it is from below, the pies do not open.
- In order for the junction to glue well and does not spread, lubricate it with whipped yolk or water.
Thanks to these simple actions, the pies are beautiful and will not creep on a baking sheet.
How beautifully and correctly sculpt pies from yeast dough for baking in the oven - triangular, squares, round, oval, figured forms: instructions step by step with photo, video
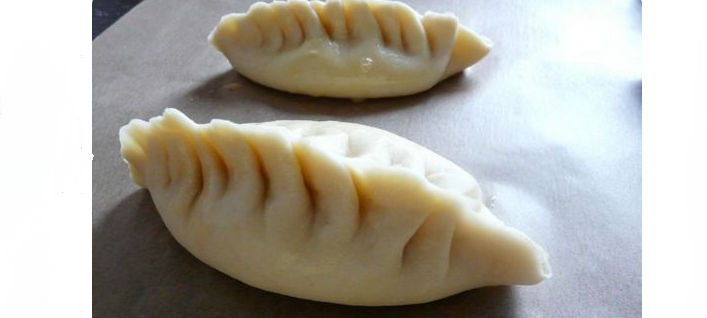
The easiest method of modeling pies is to roll out a small circle from the dough, put the filling in the middle and flood the seam inward or outward. However, the pies can be prepared in different shapes and so they will become even more appetizing. Here are the secrets of modeling pies from yeast dough:
- Before modeling, lubricate the hand with sunflower oil. Thanks to this, the test workpiece will not stick to the fingers.
- The edges of the pancakes can be lubricated with water. Thanks to this technique, they will be well glued.
- Do not rush to bake pies immediately after modeling. Cover their foods. film, greased. oil. Leave it like that for 15 min. Thanks to this technique, the products will turn out to be more magnificent and airy.
- In order for a delicious crust to form on the products after baking, lubricate the tops with a beaten egg or milk.
How beautifully and correctly sculpt pies from yeast dough for baking in the oven - triangular, squares, round, oval, curly forms? Here are the instructions step by step with photos and videos:
Round pies:
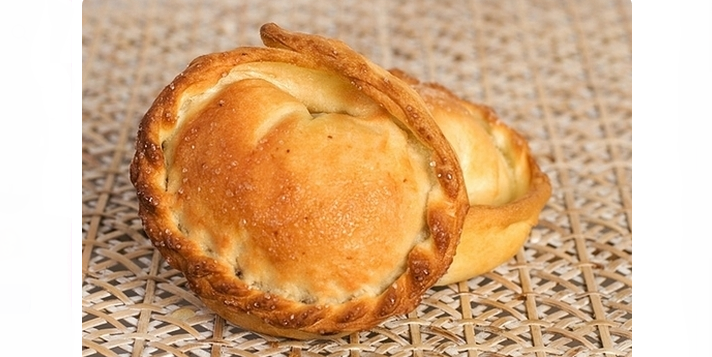
- Round -shaped pies so much resemble childhood. They are usually prepared with fillings of fruits and berries, most often with apples.
- In order to bake attractive round pies, you need to roll out a test workpiece in the form of a small pancake with a layer with a thickness no more than 5 millimeters.
- Put the layer in the middle, bent the edges to each other so that they take the shape of a bag.
- Lay out the products on a baking sheet of a seam downward so that they do not unfold during baking.
- You can create a bag with an open top. To do this, roll out the workpiece with a thin layer, with the help of the mug, squeeze smooth circles on it. In the middle of the circle, lay out about one table. a spoonful of the layer and turn the edges up, leaving a small hole upstairs.
- Baking in the shape of a circle with an open top can be prepared with any filling that will not spread.
Oval -shaped pies:
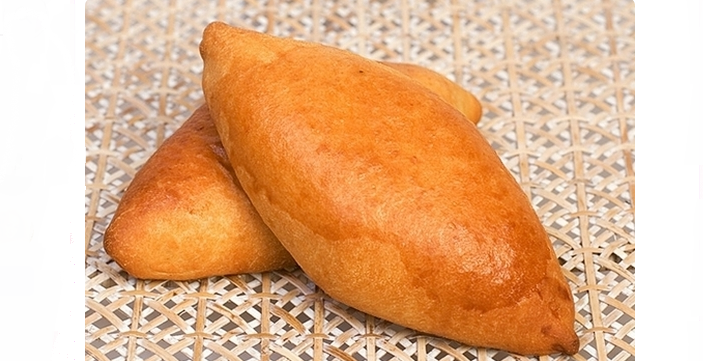
- The most common test products. They are baked with sweet fillings: fruits, jam, and with cabbage, potatoes, peas, egg.
- In order to bake oval pies, you need to divide the workpiece into small pieces, each of them separately wrap in the roll.
- Cut such a strip into small segments (approximately 40 mm) and roll each in a thin pancake.
- Place a layer in the center.
- After that, put one edge of the pancake on the second, covering the filling, and pull out a product like a semicircle out of the workpiece. Put the pies on the sheet with a seam downward.
Triangular pies:
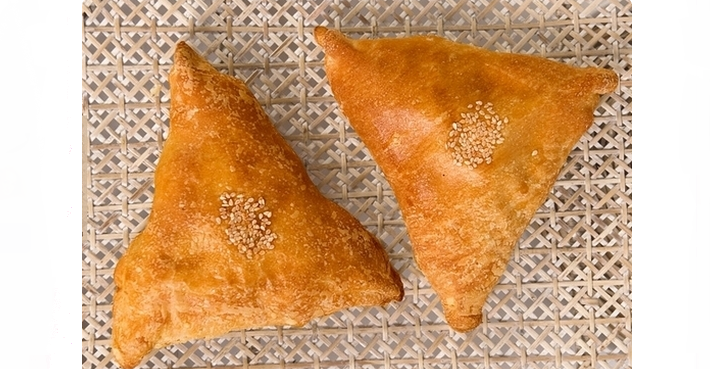
- Often bake with an open inner layer.
- The filler is often potatoes, chicken, fish.
- The triangular shape is given in this way: from the workpiece you need to roll out a thin one ( no more than 5 mm) a layer and cut a circle on it with a glass. With a knife, we subtly mark the triangle inside the circle. We lay the filling in the middle of the triangle. We bend the dough along the lines and connect the edges.
- The seam can be decorated in the form of a braid or tired. We will talk about the types of seams further.
Square pies:
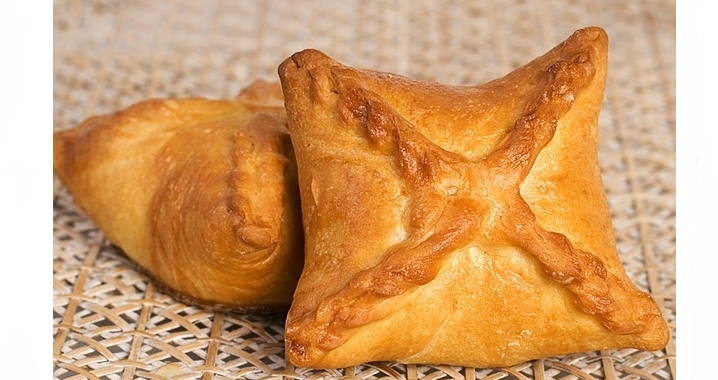
- To give the pies the shape of the square, as in the photo above, you need to thinly roll out the test blank with a rolling pin and cut into the same rectangles with a knife.
- In the central part, the layer is laid out, then the workpiece is formed in the form of a mail envelope.
- It is necessary to blind two edges diagonally at an angle approximately 45 degrees.
- Similarly glue the remaining 2 edges.
- At the end, glue the middle, and fasten the seams in the form of strong flagella.
- Square cakes can be sculpted from puff -free dough.
The pies will turn out delicious in any oven if you know how to handle it correctly. These tips will help you bake the pies correctly:
- It is better not to lubricate the baking sheet with oil, but lay parchment paper on it. The pies will not stick and the baking sheet will remain clean.
- Convection is the most suitable baking mode of pies.
- Products from yeast dough should re -rise before baking. If you leave them for 40 minutes, then in the oven the pies will not lose shape and the seam will not be dispersed.
- Do not lay out the pies on a baking sheet too close to each other. The dough increases during baking and they can connect to each other.
- Do not remove freshly baked products from a baking sheet. Let them stand for 10-15 minutes and cool under a clean towel.
- If you bake sweet and salty pies on the same baking sheet, make them different shapes so as not to confuse.
- Before you get the pies bake, heat the oven well. Do not open the oven door during baking, since the pies can fall off and will no longer be so lush.
Now you know how to sculpt and bake beautiful and mouth -watering pies from yeast dough. Use all the tips in the process, and then everyone who tries it will admire your pastries. Watch the video how the mistress sculpts pies in different ways:
Video: How to make pies beautifully?
Even more secrets below. Read further.
How beautifully to sculpt pies from a non -cheerful dough: instructions step by step with a photo, video
It is just as simple to sculpt from the non -exposure dough the pies as from a yeast blank. Here are the instructions step by step, how beautiful it is to do:
Form "rose":
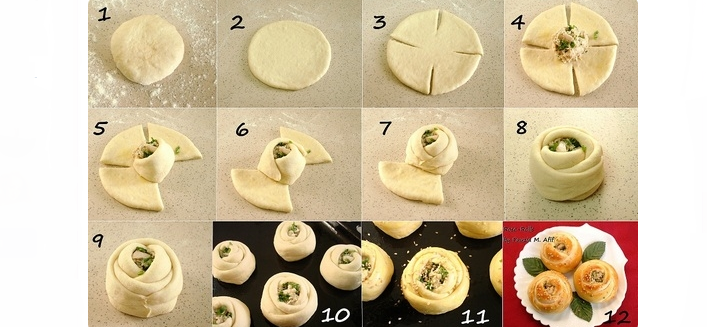
- Roll up a piece of dough in the shape of a circle.
- Make four cuts in a circle at the same distance from each other, a little not reaching the center with a knife.
- Put the filling in the center.
- Now wrap around the filling, as far as possible, the first “petal” from the dough, then the opposite to it.
- Repeat with the remaining two "petals". So that the rose does not turn around, flip the edges.
Advice: To sculpt smaller cakes in size, roll out the dough twice as thinner, apply the filling with a teaspoon and use glasses and cups, marking even circles.
Pies with embossed shakes:

- You will be able to surprise your households and guests with a relief form of products.
- Cut the oval from the rolled workpiece.
- Put the filling in the form of sausages.
- Wrap the top and bottom of the cake for a quarter.
- Now take the corners along the wide edge and fold their cross-steam twice.
- It turns out that you are “swaddling” a pie. It is beautiful, but suitable for modeling products with dense filling.
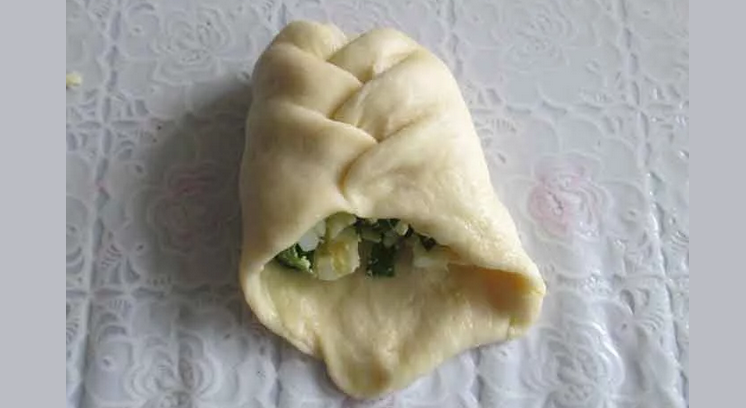
Such baking is dense. Sometimes she bakes lean. Therefore, in order for it to be fame, you need to know some secrets. Here are the tips on modeling pies from the Nedrozhzhee base:
- In order for the edges to stick well, grease the dough with whipped egg protein.
- If you want such baking to be appetizing, lubricate the already blocked pies with infused black tea.
- If you bake in the oven, then put the temperature first at 100 degrees. Then increase gradually to 200 degrees.
- To make the pies soft, after you take out a baking sheet with products from the oven, boil them with water.
Having learned to sculpt these basic forms, you can start something more complex and beautiful.
Each housewife with experience has its own way of modeling pies. Experiment, you will definitely find a form of baking that will seem more beautiful and tastier than the rest. Different figures can be sculpted from the dough: butterflies, birds, flowers. If you decorate them with a pie, it will become even more appetizing.
Video: How to fly the pies beautifully and firmly?
How to sculpt pies with liquid, sweet filling so that they do not open - cherry, jam, jam: tips
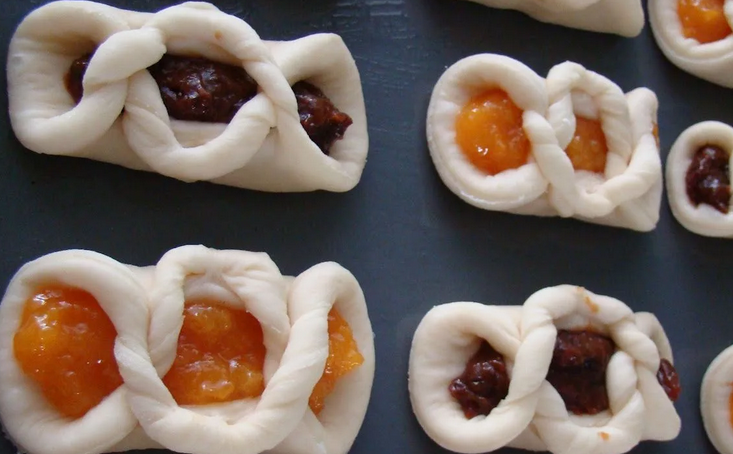
Many housewives do not make sweet cakes with liquid filling, because it flows, the bottom of the product is burning and it turns out ugly with a bitter tasting bottom. There are several secrets so that this does not happen. How to sculpt pies with liquid, sweet filling so that they do not open - cherry, jam, jam? Sometimes at home there is only a liquid filling. We will show how to cook it so that it does not flow and remains inside the pies while cooking. Here are the tips:
- Add 2 glasses jam of gelatin powder, stir, let stand stand 15 minutes And stir again.
- Add to a glass of liquid filling 1 tbsp. a spoonful of flourStir. You can also add starch or semolina.
- From white bread, make breadcrumbs and pour 2 tablespoons On a glass of liquid filling, stir.
- If you decide to use the frozen berry as a filling, defrost it, rinse and dry it with a paper towel. Then stop and add flour or semolina.
Such cakes with liquid filling prepared according to our tips can be sculpted that the contents will produce and spoil the taste and appearance of the dish.
How to sculpt pies for frying in a pan - with cabbage, potatoes, meat, apples: Instructions
How to sculpt pies for frying in a pan - with cabbage, potatoes, meat, apples: Instructions
The frying of pies in a pan is a faster process than baking in the oven. We suggest you familiarize yourself with the sequence of such preparation of products with cabbage, potatoes, meat or apples:
- You should take a good pan with a thick bottom, to which the pies will not stick.
- Pour a sufficient amount of oil into the pan. Its layer should be at least 5 mm in height, and the pie should be immersed in the oil about half.
- Warm up the oil well. It should not be overheated, otherwise the pies will be given bitterness, but non -renewal will also lead to the fact that the products will not be fried and simply absorb oil. To check whether the oil was heated enough - just drop a little water on it. If she immediately evaporated, you can safely put the workpiece to be fried.
- Oil should not foam or spray. When foam appears, it should be slightly salted.
- Cook a pie from two to four minutes. This is enough for him to bake.
Attention should be paid: Pies with meat should be brought to cooked, covering the pan with a lid.
The composition of the deeper can be changed. Many housewives add butter or animal fat to vegetable oil. Thus, you can experiment with the taste of pies. To give the products a special taste, add butter to the sunflower oil in a ratio of 3: 1.
Advice: Do not cover the pan with a lid right away - the crust will not be rosy, and the pies simply absorb condensate. Cook over low heat for 8-9 minutes (4 minutes each).
Before frying pies in butter, grease the pan with vegetable oil. This will prevent darkening of oil. If you want the pies are browned well and be soft, for 1-2 minutes Cover the pan to the end of the frying. So that the products are not fat, add a little vodka to vegetable oil. After you get a pie, all the fat is draining. If you adhere to this sequence, frying delicious pies will not be difficult.
Here are the instructions on how to sculpt such products step by step:
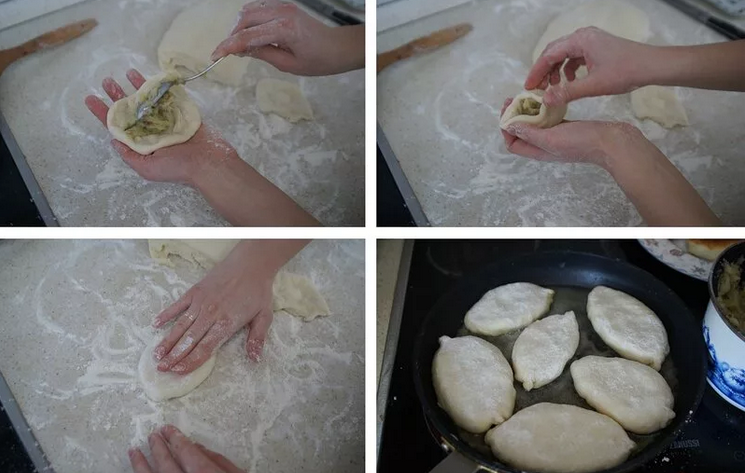
- Roll up a small cake thick 5 mm.
- Put the filling in the middle (no more 1 tablespoon).
- Now, pulling up the edges - one to another, pin them.
- Turn the pie up the seam down.
Lay out such products also with a seam down, otherwise it can open or deform and then the pie will turn out ugly.
Video: Pies
Ways to pinch the pies so that they turn out to be beautiful
The seam of pies can be very interesting. There are many species. Here are the ways to pinch the pies to make them beautiful:
Seam "Cross-Reference":
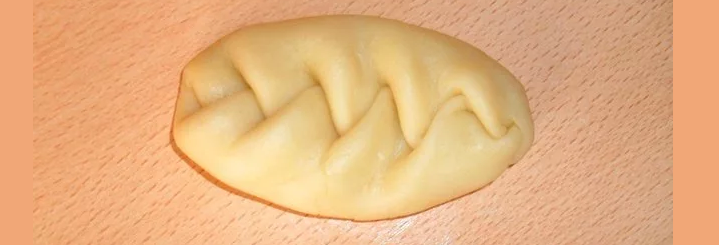
- You need to roll out a small piece of dough in the form of an oval.
- Put the filling in length and slightly bother the two opposite edges (from the beginning and end of the filling).
- Take a piece of dough at a distance of 1-1.5 cm on the left and move to the right, covering the filling. Do the same right from right to left.
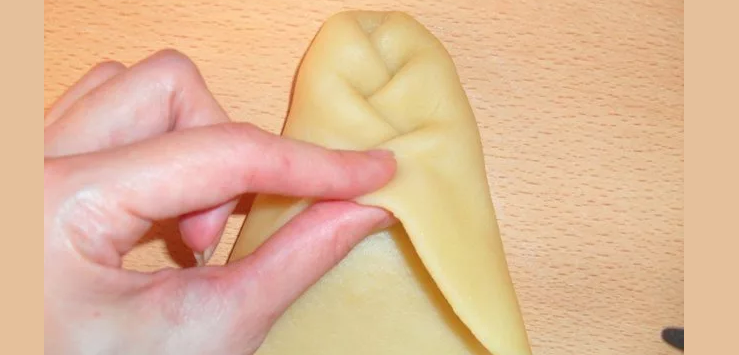
- Repeat again, sinking down a little.
- The process should resemble the swaddling of a newborn.
- The finished pie with such a seam will turn out from one end a slightly pointed, and from the other - rounded.
Seam "Rope":
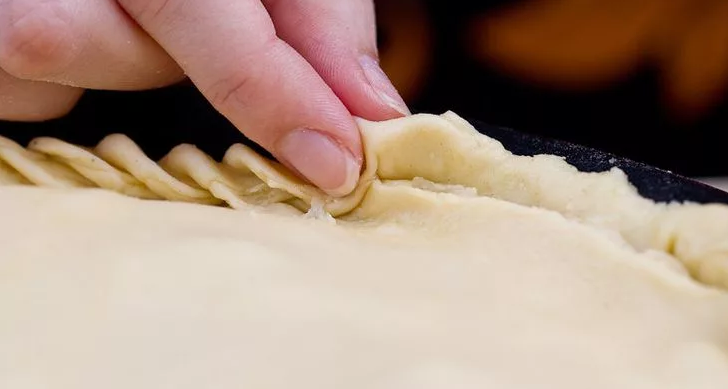
- Combine two edges with each other.
- With two fingers of the left hand, click the edges of the pies.
- Take your left hand. In this place 2 with the fingers of the right hand again click and tighten in the direction of yourself.
- Repeat the previous steps to the end of the seam.
Show "Kosichka":
- Put the edge of the pies, as usual.
- Keep the pie in your left hand, and with your right hand, start weaving a pigtail from the bottom-up.
- Make a clamp in the lower corner of the pies with the thumb and forefinger of the right hand.
- The dough in this place becomes thinner.
- With the thumb of the right hand, lay the first fold on the pies.
- Make a new clamp with a thumb and forefinger, keep the pie in your left hand, and make folds with your right hand.
- Continue weaving a pigtail until the very top. At the end, the corner must be bent.
The second version of the Switch "Kosichka":
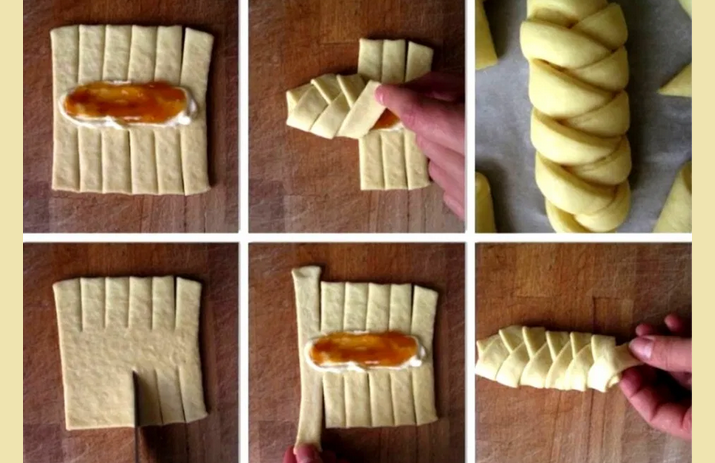
- Roll out the dough in the form of an oval, make cuts on the sides at a distance of 1.5-2 cm from each other, as in the photo above.
- Put the filling in the middle and alternately apply pieces of dough on the filling, rising from the bottom up.
The pie will look much more beautiful if you make an unusual seam. Therefore, use one of the options higher, or come up with your own, and maybe someone will then do baking according to your instructions.
Video: France. Cooking. Two ways of beautiful sculpting pies
Puff pies - how beautiful and correctly sculpt: Instruction
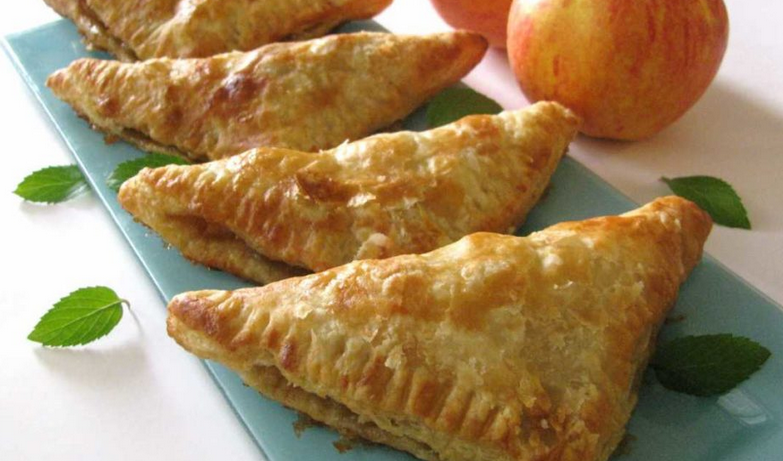
Hardy puff pastry is sold in frozen form. From it the pies are obtained with a crisp. Here are some tips on working with puff pastry:
- Do not defrost puff pastry in the microwave or on the stove. In extreme cases, the workpiece bar can be kept on the table at room temperature, or better - by putting on the lower shelf of the refrigerator.
- Roll out the dough in one direction - "from yourself." Before that, sprinkle your hands and table with flour.
- Do not defrost the dough until soft - start working with it when it still remains elastic. The soft dough will be poorly extended and it will be harder to work with it.
- Cut the workpiece only with a very sharp knife. If you see that the dough softened so much that it stretches behind the knife blade, it is better not to cut the dough, but simply apply the knife to the dough with an acute side. So you will cut the dough into pieces without deforming it.
- Do not sculpt from the dough too active and long.
- Before baking, the product of puff pastry should be pierced in several places with a fork, or to make small cuts, otherwise it can swell, burst and the filling will be produced.
- Do not fry puff pies in oil, otherwise the dough will lose its structure.
Here is the instruction how beautifully and correctly sculpt puff pastry pies:
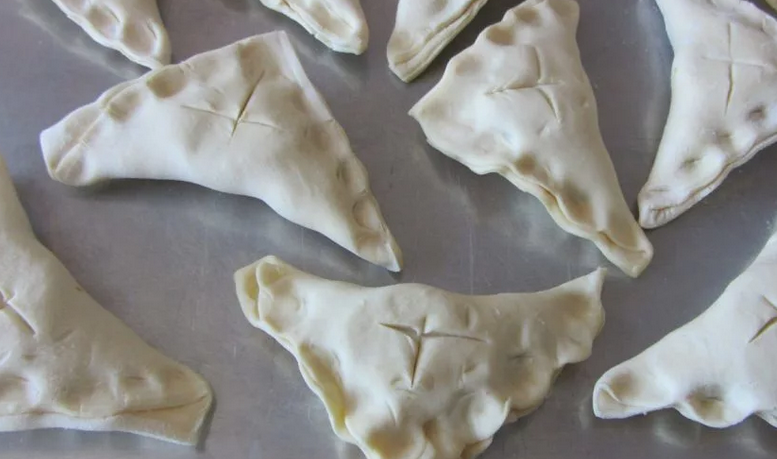
- Roll out the layer of puff pastry.
- Cut it into squares of the desired size (approximately 10x10 cm).
- Put the filling. Visually divide the square into 2 triangles.
- Distribute it evenly over the entire surface of one of the triangles, retreating from the edges of 1.5 cm.
- Then cover with the second triangle and slightly rewind the edges.
- Make incisions and put puff triangles in the oven for baking.
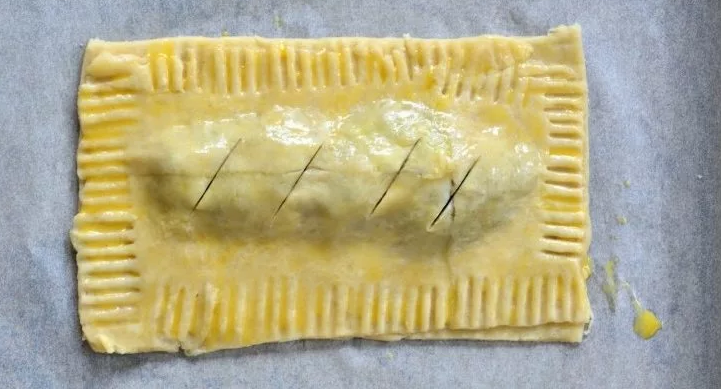
You can fly the edges with a fork:
- To do this, the pie is made of two square cakes.
- The filling is laid inside.
- The edges are pressed neatly with a fork, as in the photo below.
- It turns out very original.
Another way:
- Make cuts on a square workpiece on one side.
- Put the filling on the whole side, and cover it with cut tests on top.
- Pin the edges slightly - you're done.
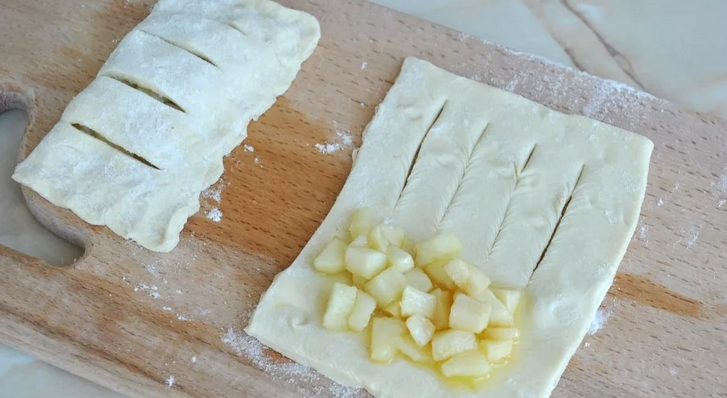
When such products are baked, they will acquire a delicious appearance. The edges of the puff pastry are beautifully open and add the beauty of the cake.
Video: 10 options for layers! Baking from puff pastry, formation of layers
How to lubricate the baking cakes in the oven so that they turn out beautiful?
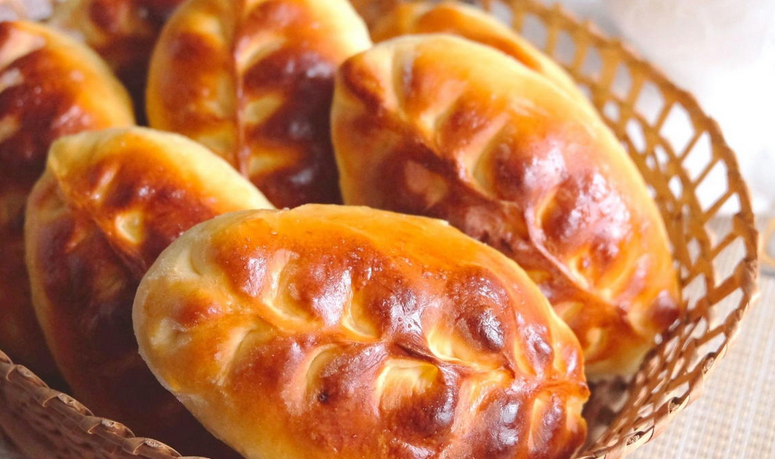
How nice to serve on the table is not only tasty, but also beautiful pastries. This is especially important when you are waiting for guests. In order for the pies to acquire an appetizing shine, they can be covered on top with various types of lanes. How to lubricate the baking cakes in the oven so that they turn out beautiful? Star options:
- Whipped yolk egg
- Sour cream
- Sour cream and butter
- Butter
- Milk
- Lenten mayonnaise
- Vegetable oil
- Sweet water (sugar and water in a ratio of 1: 1)
- Sweet and strong black tea
Good to know: In each of these options, you can add a little turmeric - so the crust on the pies will be yellow. Instead of rides, you can use sprinkles, such as sugar powder, crushed nuts, chocolate chips, dried herbs, sesame seeds.
Options for filling for pies for frying in a pan and for baking in the oven: Ideas
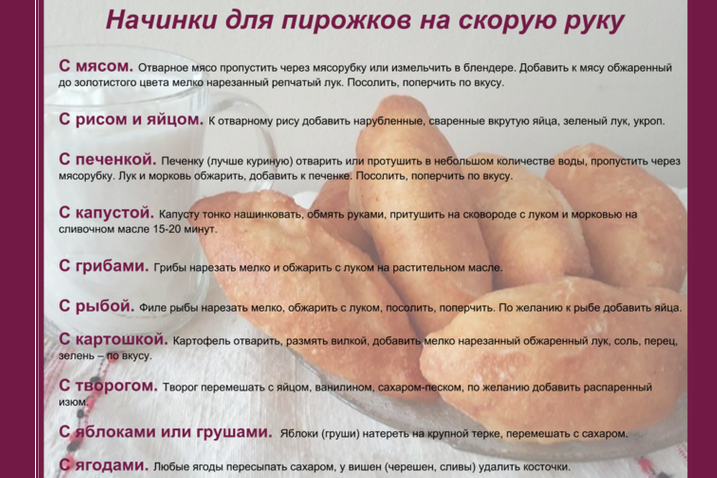
Depending on the filling of the cake, it can be eaten as:
- Dessert (fruit or sweet filling)
- Snack (filling of vegetables and mushrooms)
- The main dish (meat or fish filling)
We will tell you how to cook some of the layers. Here are the ideas of options for filling for pies for frying in a pan and for baking in the oven:
- Apples. Grate the apple on the grater or cut into small cubes. Place the filling in the pie and climb until the apples are let out the juice. If desired, you can add sugar and cinnamon.
- Potato. Boil potatoes and ceiling it with milk and butter. If desired, you can add chopped greens and/or fried minced meat.
- Brisket and potatoes. Boil potatoes and ceilings in mashed potatoes. Cut chicken breast and fry in oil. Mix mashed potatoes with pieces of meat. If desired, you can sprinkle the filling with herbs.
- Cabbage. Chop the cabbage and onions, rub the carrots. Fry in a pan for several minutes. Add sugar, salt, bay leaf and tomato paste. Stew until the cabbage is soft.
- Meat. Boil the egg and potatoes, grate them. Small the meat finely, fry over low heat. Mix all the ingredients and season at will.
Now you know how to sculpt and bake delicious pies. Surprise households and guests. We wish you the most delicious pies and pleasant appetite!

