DIY snowflakes from paper, voluminous, openwork, colored, elegant.
Contents
- Paper snowflake
- Paper Snowflake: how to do it?
- Paper snowflake templates:
- Video: openwork snowflakes
- Snowflake from paper tapes
- Snowflakes from napkins and paper: how to do it?
- Video: We make shiny snowflakes
- Video: Snowflakes Origami
- How to make a snowflake of paper is easy for children: simple snowflakes from paper
- Video: Fluffy Paper Snowflake
- Video: Simple Paper Snowflake
- Video: Light and beautiful paper snowflakes
- Beautiful paper snowflakes easy -10 schemes
- Video: Snowflake using origami technique
- On the eve of the long -awaited winter holidays, the topic of creating a New Year's decor becomes relevant. We offer you to familiarize yourself with step-by-step schemes and descriptions of master classes in the manufacture of light air snowflakes.
- To create them, we will need paper or foamiran, and various jewelry. The instructions presented in our article and step -by -step photos are designed for those who first decided to create fluffy winter beauties to decorate the house, and for those who will make snowflakes with children and grandchildren. Light wonderful crafts will delight your households throughout the winter weekend. Create with us light winter jewelry, be inspired, come up with other options and ornaments for cutting snowflakes!
Paper snowflake
Being children, we glued and cut New Year's jewelry in the joyful expectation of miracles and magic. And then they hurried to boast of the craft in front of his sister, brother, mother, grandmother or teacher. And already at these minutes the New Year mood found a convenient place in the heart and was looking forward to the most important holiday. Time goes on, and we all also believe in the New Year due to the magical New Year's Eve, only the winter attribute of the holiday is no longer cut out ourselves - an interesting lesson carries our children and grandchildren. Let's proceed to the practical part of cutting snowflakes from paper!
Paper Snowflake: how to do it?
- First, try to cut a simple snowflake. Such crafts can also impress with their appearance, despite the simplicity of execution. If it turns out beautifully, feel free to take the cutting of more complex openwork frosty specimens. You will definitely be on the shoulder more exquisite forms of snowflakes.
- We will create snowflakes from paper sheets. Napkins are also suitable. You also need to make sure that at your disposal there are sharp scissors with thin blades and a simple pencil.
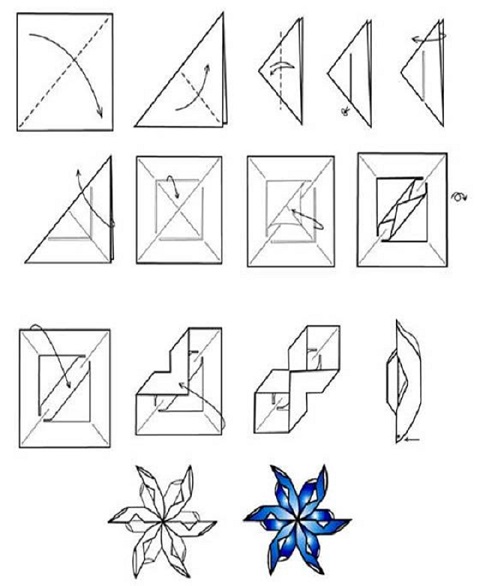
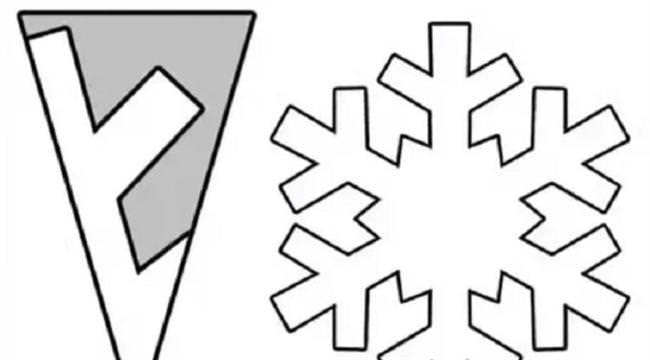
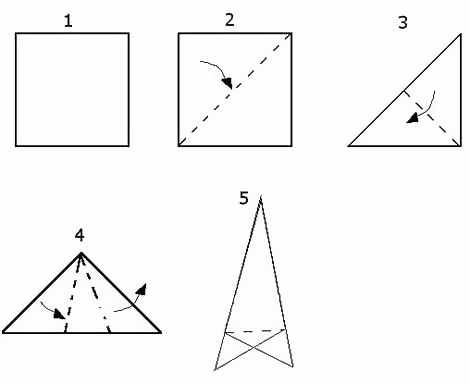
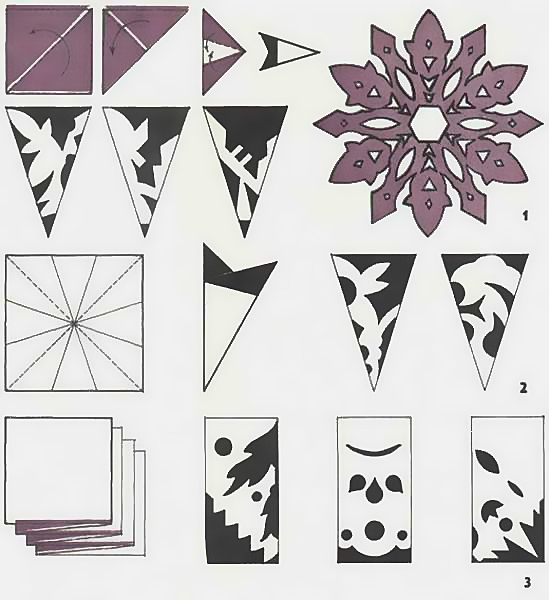
- Fold the paper with a triangle. We draw the contours of snowflakes or draw a patterned edge. Cut.
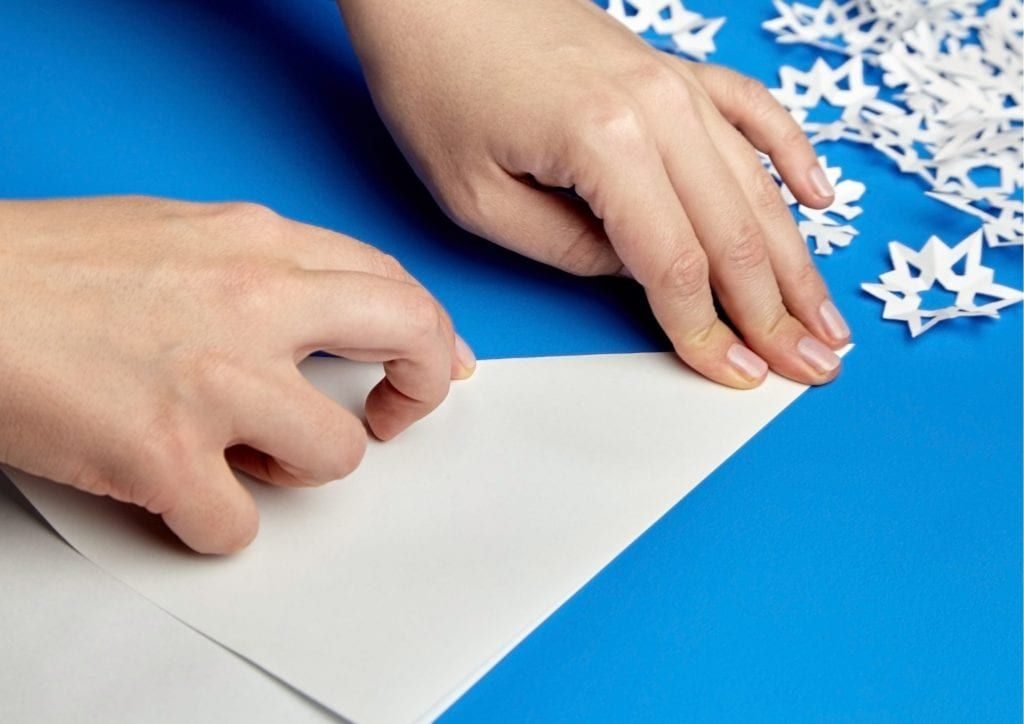
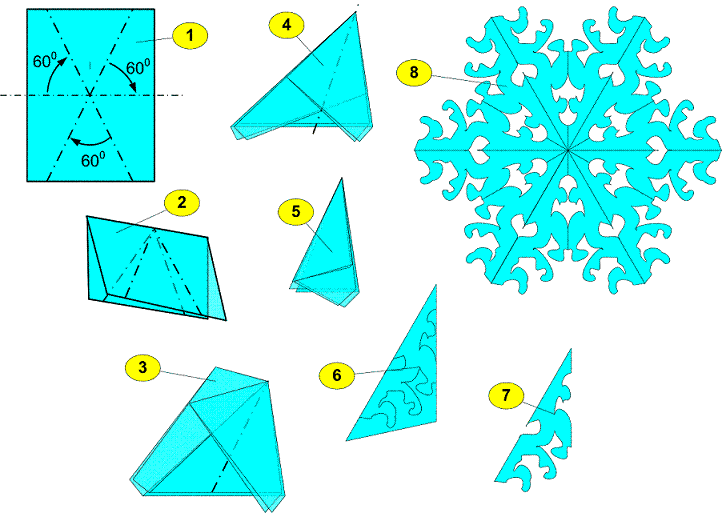
Important: Immediately take a sheet of square format and bend along the diagonal in the center. Again, connect the edges, bending along the central diagonal. And we repeat the process of adding the part in half. On the triangular side that you chose for further work, we draw a pattern or openwork edge of the snowflake.
If you drive the word “snowflake” in the search engine, then there are a lot of openwork and simple snowflakes. You can come up with your schemes, and cut out your author’s snowflake. But in order not to be disappointed at the very beginning, you need to correctly fold the paper.
- Properly folded paper is a beautiful six -beam frosty beauty, in which all parts are symmetrical.
- Paper snowflakes, the schemes of which are presented in this section, are created according to one principle. The only difference is which pattern is applied to the rays of snowflakes. In order not to arise problems, cutting out a snowflake, check all the stages with the photographs presented in our article.
Let's start:
- We cut out a square from paper. By purchasing paper for origami, which is now sold in stationery and bookstores, you can immediately start the next stage, because the sheets in such sets are already square. Another advantage of origami sets is that the paper in them is thinner than the standard office, which means it will be easier to cut out openwork snowflakes. In addition, such sets are produced colorful, they are with patterns.
- But if in the nearest stationery store you did not find a set for origami, then this problem is quickly solved. We fold two corners together diagonally and cut off the excess strip. Cutting paper sheets into squares will not take much time.
- The finished basis for one snowflake, folded diagonally in the form of a triangle, can be used for further work!
- We fold the resulting triangle in half. By the fold, we determine where the center of the snowflakes is located. It is better to designate this bend with a dotted line. Then it will be easier to navigate in the future. In the previous step, we lay down the triangle in half. Now you need to expand it back so that we just have a square, which we previously folded diagonally.
- To cut the perfect snowflake, we will use the transporter. We measure from the central point an angle of 60 degrees on both sides. We bend the paper on these lines.
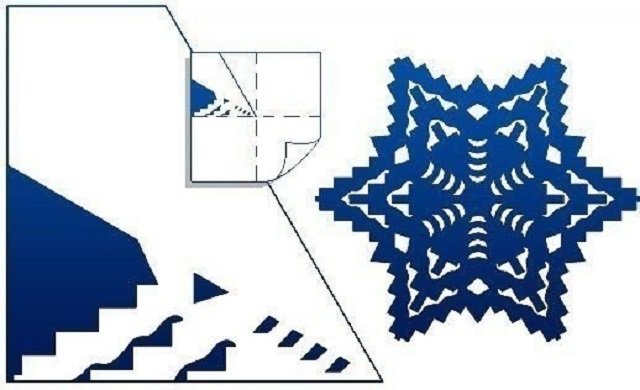
- We bend the left corner, then the right. We turn the future snowflake and bend along the central line. We cut off all unnecessary parts from the resulting part so that the triangular base remains. Here is such a straightforward way to properly prepare the hexagonal base for snowflakes. We cook several of these triangles and apply an openwork pattern presented below for each of them. It remains only to cut carefully with a layout.
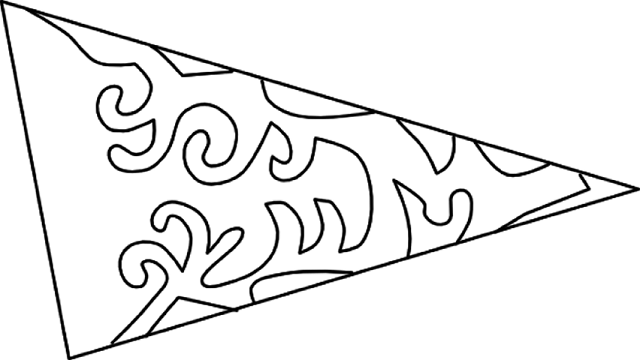
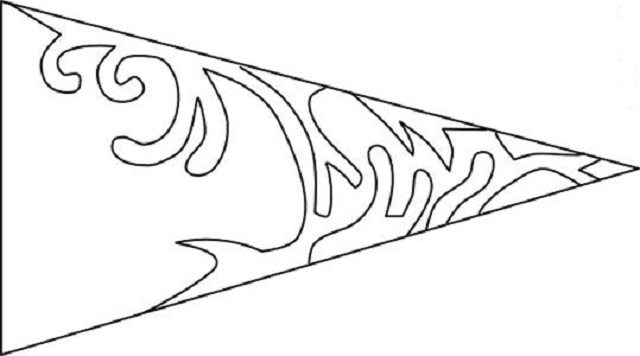
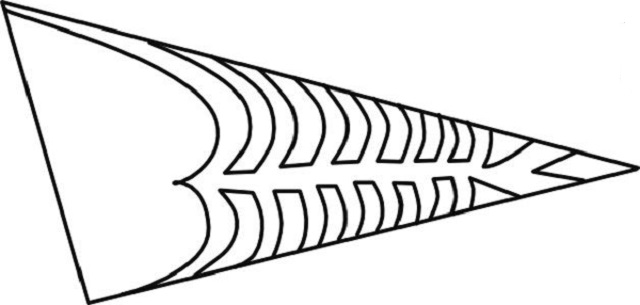
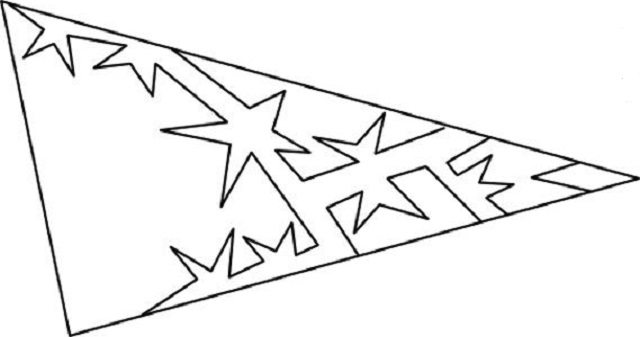
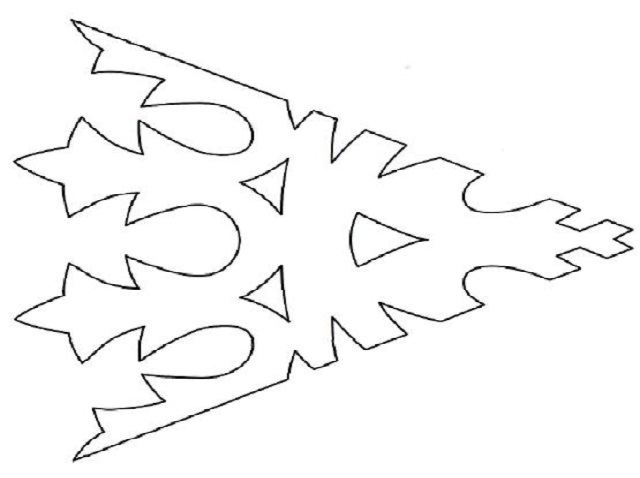
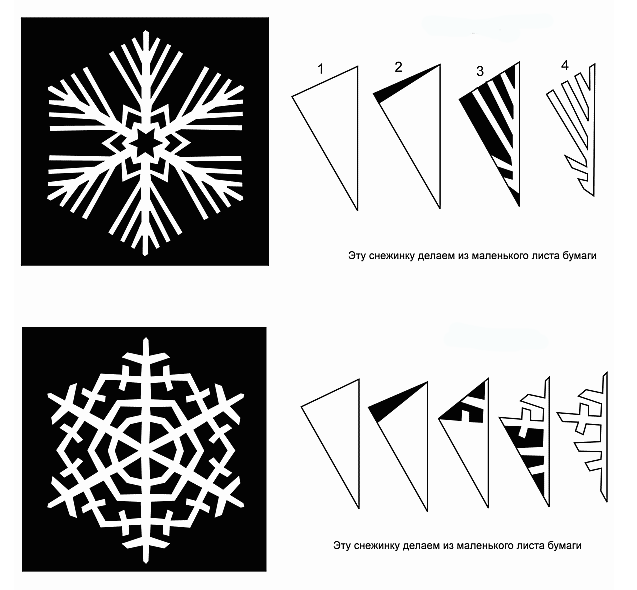
If desired, you can come up with a snowflake pattern yourself. But there is another option - to look for beautiful templates in the World Wide Web and translate the contours to a triangular workpiece. This can be done in any way known to you - using tracing paper, through parchment paper, simply redrawn. You can decorate the children's room with snowflakes cut out of paper, take it to a kindergarten for decor windows to the matinee.

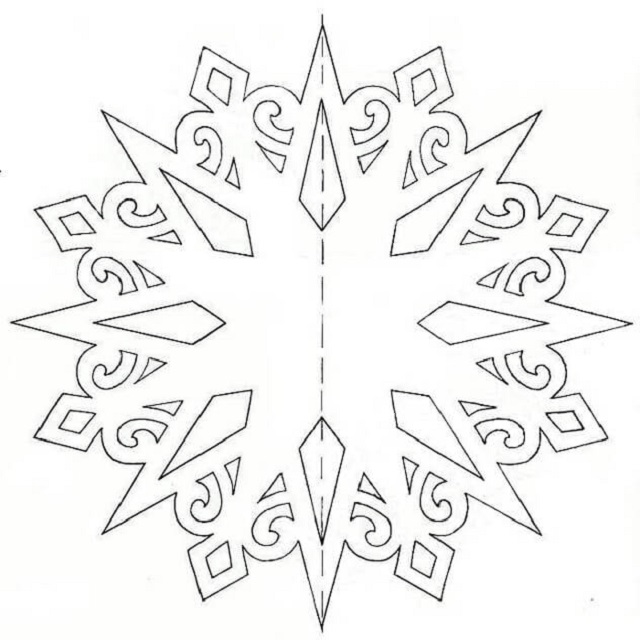
- You can make openwork snowflakes. But for this you will have to very carefully cut out all the elements. On the Internet you can find a variety of schemes for cutting openwork snowflakes.
- If desired, you can find templates for cutting frosty patterned beauties in the same style or find irreplaceable winter elements of decor completely different in design and technique.
- All templates are impressive by the variety of design of the contours of snowflakes and picturesqueness, and even one who cut out snowflakes for the last time in the company of his classmates can create such a winter decor.
Paper snowflake templates:


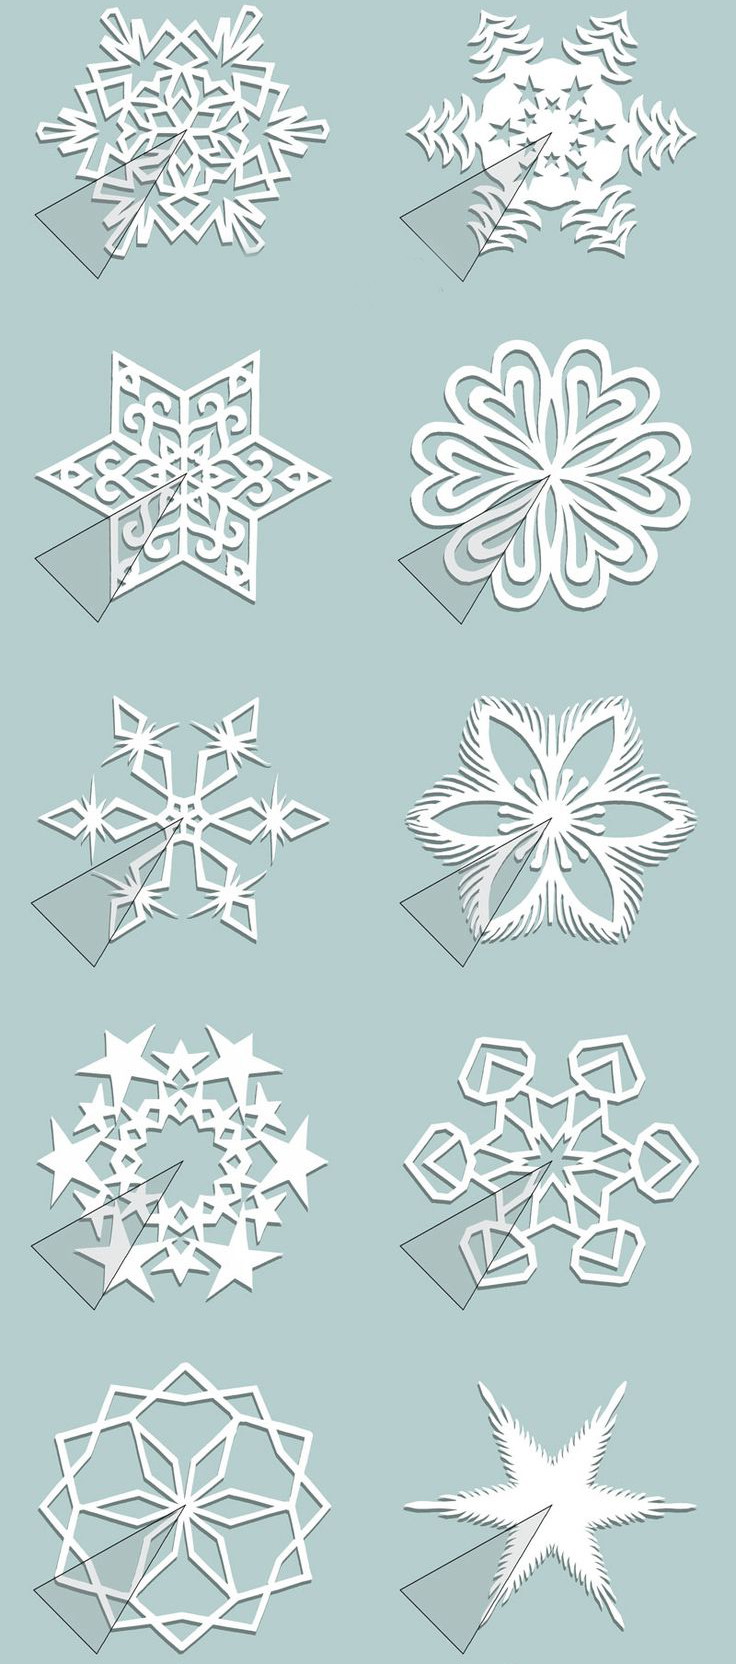
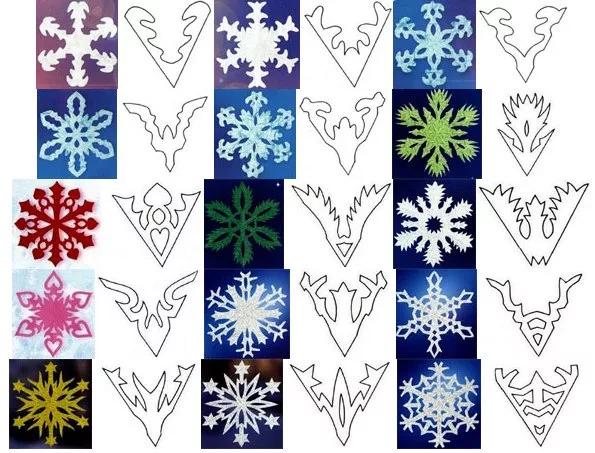
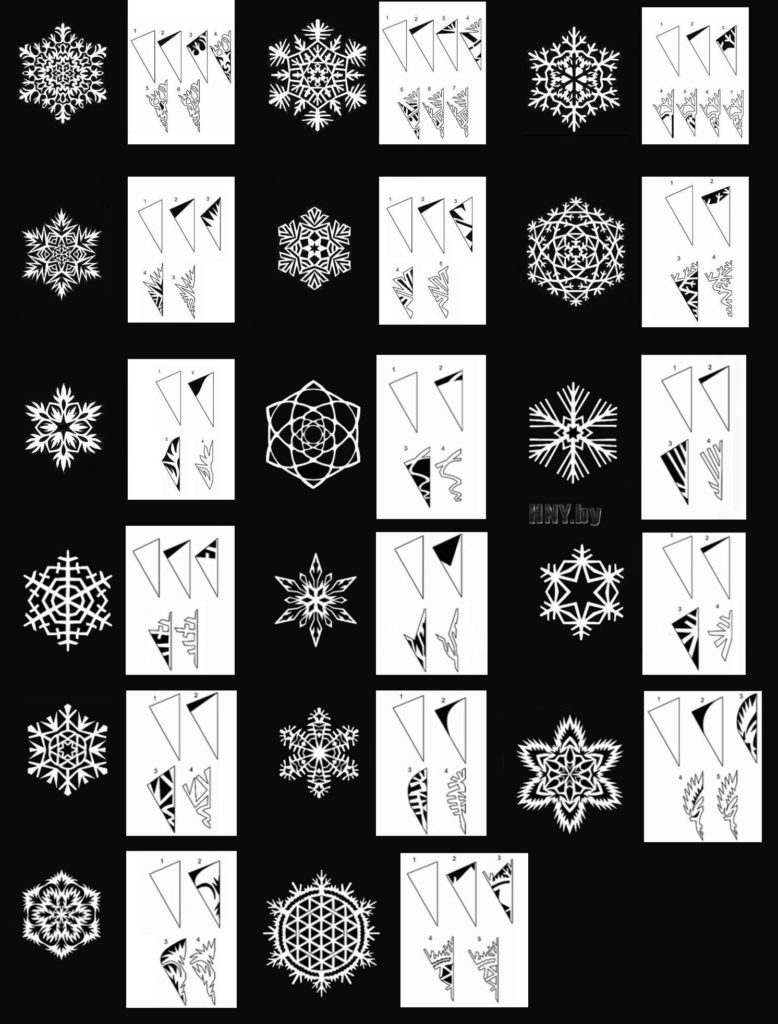
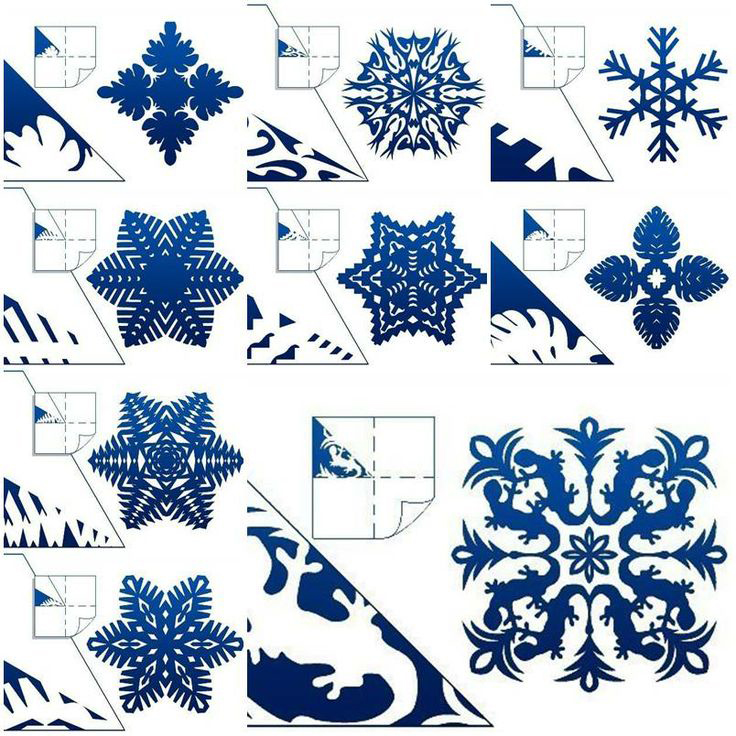
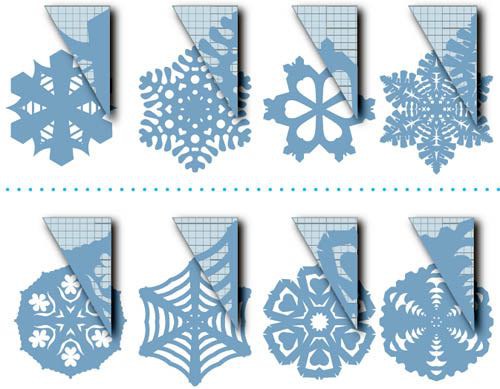
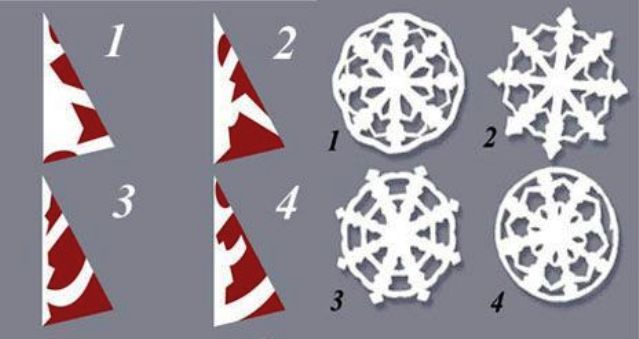
A selection of schemes for cutting openwork snowflakes from paper:
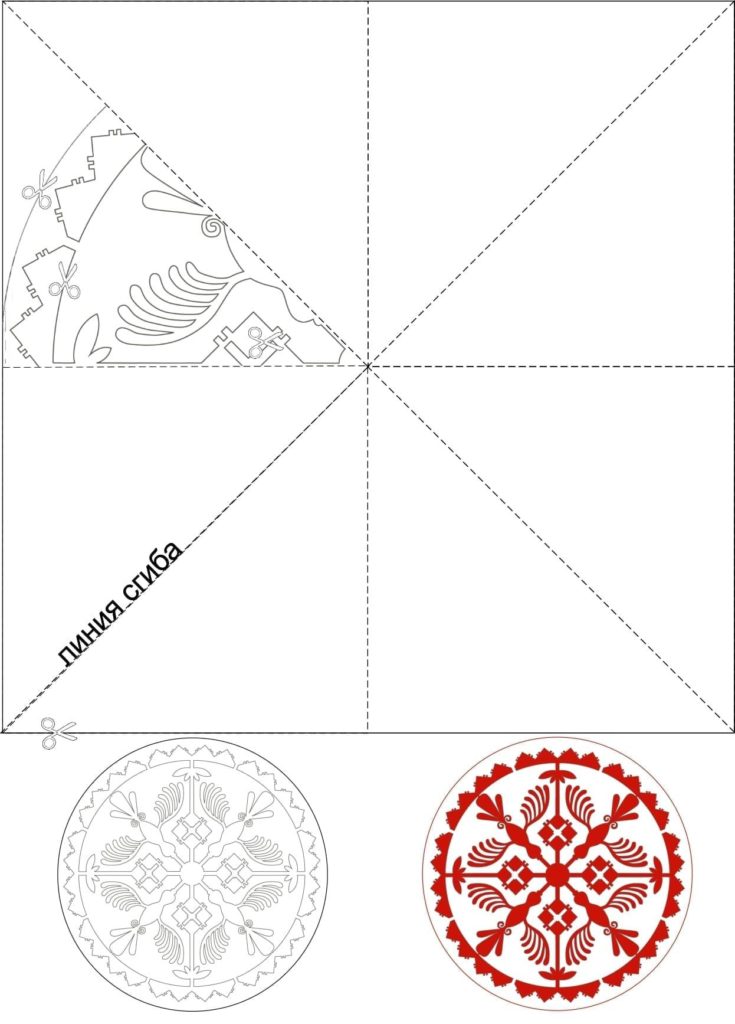
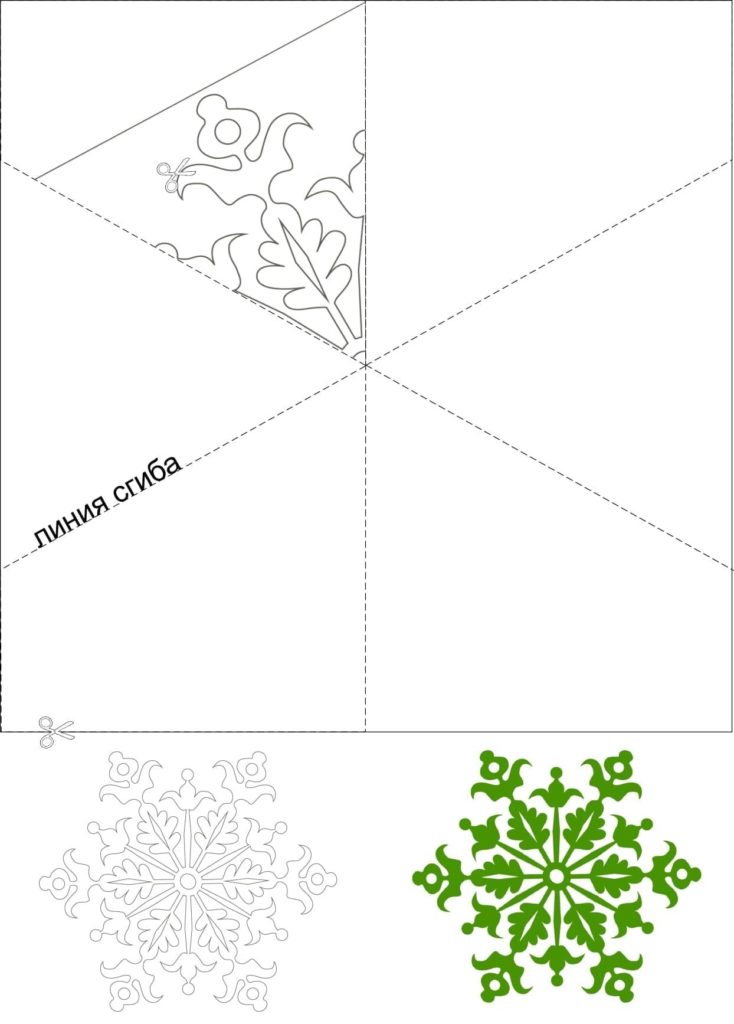
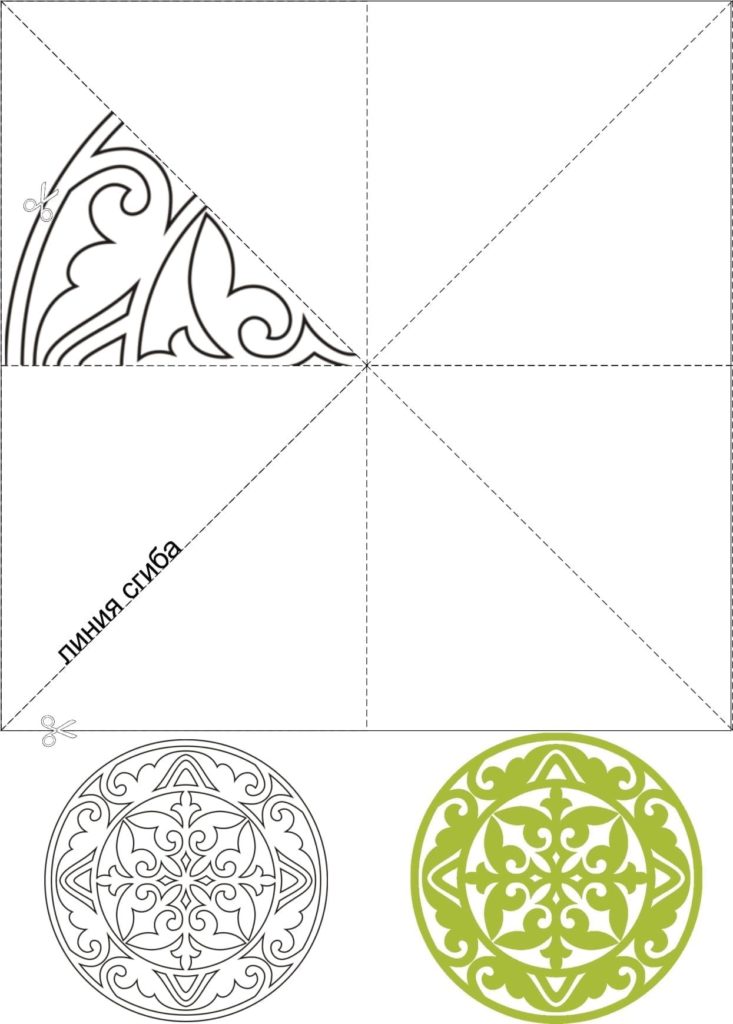
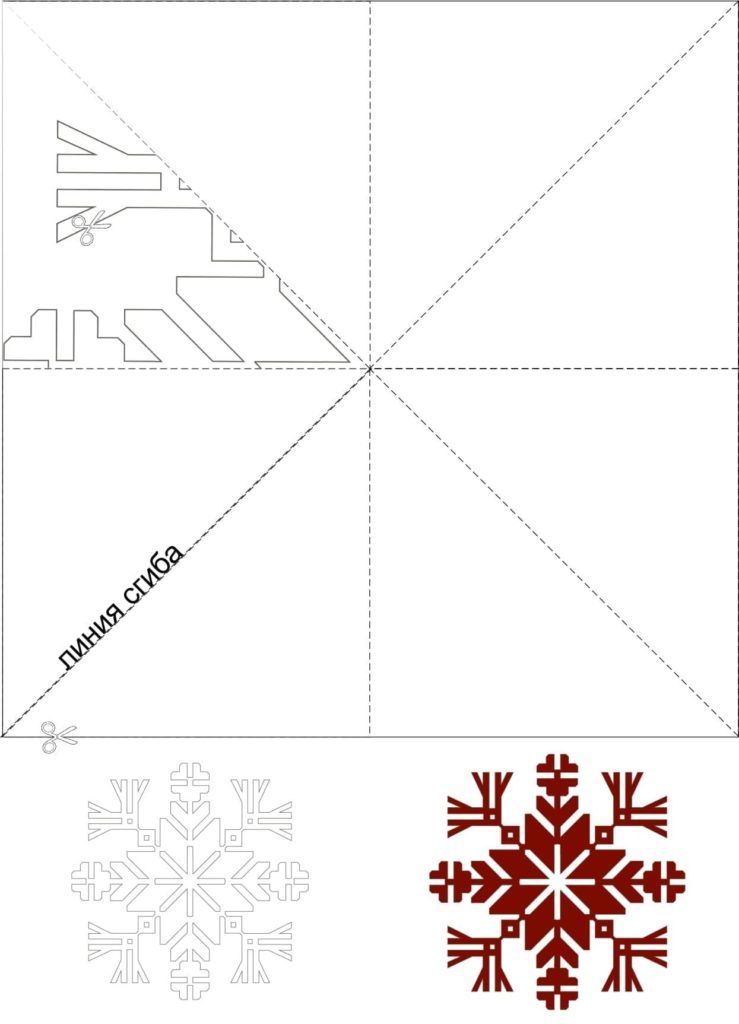
Snowflake cuttings:
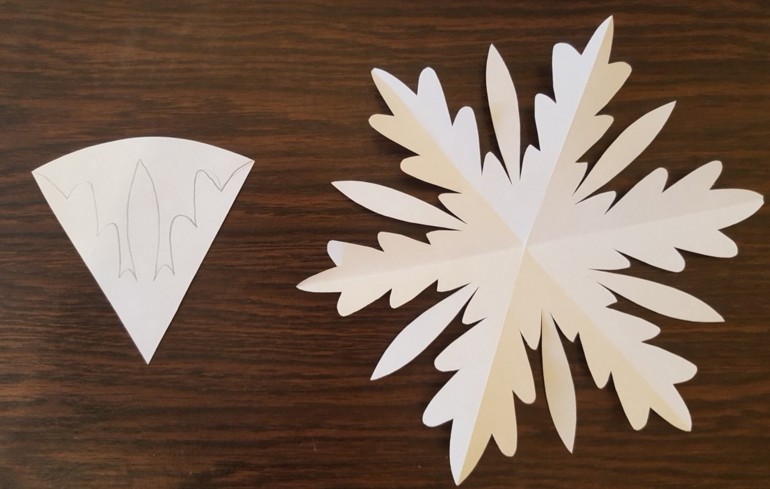
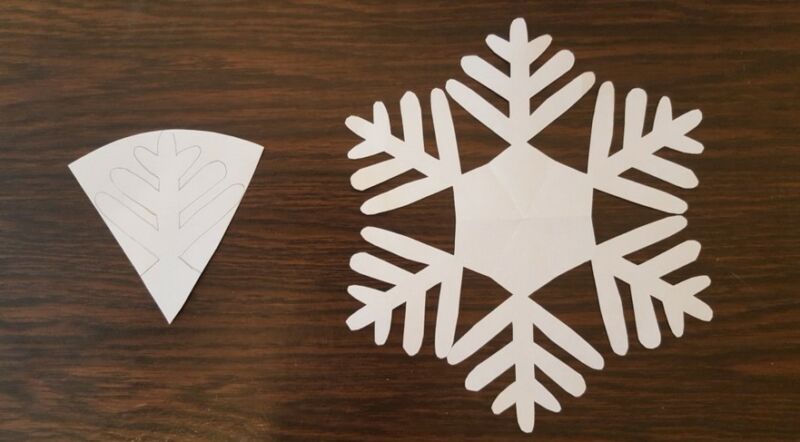
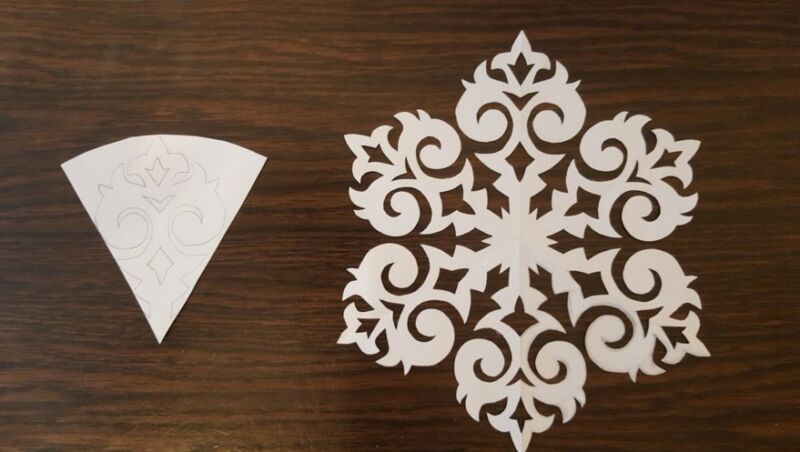
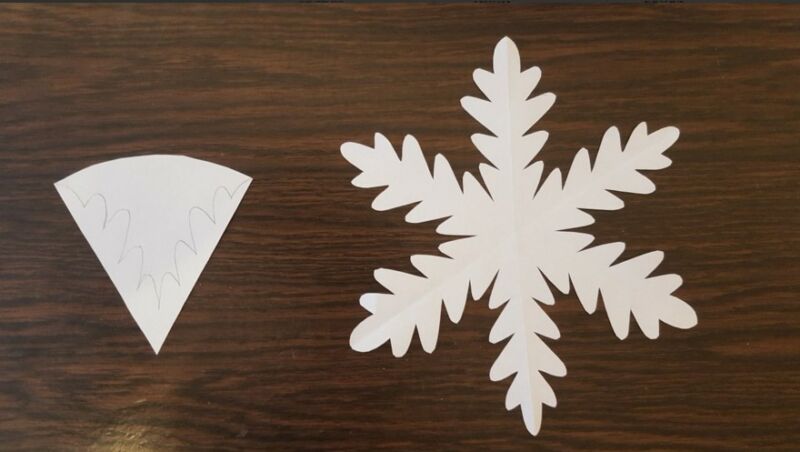
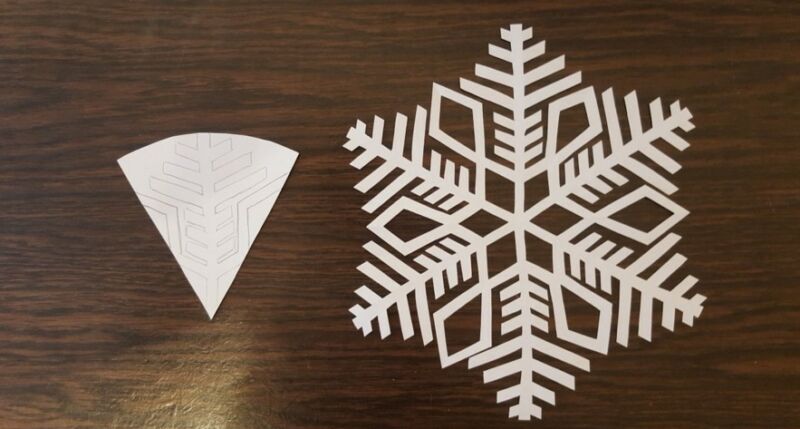
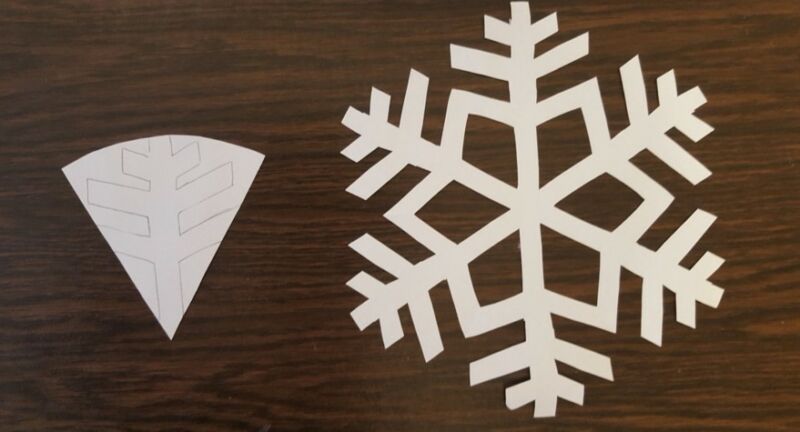
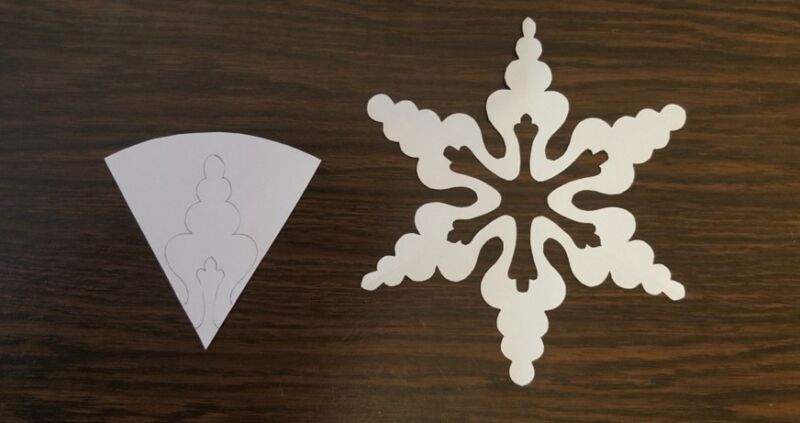
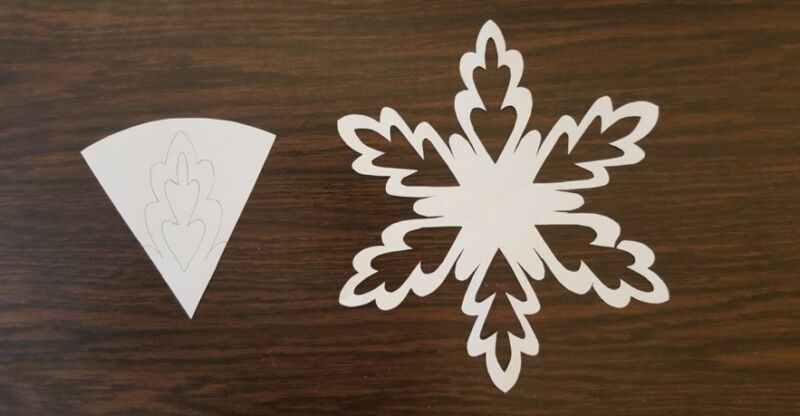
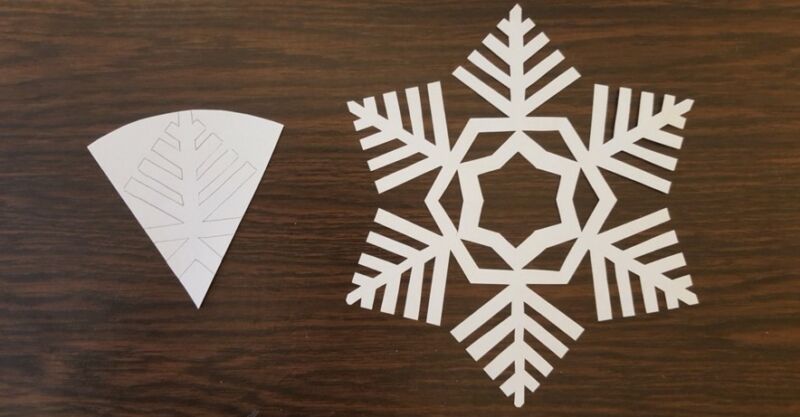
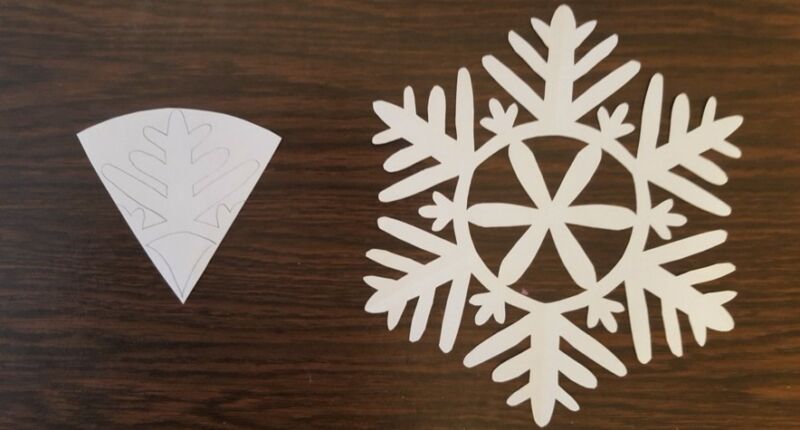
Video: openwork snowflakes
Snowflake from paper tapes
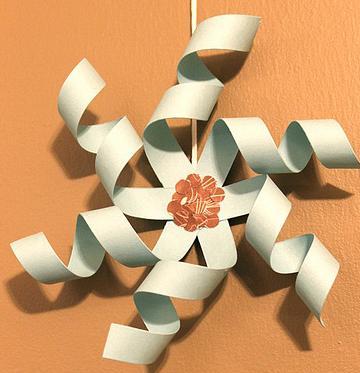
- You can spend an evening with children interesting and benefit, creating a New Year's decor - snowflakes from paper tapes. With the help of a felt -tip pen, fountain pen or simple pencil, paper tapes easily turn into beautiful curls.
- For one snowflake you need to prepare 3 curls. They are fixed at the central point with glue, and on top for beauty you can fix rhinestones or cover with glue and sprinkled with glitter. On the wrong side of the craft, you can fix the thread or stick.
Snowflakes from napkins and paper: how to do it?
To make you manage to cut an elegant snowflake from a napkin, it is not necessary to sign up for a road to convert paper sheets into incredible masterpieces, worthy of taking honorary places at creative events or simply become a New Year's decoration of the room. We offer you one of the most budgetary and popular ways to create beauty for the New Year. You will need only glue, napkins, scissors, a little cardboard and a simple pencil.
Important: Instead of ordinary napkins, you can use decoupage, or any thin paper - corrugated, colored or office.
Repeat all the stages and you will succeed.
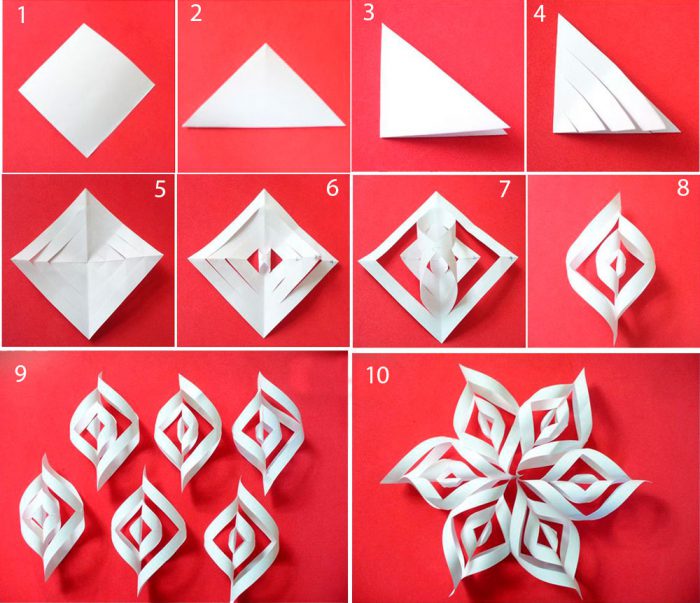
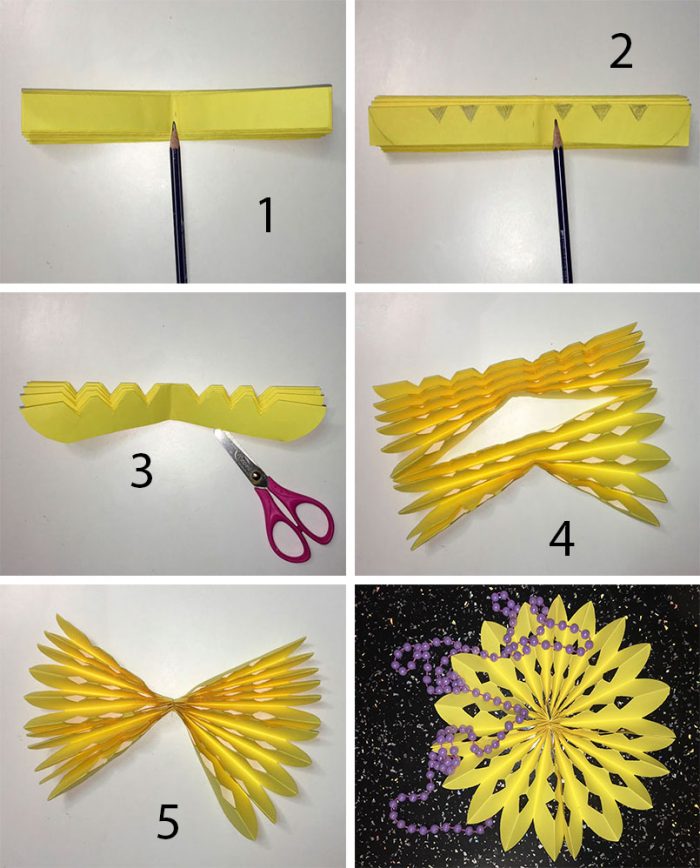
Volumetric snowflakes of paper: how to do it?
You can fill the house with a fabulous atmosphere by applying attributes traditional for the winter holiday as a decor: Christmas toys, tinsel, paper lanterns and paper snowflakes. The latter will look more impressive if they make them voluminous.

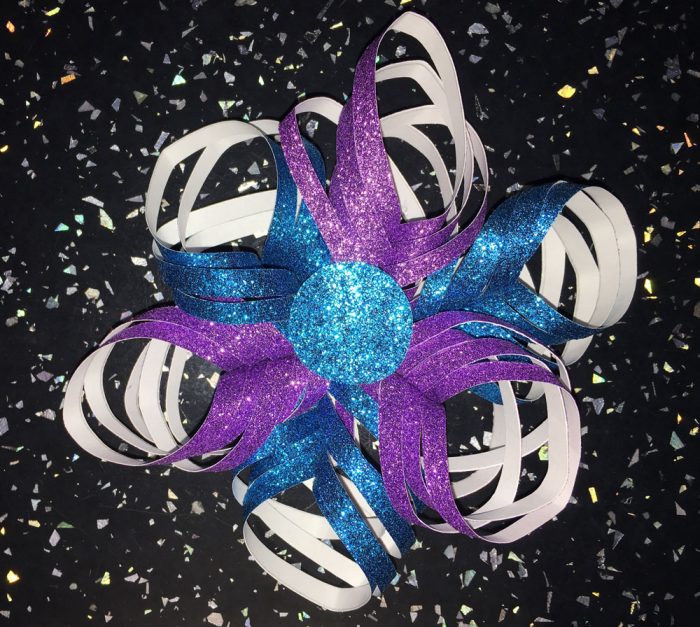
3D snowflake from brilliant foamiran
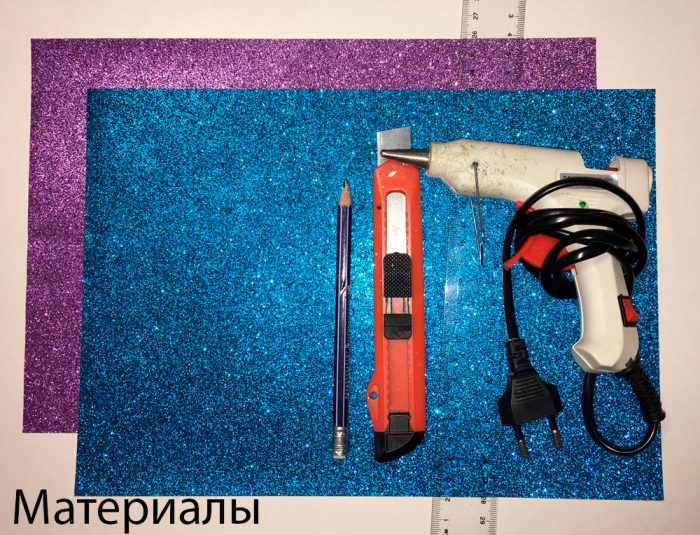
- For work, we will need a brilliant foamiran two colors: blue and purple. In the absence of foamiran, you can use brilliant cardboard, or scrapbooking paper. If you wish, you can make copyright sheets of paper. It is necessary to paint the sheet with acrylic paint, cover the surface with PVA glue - draw patterns with glue with a stencil and sprinkle with glitter, spraying for manicure, crushed into fine dust with glass Christmas toys.
- It is also necessary to prepare a stationery knife, a thermal pistol, a ruler, a barn pencil, a toothpick.
How to make a brilliant snowflake:
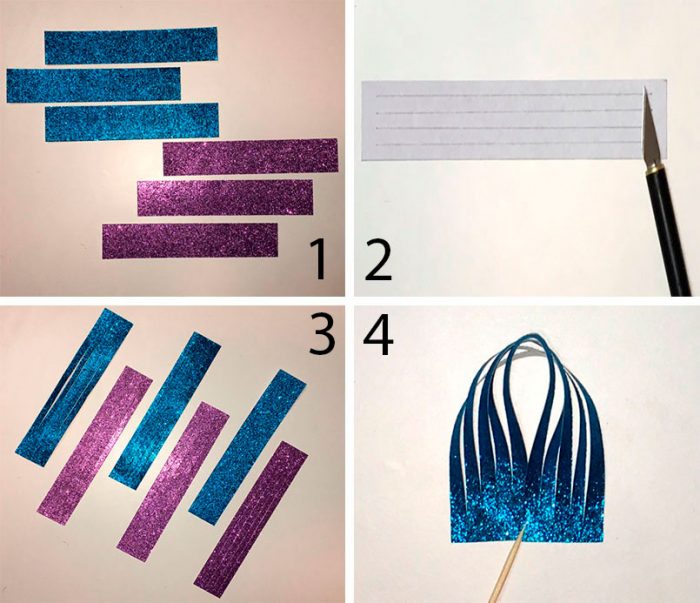
- Step 1: Cut the tape from Foamiran or thick paper. The size of the strips is 14x2.5 cm. We prepare 3 ribbons of each color 3 pieces. For one snowflake you need 6 tapes. We draw 4 lines from the inside of each strip, retreating from the edge of 3-4 cm. We cut through the line or layout of the line.
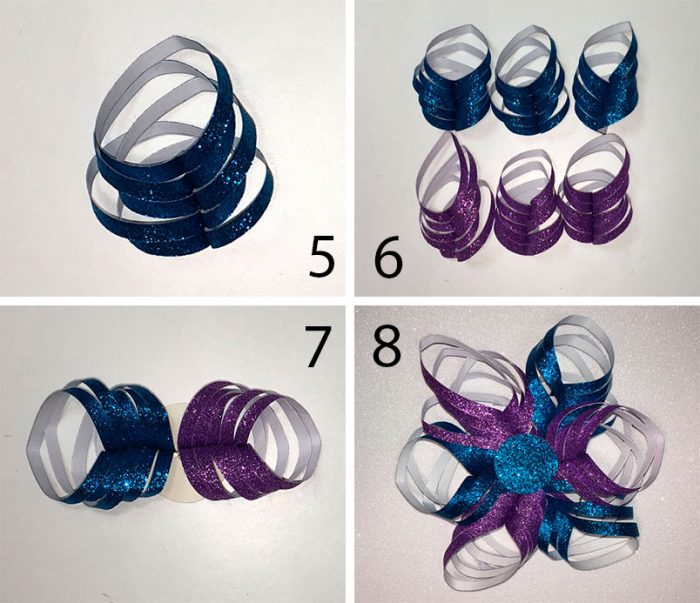
- Step 2: We form the details of the future snowflake using a thermal pistol. We will also need a toothpick. Look at the photo how to use a toothpick for this. You can use another thin object for neat gluing two halves of the tape. As a result, we get round parts cut into tapes in the center.
- Step 3: Now go to the assembly. We cook the same color from paper or foamiran. We turn the curled ribbons into the circle and, gluing the edges, fix them, not forgetting to alternate the blue and purple curls. We made a brilliant snowflake and we can begin to make the next frosty beauty.
Video: We make shiny snowflakes
Video: Snowflakes Origami
How to make a snowflake of paper is easy for children: simple snowflakes from paper
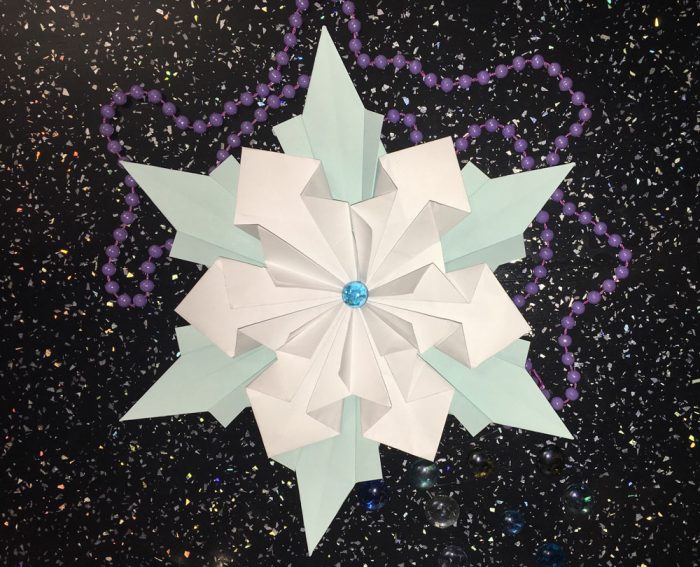
Exquisite snowflake from paper - how to do it? We bring to your attention a step -by -step lesson in making an exquisite snowflake. Square sheets will be needed: 6 squares of white and 6 squares of blue or blue. We will also prepare a circle of blue paper in advance. We will fix the details of the snowflakes with PVA glue. We will glue rhinestones or other shiny jewelry to the surface of snowflakes.
Snowflake manufacturing process:
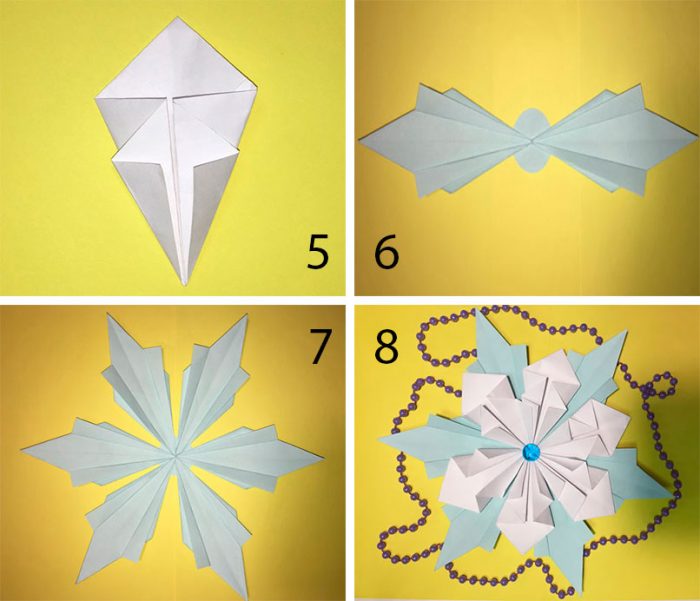
- We start working with blue paper. Fold the square in the central diagonal.
We unfold and bend all four edges to the central fold. - We turn the workpiece with the other side to ourselves and bend the sidewall to the central point so that the rhombus is obtained. We turn the workpiece again. Now we need to bend the upper layers.

- According to the above scheme, we add another 5 blue parts of the snowflake.
- We proceed to the manufacture of white parts. Fold the squares along the middle diagonal line on both sides. After that, unfold the part and bend the edges of the square sheet to the central point.
- We turn over and bend the sidewalls to the center again. The sides of the part on the reverse side is turned out and bend to the center. We add 5 more such modules from white squares.
- We glue the blue modules onto the circle, placing them diagonally in pairs. After that, we have white modules on top of the blue in a checkerboard pattern. We glue a large decoration or rhinestones into the central point.
Other options for manufacturing volumetric snowflakes are presented in video videos.
Video: Fluffy Paper Snowflake
Video: Simple Paper Snowflake
Video: Light and beautiful paper snowflakes
Beautiful paper snowflakes easy -10 schemes
- Snow and a beautifully decorated house is exactly what we imagine when we begin to prepare for the New Year holidays.
- Do -it -yourself snowflakes from paper will be an excellent winter decor and help solve the problem with decorating your home.
- We invite you to cut off the lace snowflakes. It is always nice to create something very light, elegant. Especially if such a craft will be used for its intended purpose - fill the festive magical atmosphere of an elegant house!
