Make a Christmas tree with your own hands and decorate the interior. In this article you will find several step -by -step instructions that will help build the original composition of the “forest beauty”.
Contents
- How to make a Christmas tree with your own hands from Mishura: Master class
- Do-it-yourself Christmas tree: step-by-step master class, video
- Video: Christmas tree from sisaler balls. Master Class
- Children's Christmas tree in the garden with your own hands: step -by -step instructions with photos, video
- Video: New Year's tree from Mishura with your own hands in 5 minutes
- DIY Hands with hands from cardboard: step -by -step instructions, video
- Video: New Year's tree from cardboard. Crafts for the New Year
- Do -it -yourself Christmas tree: Instructions, photos, videos
- Video: Christmas tree for the New Year with your own hands from paper. Simple and easy!
- Christmas tree with your own hands to school from improvised materials: step -by -step instructions with photos, video
- Video: How to make a Christmas tree from pasta for the New Year with your own hands?
- Do -it -yourself Christmas tree from cotton pads: step -by -step instructions with photos
- Video: 10 New Year Christmas trees from different materials. New Year's crafts
The Christmas tree is the main attribute of one of the most beloved holidays of adults and children - the New Year. But there is not always the opportunity and desire to buy “live” spruce. It will be much easier and more humane to make such a festive symbol on its own. This is available to everyone, since the Christmas tree can be built from tinsel, colored paper, beads and other materials that are often already in the house, and they do not need to be specially bought. Below you will find ideas and master classes that will help make a Christmas tree with your own hands-simply and quickly. Read further.
How to make a Christmas tree with your own hands from Mishura: Master class
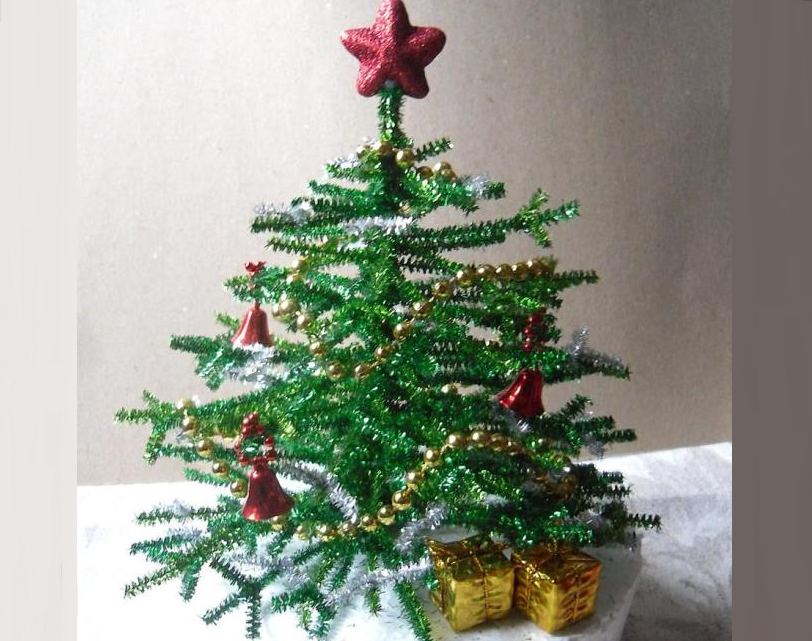
Such a Christmas tree can be made of tinsel on the wire. It is sold in all stores where there are New Year's attributes in the assortment, as well as in network stores of Fix Price. There you can also purchase other tools and details for decorating a green beauty. You can choose any color, according to your idea, imagination or interior, which such a Christmas tree will decorate. So, we start-a master class on creating a Christmas tree with your own hands from Mishura.

Necessary devices and elements:
- Tinsel on the wire (one and several shades according to the idea)
- Christmas decorations - miniature (star, toys, beads, "gifts")
- Foam for building the base
- Wooden stick, flat branch or skewer
- Scissors
- Glue
- Chancellery knife
Work on creating a Christmas tree consists of such stages:
- From a piece of polystyrene, cut the base of the required size and shape. Do not make it too small, it should be stable so that the finished product does not fall from the slightest draft.
- Stuck a wooden stick or skewer into this foam base.
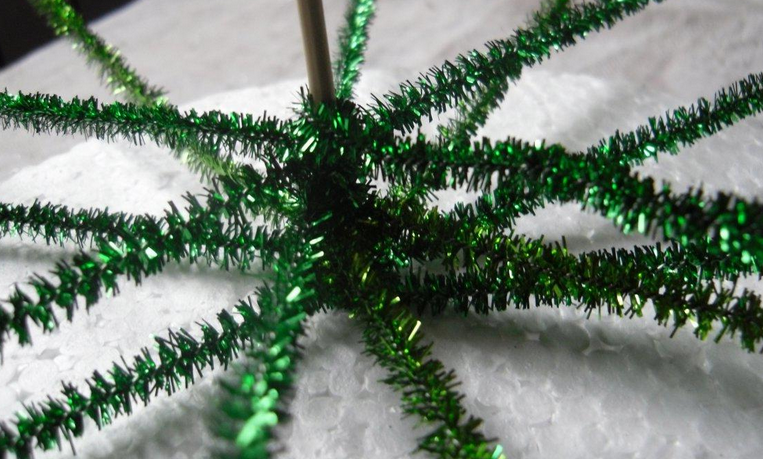
- Now take the tinsel or wind one end to the rod. If the tinsel is too long, then cut into several parts or simply cut off the excess.
- The wire, which is inside the tinsel, will well attach the “branch” to the rod. But if there is a desire, then you can fix each tier with glue.
- Place the ends of the tinsel so that the Krona turns out to be evenly beautiful and fluffy. You can reduce the length of future "branches" to the top so that the Christmas tree is similar to the real one. If you bought a tinsel of different shades, then do not forget to alternate so that the Christmas tree seem more natural.
- At the very top, just wrap a piece of the rod with tinsel to make the top of the Christmas tree.

- Naturally, at the stage of attaching tinsel to the rod, it is impossible to perfectly make the crown beautiful, with a habitually conical shape. Therefore, when all the twigs are attached, cut them with scissors. To do it is simple: just shorten each tier, minimizing at the very top.
If you like minimalism, then you can leave the Christmas tree in the form as it turned out. If you want the New Year's “beauty” to be more fluffy, then continue:
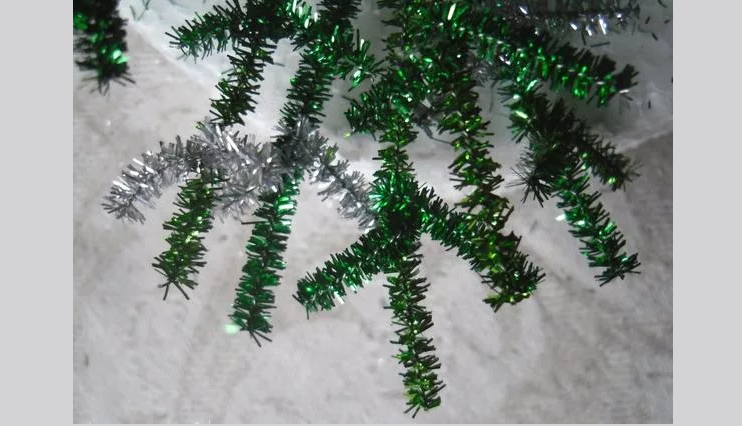
- After cutting the crown, you still have scraps of tinsel. Fasten them on large branches from below. It will be "spruce paws."
- You can use silver tinsel, branches from which will turn out similar to the snow covered with snow.
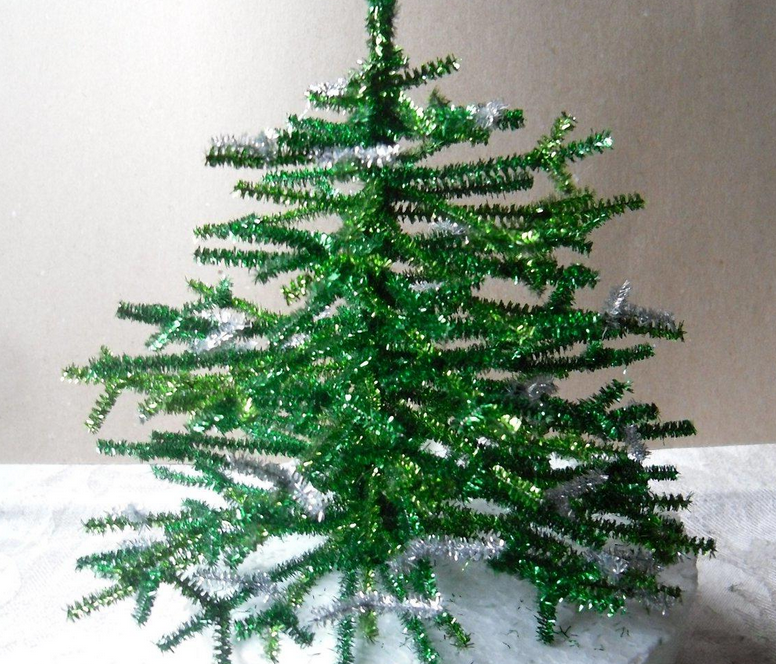
At this stage you can stop, because the Christmas tree turned out to be fluffy and beautiful. It will become an interesting decor for a house or apartment. But, if there is a desire, then you can go even further, and decorate with toys, beads and other decorative elements.
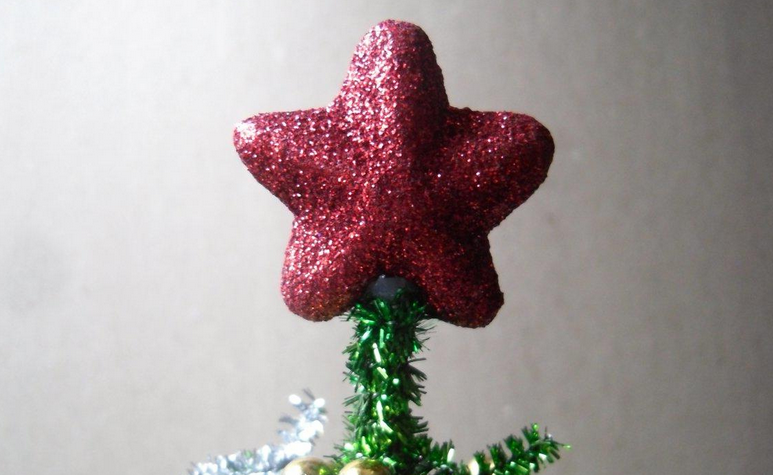
- Attach the star to the crown.
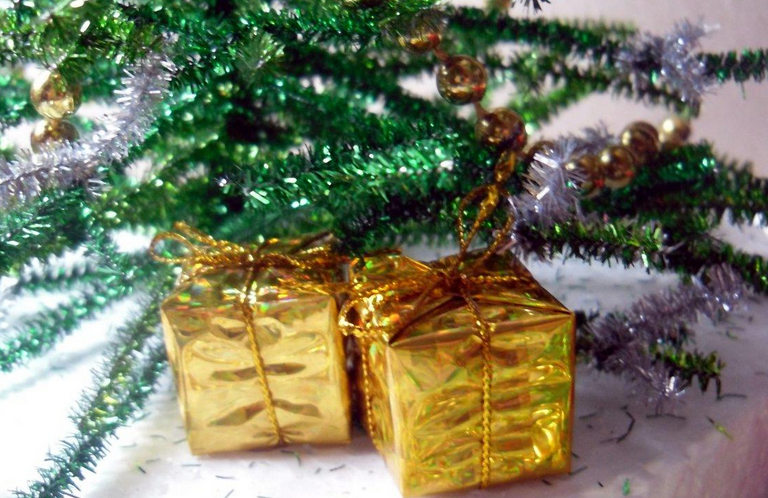
- Spread beads and Christmas toys.
- You can add brilliant tinsel and "rain" of contrasting colors. Put the boxes with gifts under the Christmas tree.
If you build such a spruce with the kids, then you can do it yourself and decor. To do this, cut out of col. Cardboard of different sizes of circles and tie the thread. Glue the sparkles to such blanks - you get real balls. And beads can be created by yourself if there are beads in the house. Do not be afraid, fantasize, come up with something original. This is interesting, easy and it will certainly turn out very stylish.
Do-it-yourself Christmas tree: step-by-step master class, video
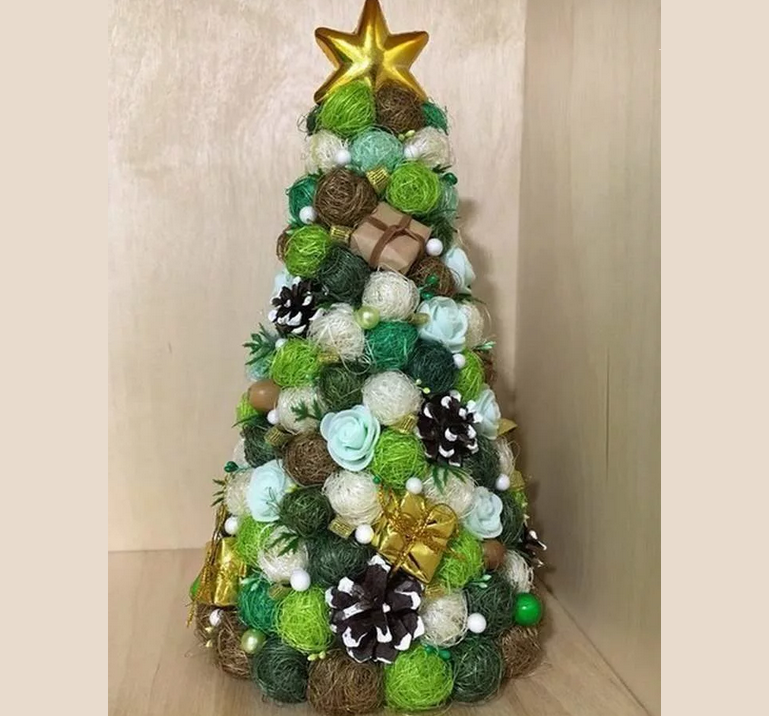
To make such a spruce from Sizal is easy and fast, but it looks very impressive. At any competition, she will definitely take first place. In addition, if this “forest beauty” is needed for the competition for the child to school, then he can do almost everything on his own, and you will only help him. So, we are starting.
You will need such elements and devices:

Here is a step-by-step master class on creating a Christmas tree with your own hands:
- First, make a rocker ball from Sizal. From a piece of material, roll the ball in your hand, like from plasticine.
- Now pour gypsum (slightly more than half of this container from paper from paper of the desired size). Add water and leave - let the mixture dry out.
- Make a cone from cardboard.
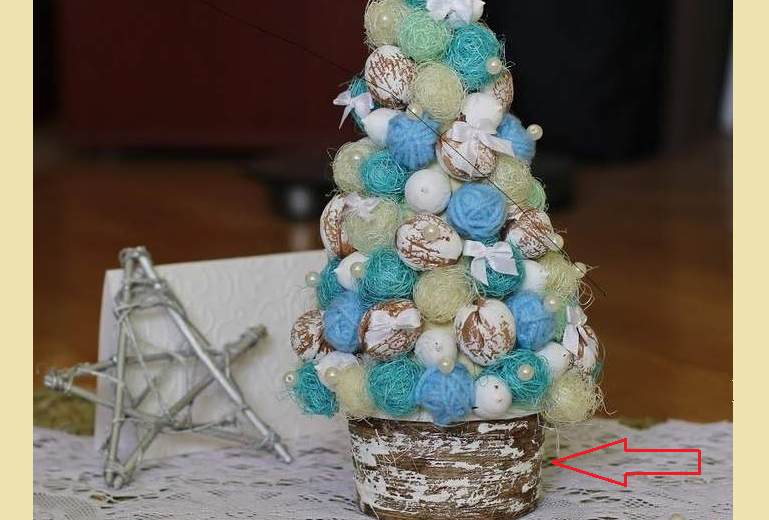
- Turn the glass with gypsum and glue the cone to it. If it turns out that part of the glass is visible, then glue it with brown paper - it will be a barrel. If it turns out to make a cone of such a size that the glass-offering was inside it, then the Christmas tree will “stand” on the surface without a barrel.
- Then begin to glue the sisal balls to the cone. You can alternate them with toys similar in size or cones.
- Start glorifying from below and evenly distribute all the details, reaching the very top.
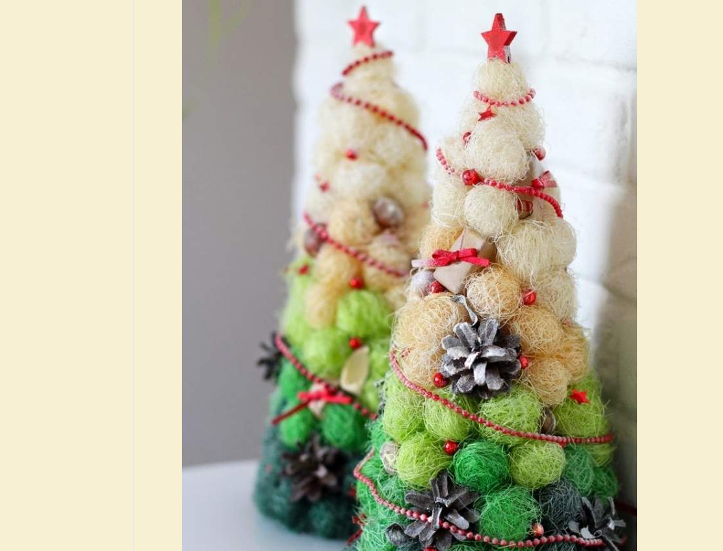
When the entire structure is glued, you can add decor: beads, strips of tinsel or other jewelry.
Video: Christmas tree from sisaler balls. Master Class
Children's Christmas tree in the garden with your own hands: step -by -step instructions with photos, video
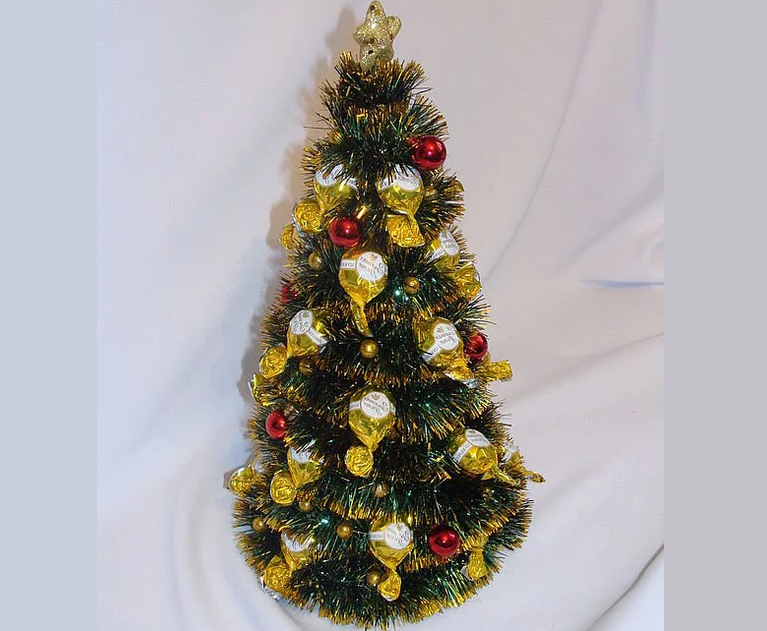
Such a Christmas tree can be built in 5 min. A child can even help you, since the process of creating a “forest beauty” is very simple. You can decorate the Christmas tree with different sweets, and at the end of the holiday, the children will enjoy them with pleasure. Minimum materials, but there will be a lot of joy and pleasure. Therefore, we proceed - step -by -step instructions with a photo to create a children's Christmas tree in the garden with your own hands:
Materials:
- Paper
- Double sided tape
- Scissors
- Tinsel
- Candies
- Different decor
Do the work like this:
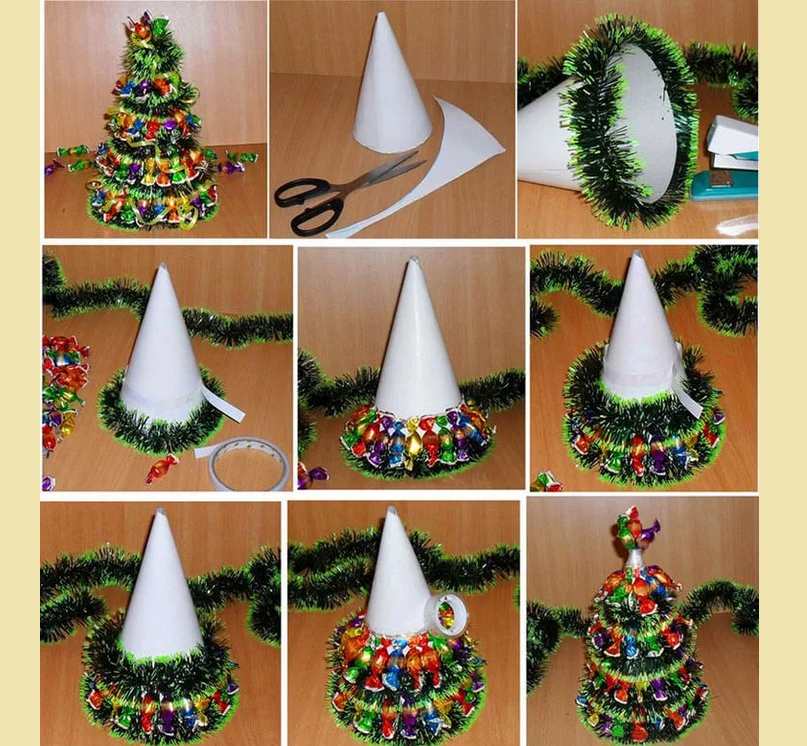
- You can glue sweets alternating with tinsel, or you can make a product only from tinsel, and then hung sweets, like brilliant toys.
- From a paper sheet, make a cone of the desired size.
- Below, at the base of the cone, glue the strip of bilateral tape. Attach the tinsel to it.
- Then, if you decide to glue sweets, there is a strip of them. Glue them by the “tail” of the candy wrapper to the tape, and then stick to the cone.
- Continue to alternate to the very top.
- At the top, insert 3 sweets into the hole of the cone and fix it with tape. The Christmas tree is ready.
If you make a “forest beauty” only from Mishura, then after gluing it, attach sweets and decor with the same tape. At the top you can decorate with a star or other decor.
Video: New Year's tree from Mishura with your own hands in 5 minutes
DIY Hands with hands from cardboard: step -by -step instructions, video
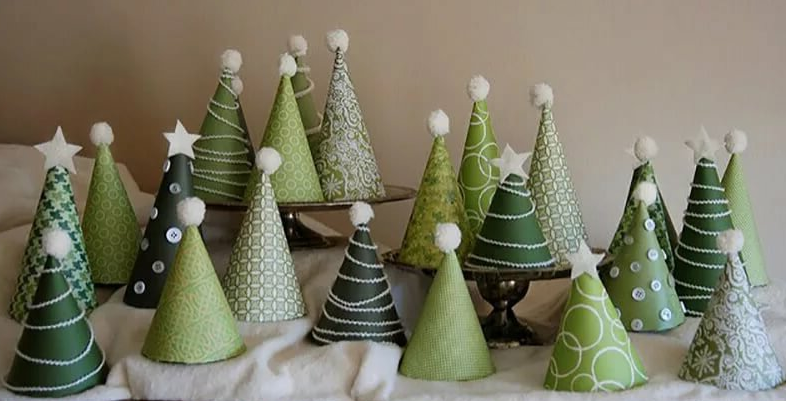
With great interest, children like to make such Christmas trees from colored cardboard. If you do not have a suitable color or decor, then you can glue the paper for packing gifts on a regular cardboard sheet. You will make such a “beauty” in 15 minutes - we proceed:
Devices and elements:
- Tsv. cardboard - 1 sheet
- Glue or 2-table. scotch
- Decoration for decoration: pompom, paper stars, bright buttons, etc.
- Scissors
Step -by -step instructions for creating volumetric spruce with their own hands from cardboard:
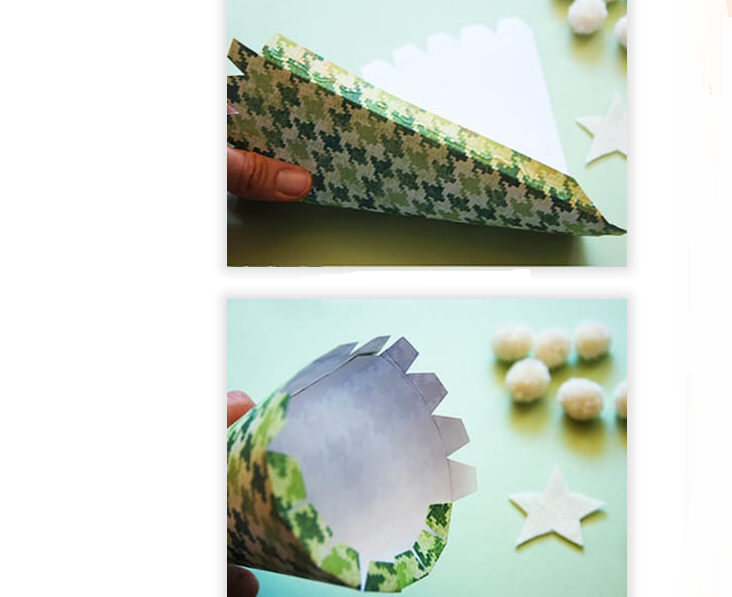
- Cut the cone from the paper sheet, glue it.
- At the bottom of the cone, cut, as shown in the photo above.
- Bend these chopped strips.
- Until the bottom of the bottom to the cone, you can put a surprise or gift inside the Christmas tree.
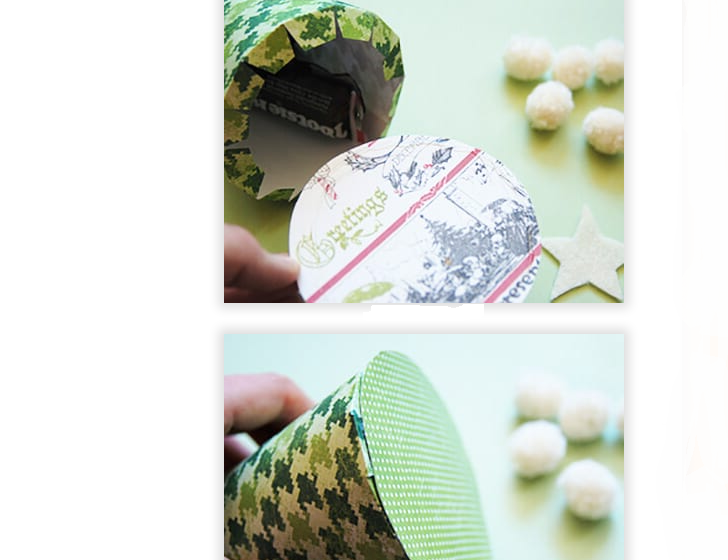
- Glue the bottom.
- Now cut the star and glue it into the crown. You can replace it with a pompom or other decor.
If desired, you can add other beautiful and shiny elements that will decorate your craft.
Video: New Year's tree from cardboard. Crafts for the New Year
Do -it -yourself Christmas tree: Instructions, photos, videos
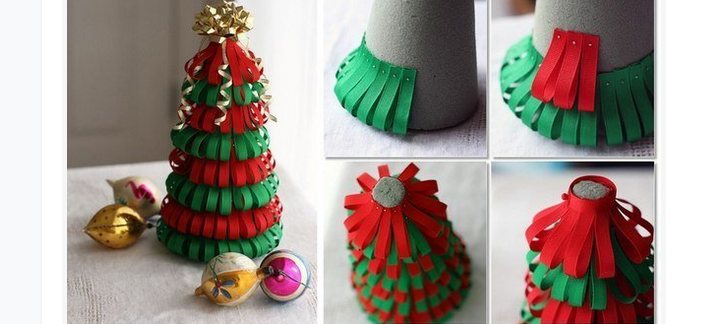
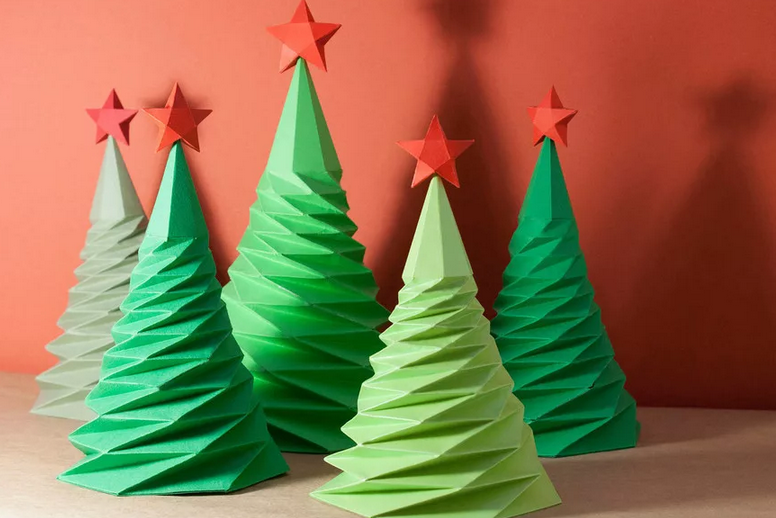
To make such a “forest beauty”, you will need only a b. The paper of two shades (contrasting), glue and scissors. First cut the strips with the width 1 or 2 centimeters and length up to 10 cm. Then make a conical shape for the base and begin to glue the strips alternately to it, as in the picture above. After that, glue the decor - a spruce from the color. DIY papers are ready. The instructions are simple, so even a child can do this craft. See what other "trees" can be built from paper sheets:
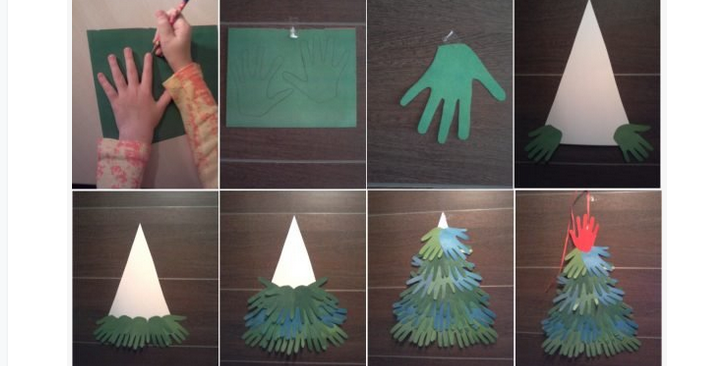
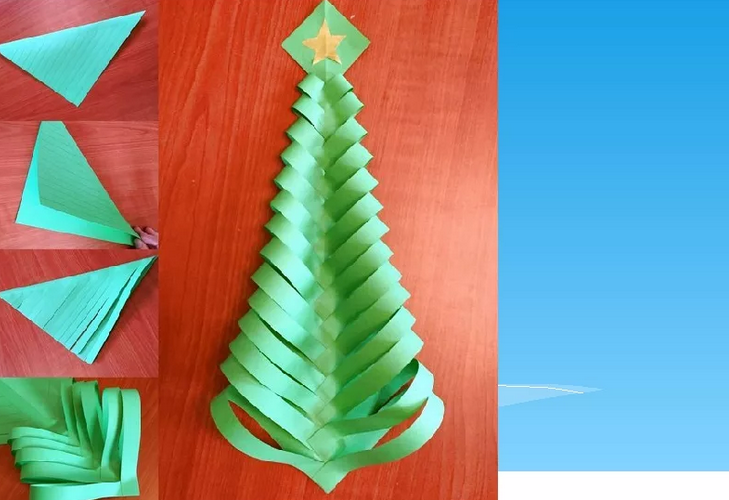
Here is such a stylish and beautiful wood-tree can be created from green tablespoons.
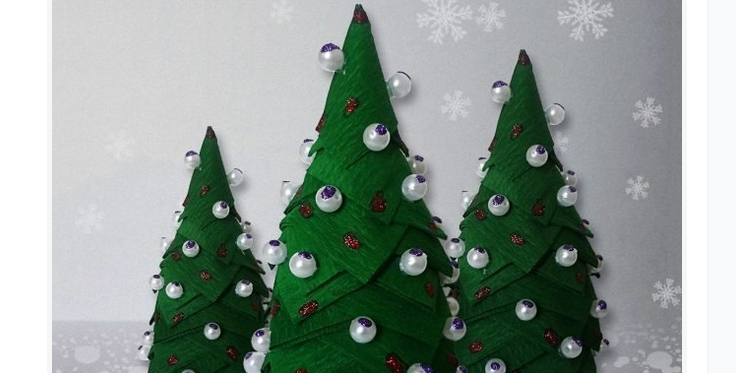
Video: Christmas tree for the New Year with your own hands from paper. Simple and easy!
Christmas tree with your own hands to school from improvised materials: step -by -step instructions with photos, video
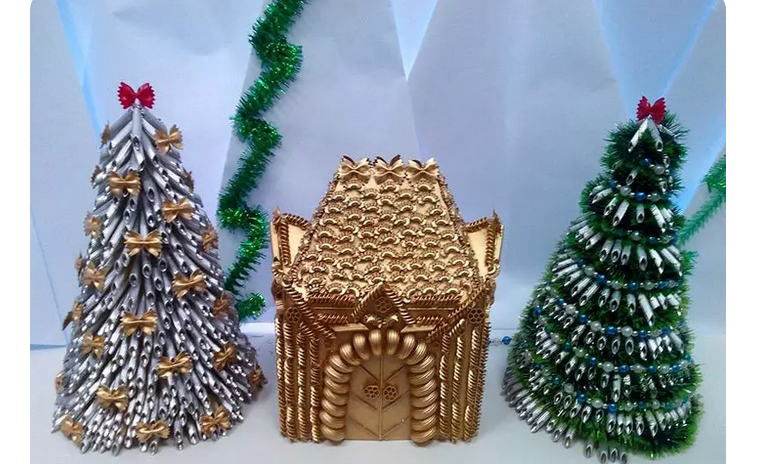
Schoolchildren always want to surprise each other with unusual crafts. If the teacher gave the task to make a spruce from improvised materials, then do it from pasta. With the help of such a craft, you can really really surprise.
Necessary materials:
- To create a foundation cone-thick paper, a large coil from threads, a plastic glass or a glass.
- Pasta — 1 pack And a little for decor (other shape).
- Adhesive device in the form of a pistol - PVA will not work. You can also use plasticine and glue all the details to it.
- Balloon With silver or gold, or other suitable color substance.
- Decor elements - According to your preferences.
Step -by -step instructions with a photo to create a New Year tree with your own hands to a school from pasta:
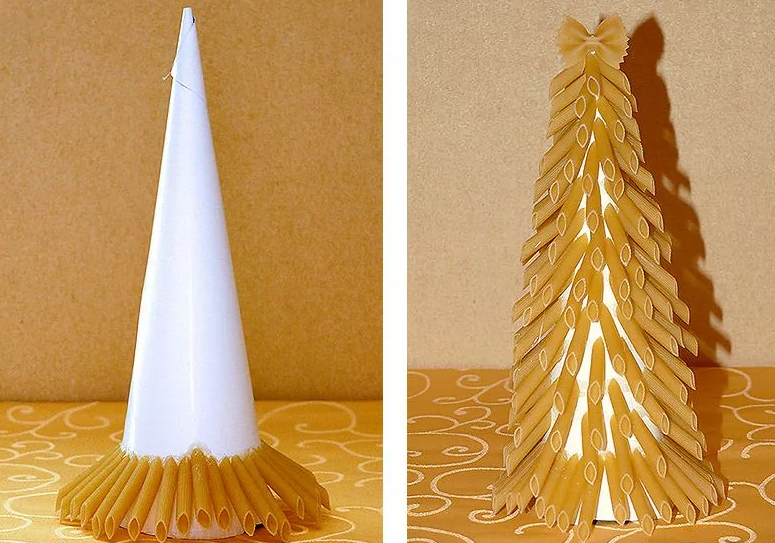
- First make a cone shape.
- If she is already ready, or you decided to use a plastic glass in place, then begin to glue pasta from below to it. You can do this with a dense layer and then the Christmas tree will be “fluffy” or not too if the products are freely glued.
- When you reach the “crown”, you can begin to decorate the spruce.
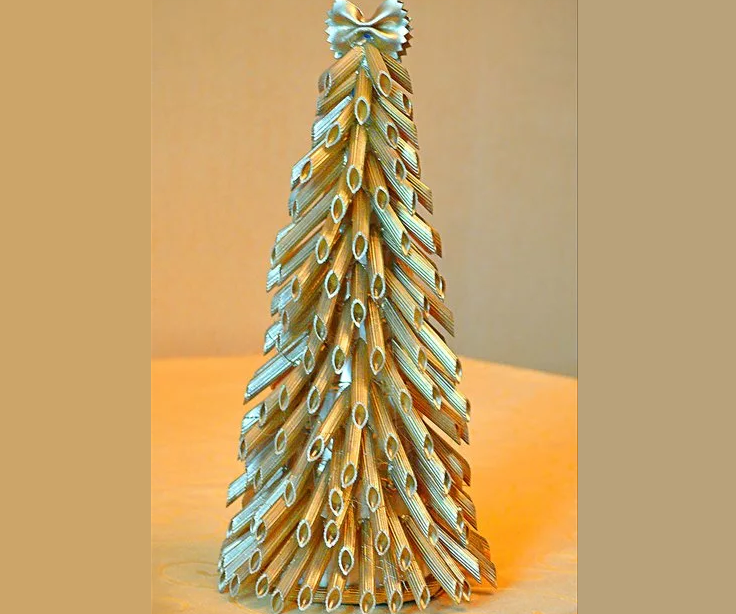
- Paint the product, evenly spraying the substance from the spray can.
- Glue the decor of pasta of a different size and shape. You can make a beautiful design of tinsel or brilliant rain.
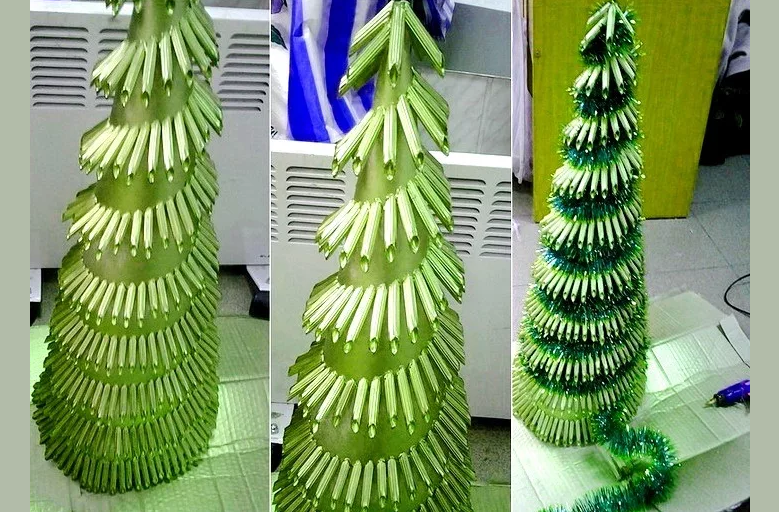
Now you can show imagination and continue to decorate the Christmas tree as you like. Here are a few ideas of creating and decorating such a Christmas tree:
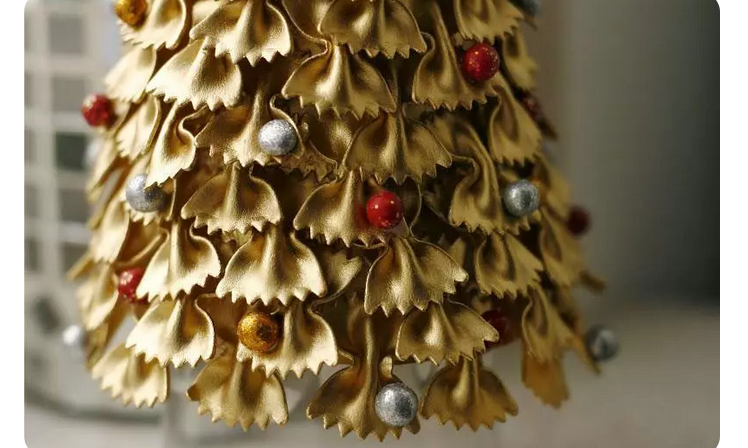
Green "Beauty" with multi-colored bows-macarons.
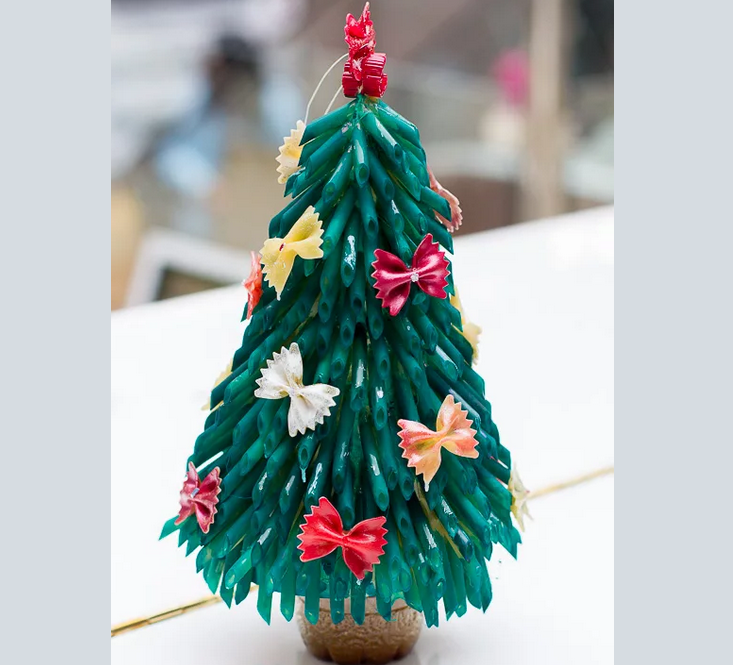
One Christmas tree is first painted from a spray can with green paint, and then with artificial snow. The second is made of pasta-racches, and decorated with beads.
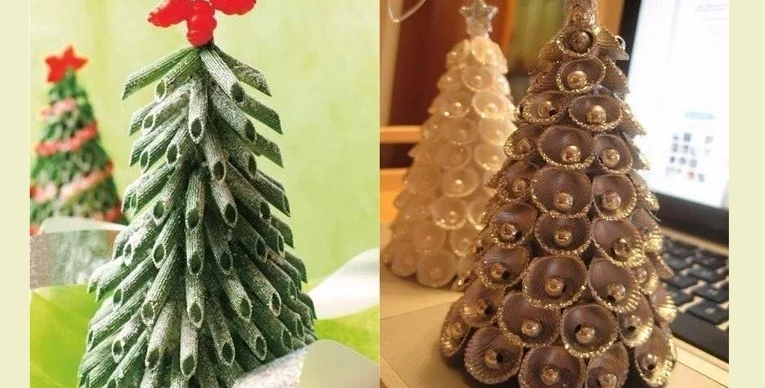
You can stick, for example, such bows are not across, but along. Add bright decor, and you will get such a stylish Christmas tree.
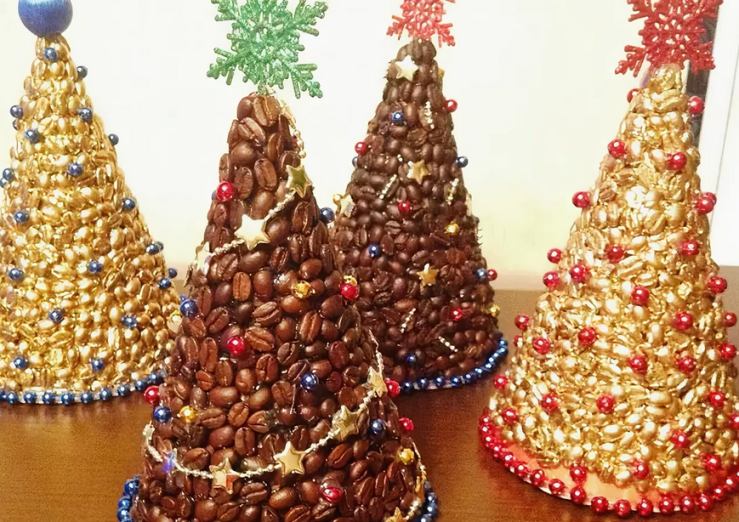
Here is the option of a Christmas tree made on the same principle as from pasta, only with the use of coffee beans.
Video: How to make a Christmas tree from pasta for the New Year with your own hands?
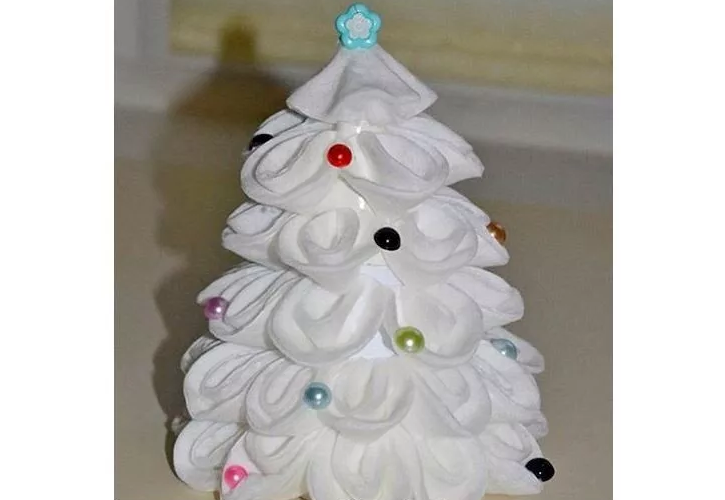
Do -it -yourself Christmas tree from cotton pads: step -by -step instructions with photos
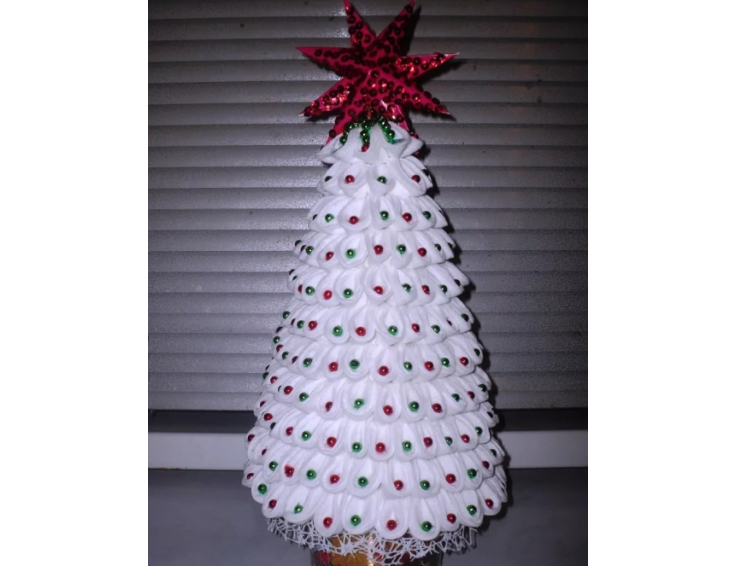
Making a Christmas tree from cotton pads is so simple that this can be done without even reading the description. The materials are cheap, spend no more time 15 minutes. As a result, get a beautiful “snow -covered” beauty that will perfectly complement the interior of your home for the New Year. This is what you need to do the work:
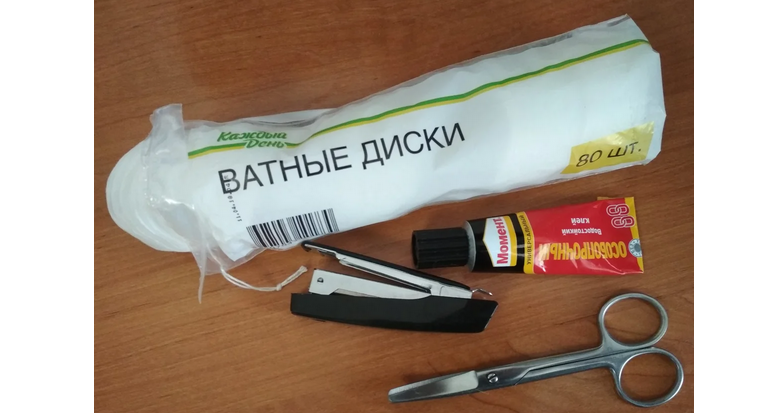
- Cotton wheels - one packaging
- Paper
- Stapler
- Scissors
- Glue
Step -by -step instructions with a photo for performing a Christmas tree with your own hands from cotton pads:
- First prepare the discs yourself: roll everyone 4 times And fix the stapler, as shown in the photo below.
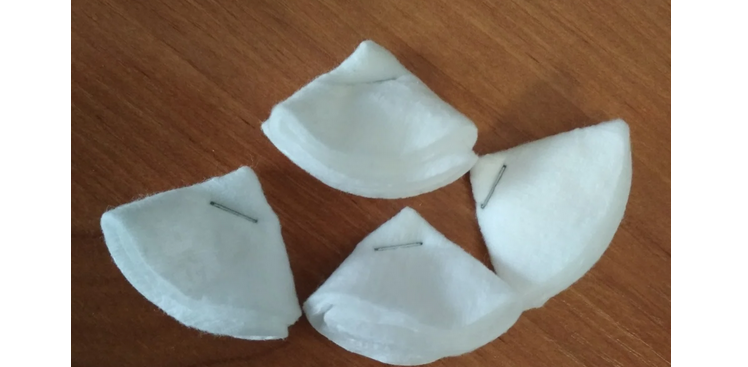
- From the paper sheet, make the conical shape-blue and glue the edges so that it does not break up.
- Now start to glue cotton circles to the cone from the bottom.
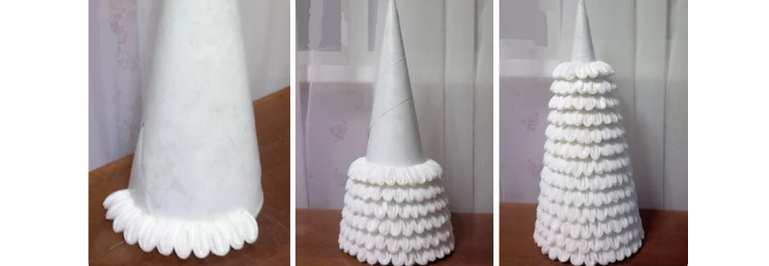
- When glue the entire cone, attach the star and other decor. Ready.
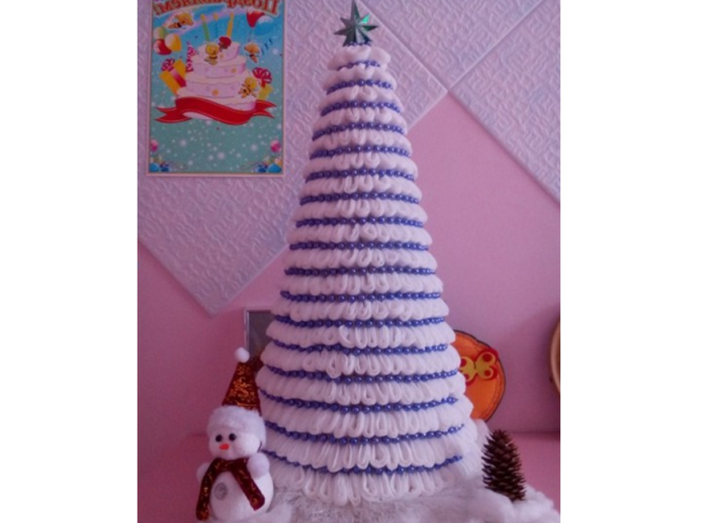
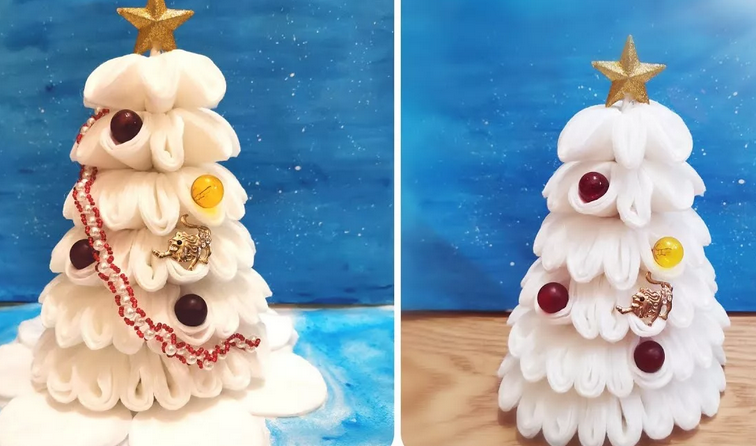
- You can make such a Christmas tree in different options:
