Learn to create beautiful things from trash. This will help patchwork for beginners.
Contents
- Types of patchwork
- Patchwork ornaments
- Patchwork sewing - patchwork for beginners: what kind of technology, templates, video
- Video: patchwork without troubles
- Pizza technique in a patchwork sewing for beginners: what is it, templates, video
- Video: zero waste. Pizza technique is a master class for beginners
- Crazy's technique in patchwork sewing for beginners: description, video
- Video: Crazie-Kvivt for beginners
- Barjello technique in patchwork sewing from strips of fabric in stages for beginners: description, video
- Video: Master class "Sewing a pillow using Barjello technique"
- Boil technique in patchwork sewing for beginners: description, video
- Patchwork sewing from jeans: beautiful and easy
- Patchwork sewing from knitwear: Description
- Patchwork sewing from the material with a pattern "Asterisk": Description, video
- Patchwork sewing from old clothes, socks: beautiful, video
- Video: Patchwork Lyapochikha - Lesson 1
- Video: Patchwork Lyapochikha - Lesson 2
- Video: Patchwork Lyapochikha - Lesson 3
- Patchwork sewing from triangles: Description
- Patchwork sewing - Rombs: Description
- Patchwork sewing: block combining
- Kayma in patchwork sewing: what happens and how to do?
- Patchwork sewing - tacks, napkins and other small crafts: schemes, video
- Video: DIY patchings. Patchwork. Patchwork sewing
- Patchwork sewing - blanket, bedspread: schemes, video
- Video: Patchwork. We sew a summer blanket using high -speed assembly techniques. Master Class
- Patchwork sewing for children with your own hands: ideas, schemes
- Sewed bag of shreds: description of patchwork, video
- Video: Patchwork. Waste - in income! How to sew a bag from nothing? Patchwork ether
- Patchwork: apron
- Patchwork: pillowcases
- Cunning in patchwork sewing: High -speed technique
- The best products in patchwork technique: Ideas
- Video: Patchwork for beginners. 11 methods for sewing patchwork blocks from squares and strips
Now the technique of creating masterpieces from the remnants of fabric in the form of mosaics is gaining particular popularity. In a different patchwork. There are different techniques, ornaments. Each with their own implementation methodology. Nevertheless, this is precisely what gives a large assortment of handmade things, which not only can become necessary objects, but also aesthetically beautiful decorative crafts. Below are the basics of technology, tricks of craftswomen and numerous master classes on the manufacture of patchwork. Read further.
Types of patchwork
Before talking about varieties, it is worth mentioning the history of craft. Introductory sewing appeared at the same time when the fabric appeared. After all, the masters had to spend somewhere scraps and threads. The first ornament dates back 980 a year BC. Location - Ancient Egypt. And real masterpieces of art began to make the British in 16th century. And with the development of international economic relations, craft has become popular all over the world. In Russia, the story of sewing different products begins with 9th century. It was at that time that work began with materials. Since then, the modernization of the craft has continued.
There are such types of patchwork (using techniques):
- Traditional. This is the Anglo-American type. It is necessary to make a whole panel of shreds. Be sure to have geometric patterns. Often, many craftswomen for the strength of the base use a special gasket.
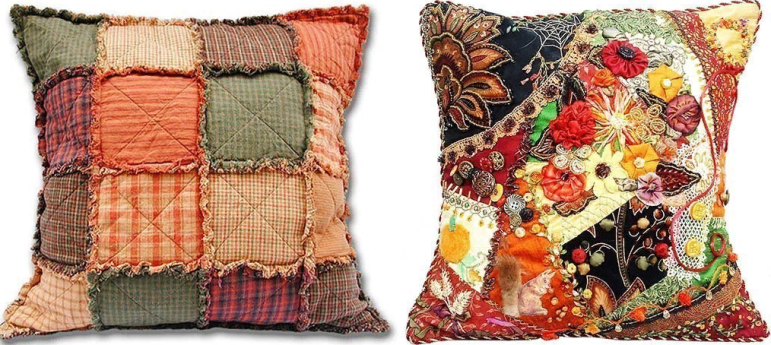
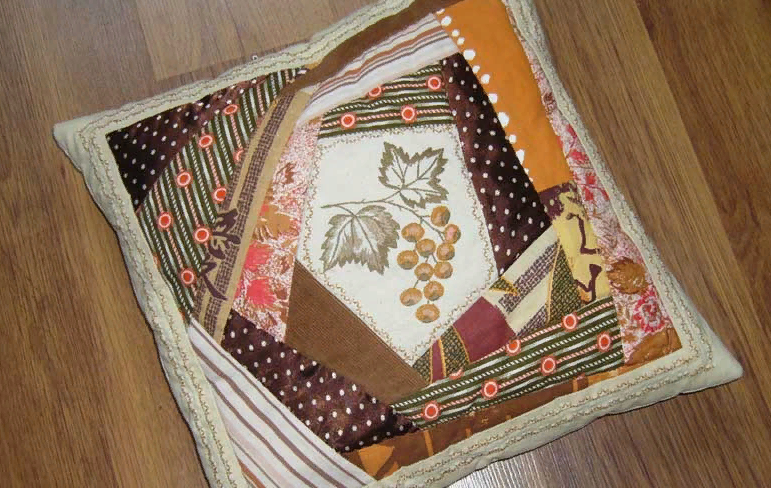
- Crazy shreds. A completely different fabric is used. The dimensions of the parts are also different. Basic: asymmetry, curved lines, applications and seams, decorated with ribbons and beads.
- Japanese. Fabric - silk, the main technique is a stitch. It is used not only to create clothes and bedding, but also for making a beautiful panel and decor of the room.
- Knitted. Here the parts need to be tied, and then glued to each other on a prepared basis. Characteristic for various kinds of bedspreads.
- Watercolor. The basis of blocks. Difficulty: selection of a color palette.
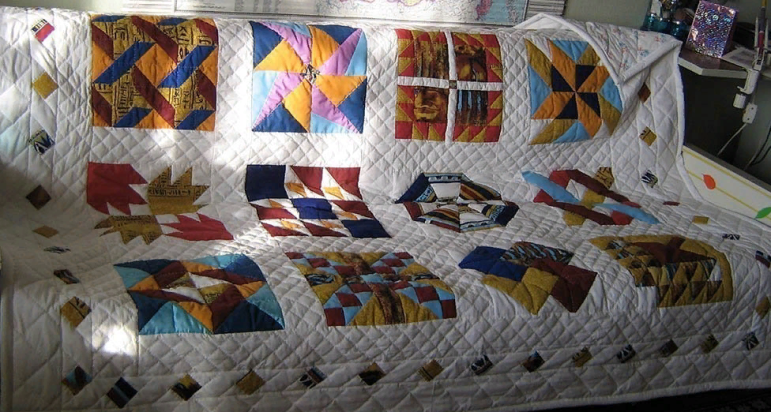
- Strips. The most popular type of patchwork. After all, completely different materials and techniques are used here.
- Logs. The image is formed from strips around the main square. Moreover, all ornaments fit in a spiral.

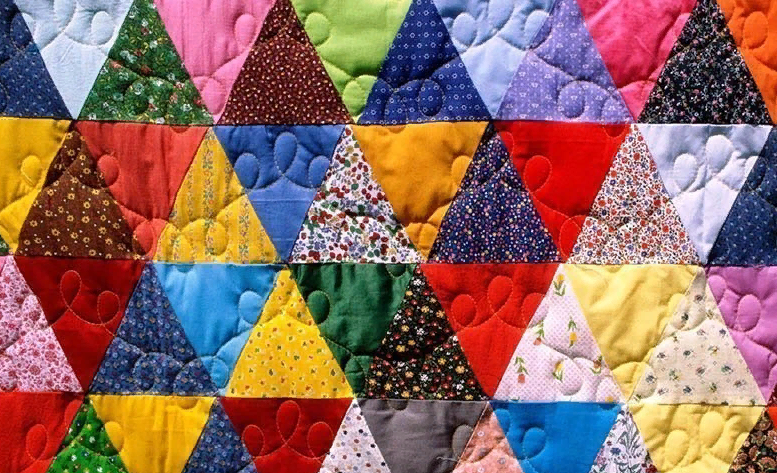
- Triangle. Another popular technique. Used for sewing pillows, bedspreads and blankets.
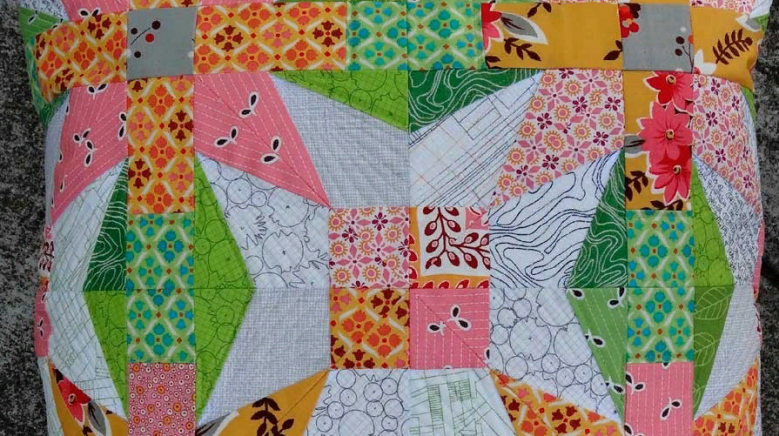
- Corners. They are compiled from pieces of material, and not using a scheme and templates. With the help of them, volumetric products are made.
- Chess. The main elements are squares and rhombuses. The location based on the name is clear.
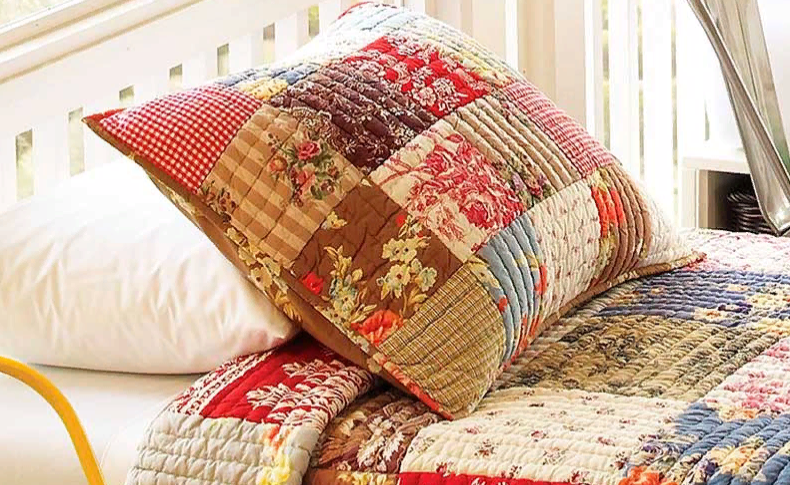
- Russian square. The central part consists of squares. But the rest is laid out by isosceles triangles.
- Sot. The basis is hexagonal polygons similar to honeycombs.
- Quivating. This is a kind of quilted canvas. Patterns are the seams driven out on a sewing machine.
The presented techniques enable needlewomen to show their imagination and ingenuity when creating clothes, decor elements and beautiful souvenirs.
Patchwork ornaments

In addition to the technique, there are different ornaments of patchwork. All of them are very beautiful, and if the needlewoman does everything right, during the creation of the product, then it will look stylish.
The most popular ornaments:
- Squares
- Sot
- Snake
- Corners
- Strips
- Crosses
- Zigzags
- Watercolor
- Waves
There are also other ornaments - combined from the above. It all depends on the needlewoman. More precisely from her inspiration, skills and fantasy. So how to sew in this technique?
Patchwork sewing - patchwork for beginners: what kind of technology, templates, video

Patchwork, patchwork is a very old technique. According to it, multi -colored shreds are sewn according to the type of mosaic. But in the end, a recognizable drawing of some object, interesting ornament or stylish pattern should form. It turns out a beautiful whole product with a specific image.
In addition to the material for the process, you will need:
- Threads
- Sharp tools
- Various decorative elements
- Plastic (to create templates)
- Chalk or soap
- Yarn (for knitted techniques)
- Sewing machine
- Hook or knitting needles
- Cardboard
- Special glue
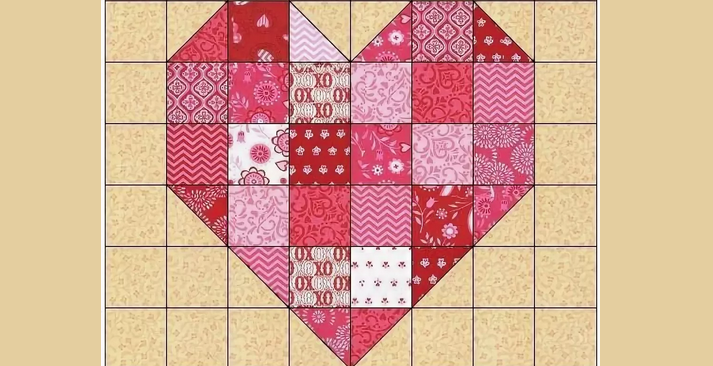
- To sew the product in such a technique, first think about the pattern.
- Then, from the available cuts of different material, cut the workpieces.
- Draw a sketch, and then select shreds.
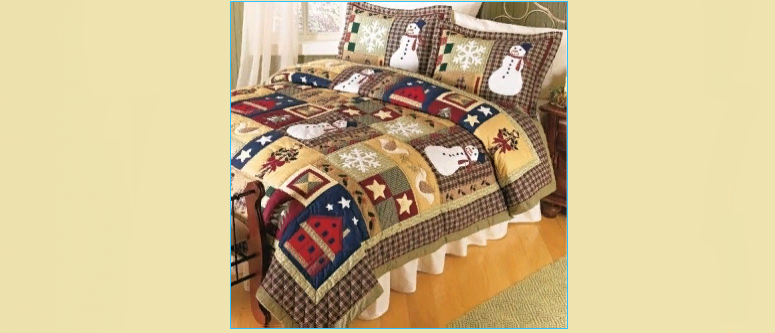
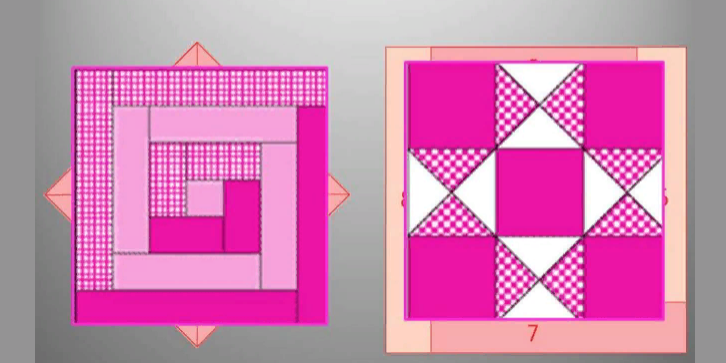
Make sketches according to pre -drawn schemes. Such templates are suitable:


Watch the video how the craftswoman cuts flaps and sews the product from them.
Video: patchwork without troubles
Pizza technique in a patchwork sewing for beginners: what is it, templates, video
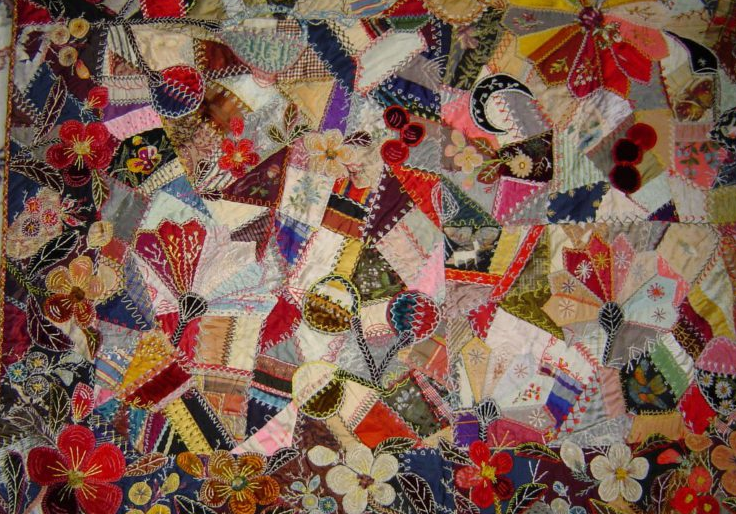
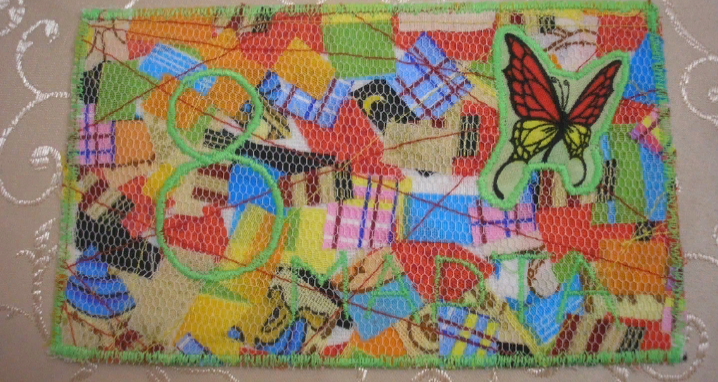
Pizza technique in a patchwork sewing allows you to remove the remains from sewing in a beautiful decor element. She got the name because of similarity with the name of the food.
The principle is simple:
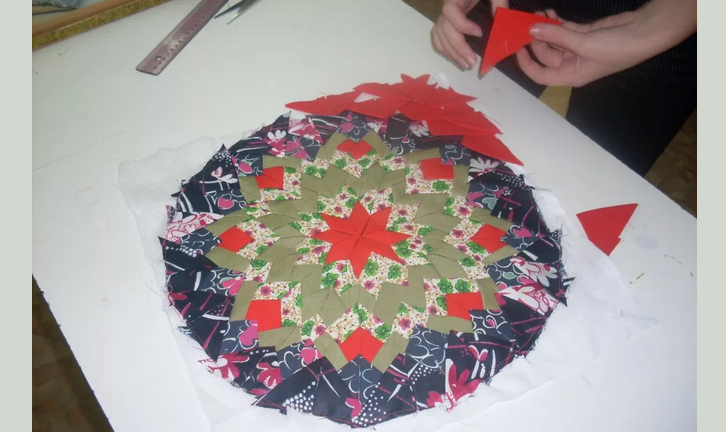
- Take the base and scatter colored shreds in a chaotic order. You can decompose them in the form of a specific drawing.
- The finished result must be well ironed.
- You can fix the layers with a tulle or a special net.
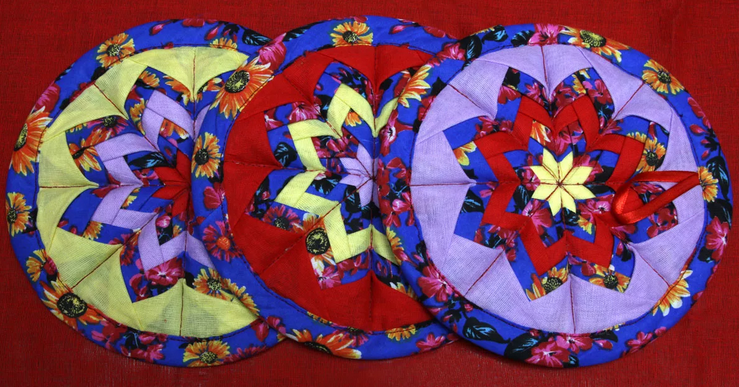
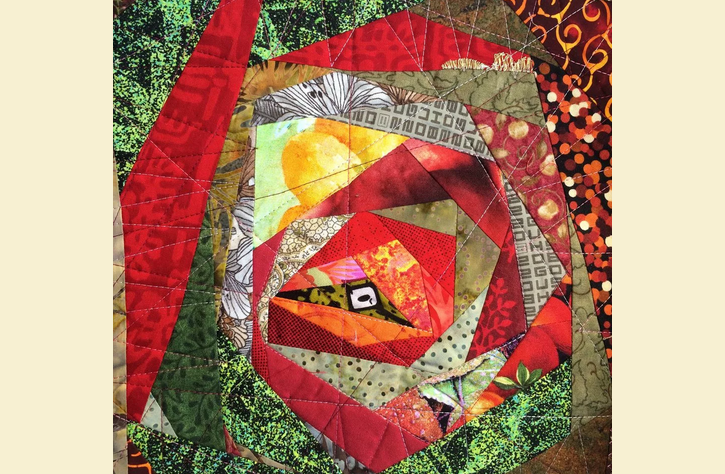
Use any patterns as seams. For the edging you will need a strip of the same type of fabric, but bright colors. There are no templates for this technology. Just take the shreds and put them chaotic or in a specific image:

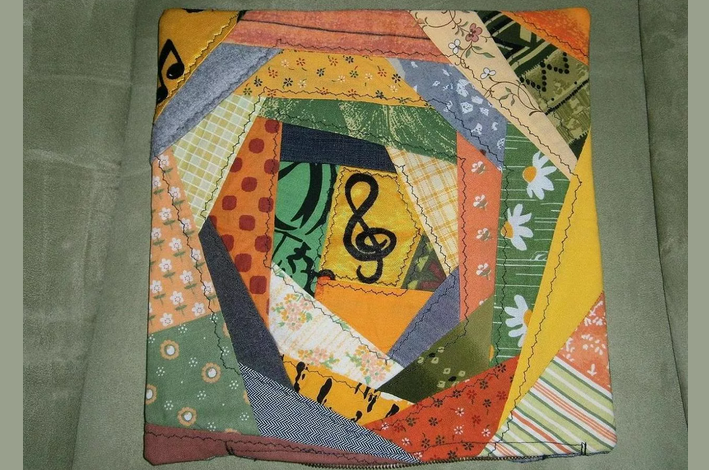
Watch the video. The craftswoman shows a master class on how to quickly and just get rid of trash.
Video: zero waste. Pizza technique is a master class for beginners
Crazy's technique in patchwork sewing for beginners: description, video

Crazy's technique in patchwork sewing is simple. You can sew any flaps in a chaotic order. This is the present madness: chaotic mixture of color scheme, textures and forms. Basically, style crazy - The schemes do not suggest, because here it is not a drawing that dictates the selection of material, but on the contrary - a print is created from the existing fabric. Ethat is the easiest algorithm for using tissue residues.
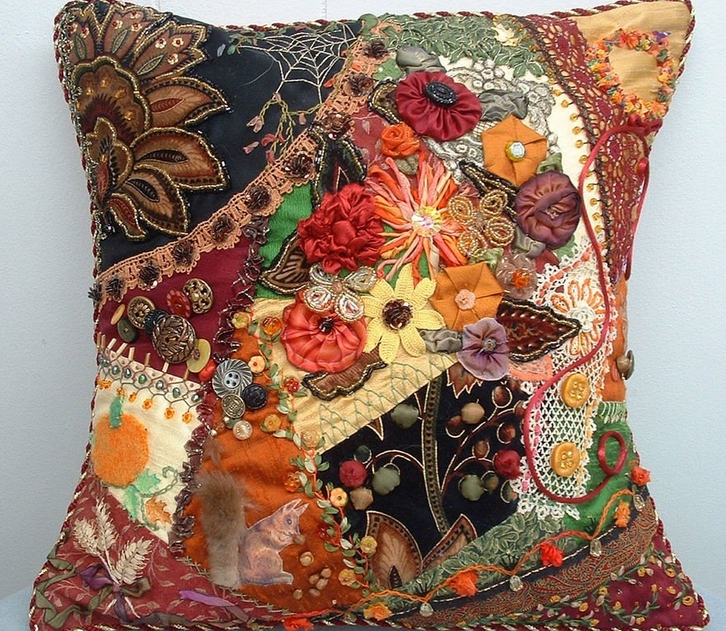
Materials that are needed:
- Basic sewing tools
- Iron
As for the fabric, it is advisable to use cotton or flax. But Elastan, synthetics, wool or silk is better to avoid. The method is simple, but a lot of time is spent - a few hours a day.
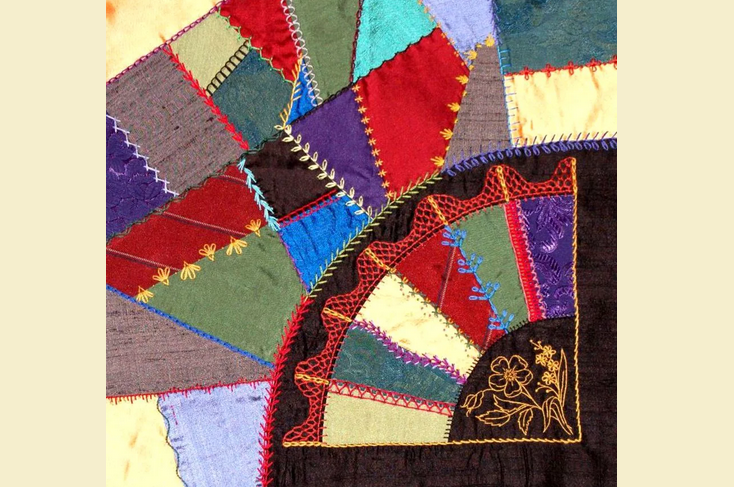
Instructions for beginners:
- Cross the base. Take the canvas 20*20 centimeters. It is better to make allowances of 0.5 cm from the edges. For various force majeure.
- Start lay out pieces (triangles) from the central part of the base.
- Do not combine the figures back, but cover the previous ones with them.
- Pinch and sew. After that, be sure to spoil the work. So you need to do it to the end.
- Close the cuts. After sewn shreds, cut off the excess.
- Turn over, remove the excess from the borders of the base.
To fix, use cardboard, dense fabric of the same shape as the resulting product. Glue or sew the workpiece to the base. You will see more in the video below.
Video: Crazie-Kvivt for beginners
Barjello technique in patchwork sewing from strips of fabric in stages for beginners: description, video
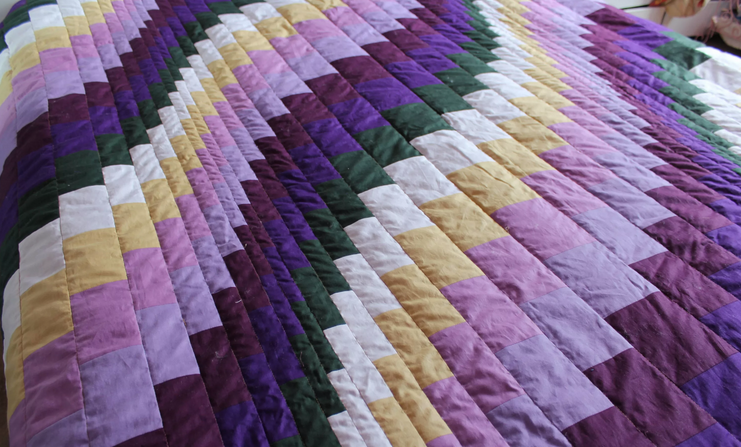
Barjello technique in patchwork - this is one of the most interesting. It seems that it is difficult to sew such a product, but in fact - everything is simple. Below you will find a description of accelerated assembly of squares. Here is the instruction in stages for beginners - the basis is strips of the same length and width, but of different shades:
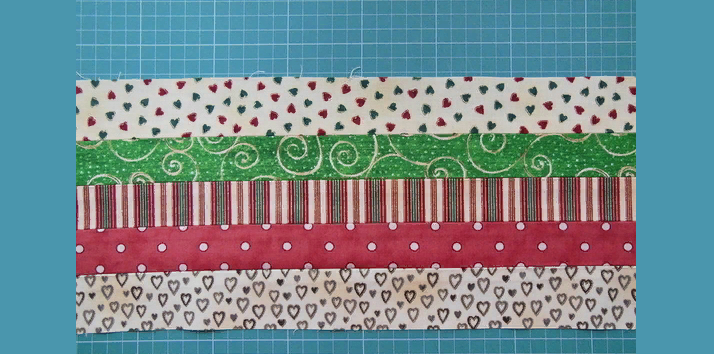
- Sew the canvas, adding strips to each other.
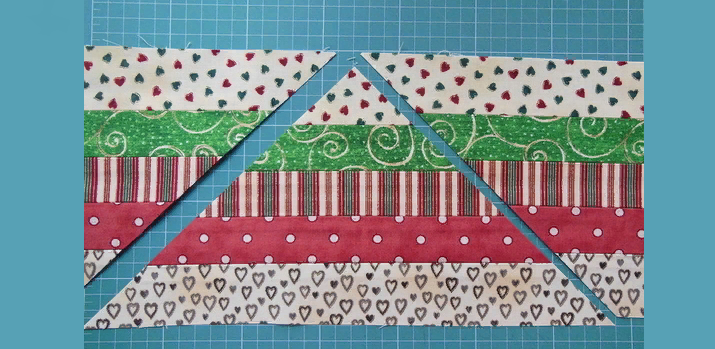
- Make triangles, cut into equal shares across.
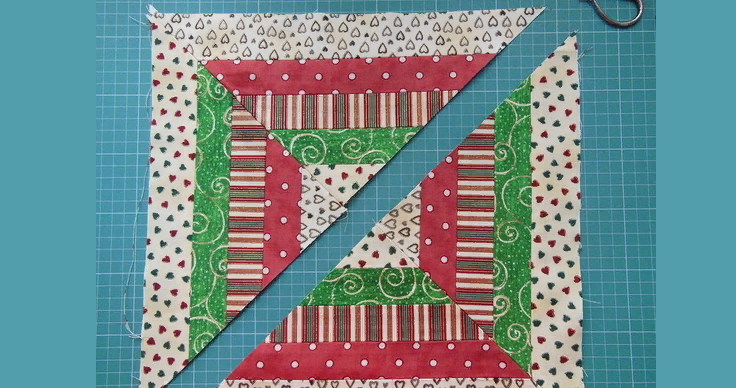
- Sew the resulting parts in a new canvas so that you get a pattern.
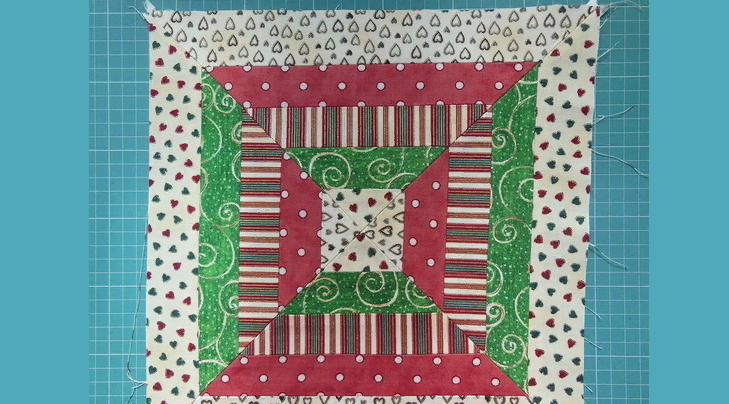
So what should the beginner need to learn?
- Correct fabrics correctly.
- Connect the stripes together.
- After creating the canvas, iron the base from the inside.
- Close the product carefully around the edges.
There are several more variations of stitching of fabric strips:
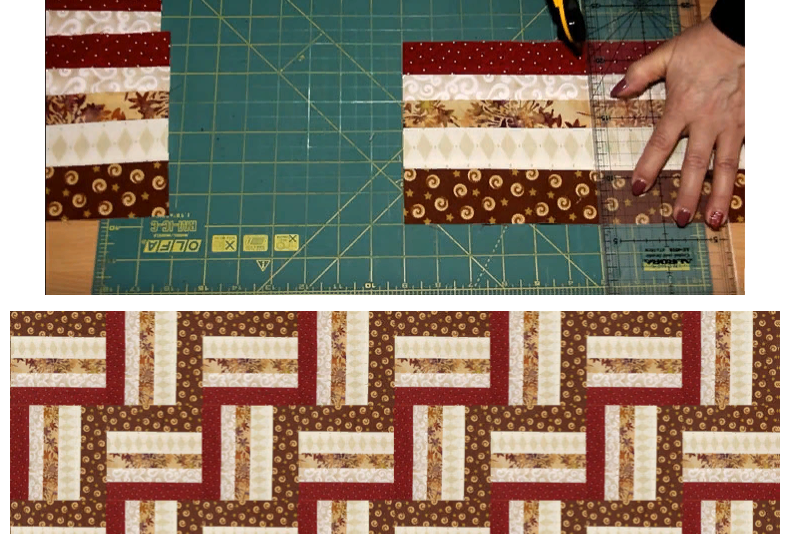
- Take strips of different widths 4 to 6 pieces. Then sew them among yourself 2 pieces, ironing at the end on one edge. Measure the width of the resulting strip and measure the same amount, and then cut into squares. From them, make a patchwork, pillowcase or bedspread.
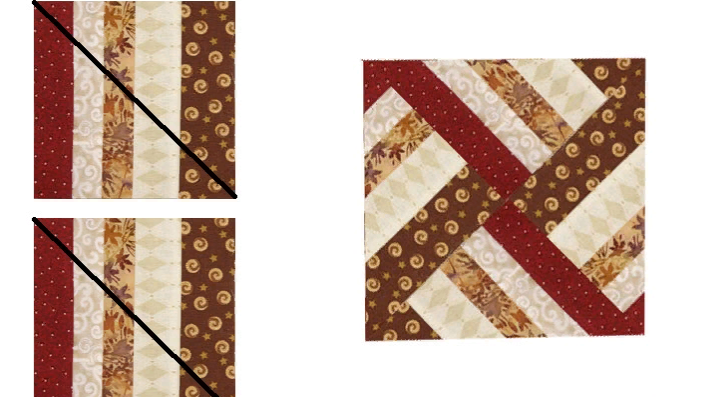
- Make fabric squares. Cut them diagonally. Sew a patchwork blanket from triangles.
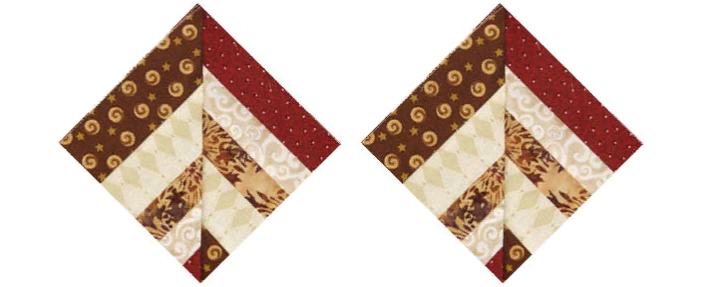
- Make squares from the strips. Put them on each other, make a diagonal and stitch on two sides on 6 mm from her.
Watch the video how else you can sew using this technology.
Video: Master class "Sewing a pillow using Barjello technique"
Boil technique in patchwork sewing for beginners: description, video
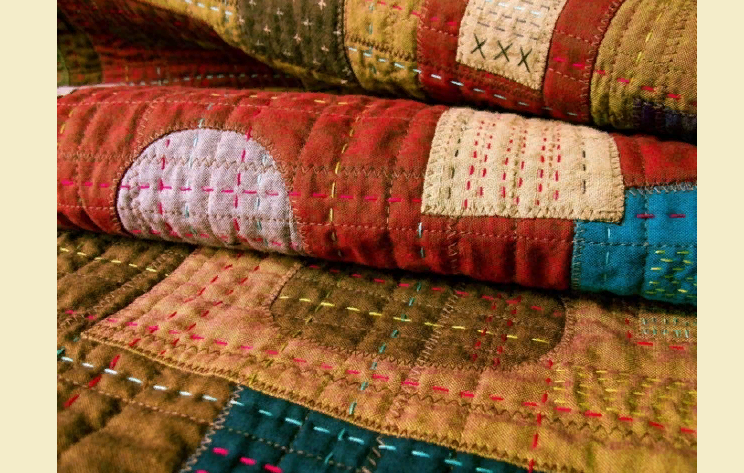
Boro technique in patchwork sewing is the only technique of philosophical significance.
The basis is a dagger with patches that are manually sewn with rough threads. This is a deliberately rude use of patches. Rags, fabrics are simply applied to the base and sewn. It turns out a real ethnic element, but it always looks stylish. It is especially very fashionable now.
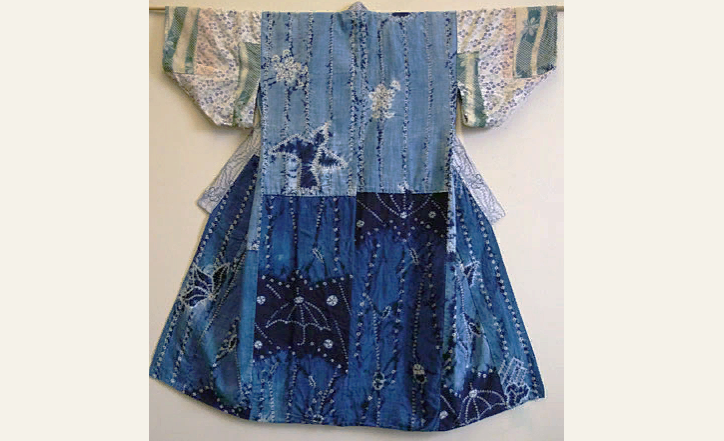
Here is a description of the process of creating a bag in the style of shreds for beginners:
You will need:
- The basis for sewing
- Syntephop
- Glue
- Denim threads
- Fittings and different elements for decor
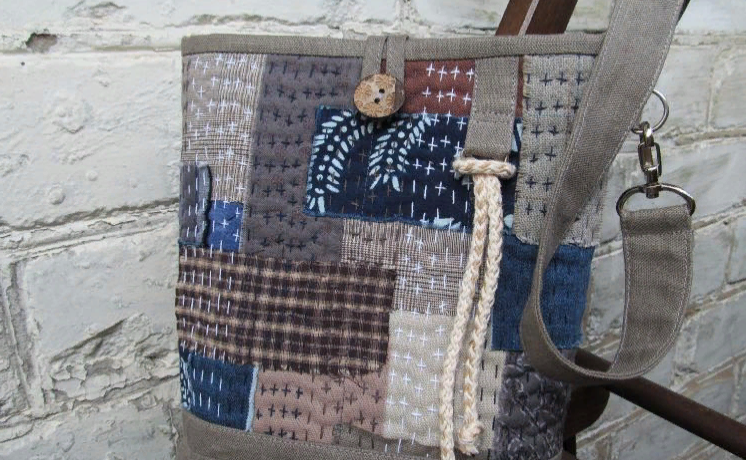
Instructions:
- Prepare patches.
- Put them on the basis.
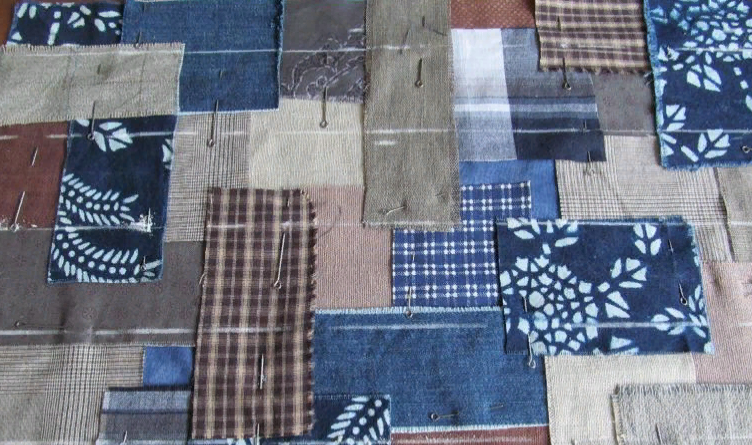
- Select, and then glue the located parts.
- Stitch the decor with jeans material.
- Mark the workpiece to 2 equal parts.
- Put the bottom in the middle and fix it with lines.
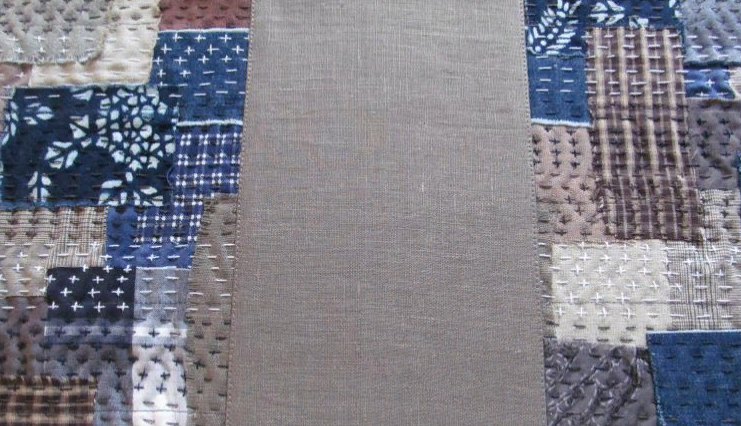
- Glue a synthetic winterizer on a web.
- Content the edges, sew the side seams.
- Sew the corners. Debt the workpiece and turn out the product.
- Make a lining and pockets.
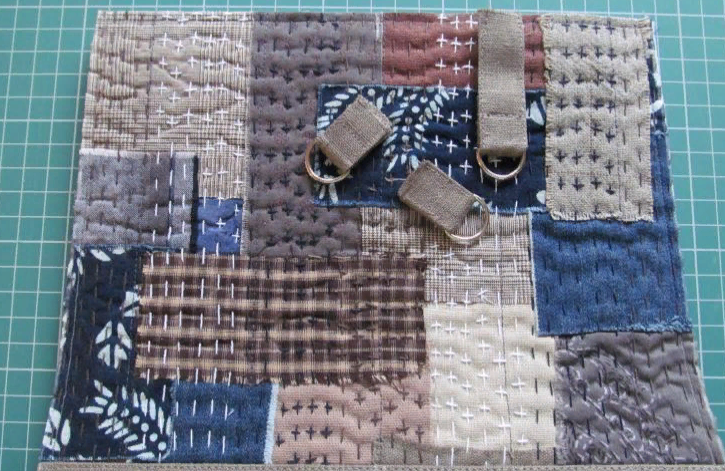
Make a carbine and sew the belt. Suma is ready.
Patchwork sewing from jeans: beautiful and easy
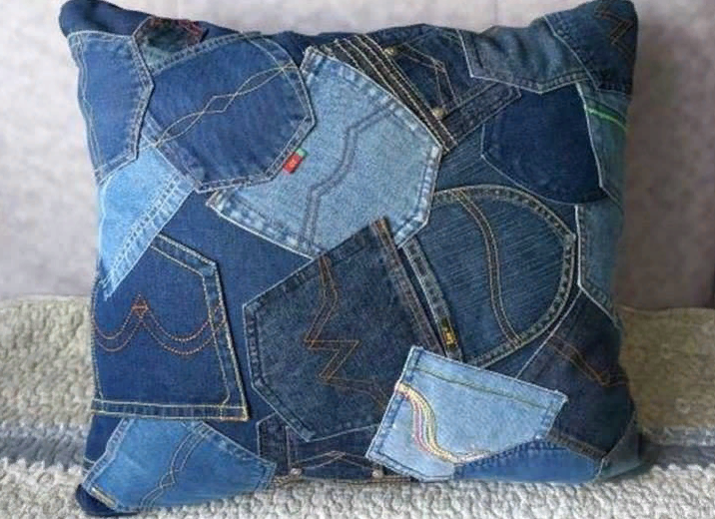
The advantages and disadvantages of denim are obvious.
Pros:
- Strength
- Wear resistance
- Hypoallergenicity
- "Breathing" properties
But among the minuses: the high cost and the complexity of washing. However, still we love things from such fabric. Patchwork of jeans is beautiful and easy. Below are instructions for manufacturing various products.
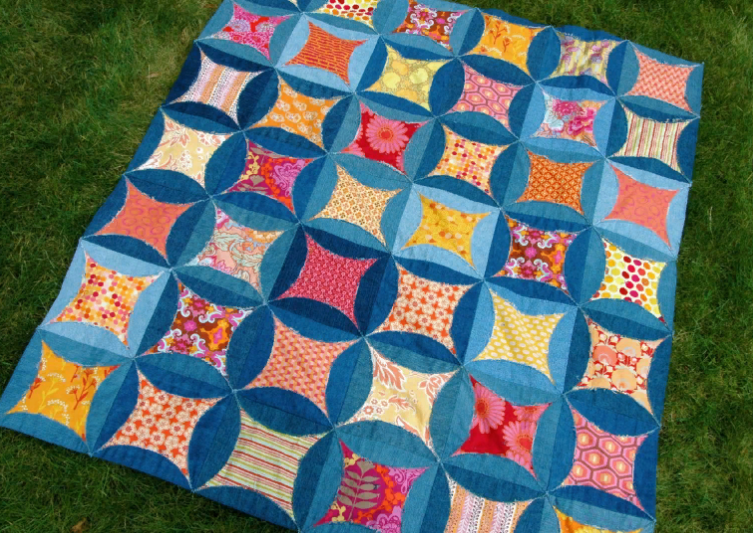
Plaid:
- Make shreds and lay out on the material that will serve as the basis.
- Spend them with a zigzag stitch.
- Strengthen the stripes.
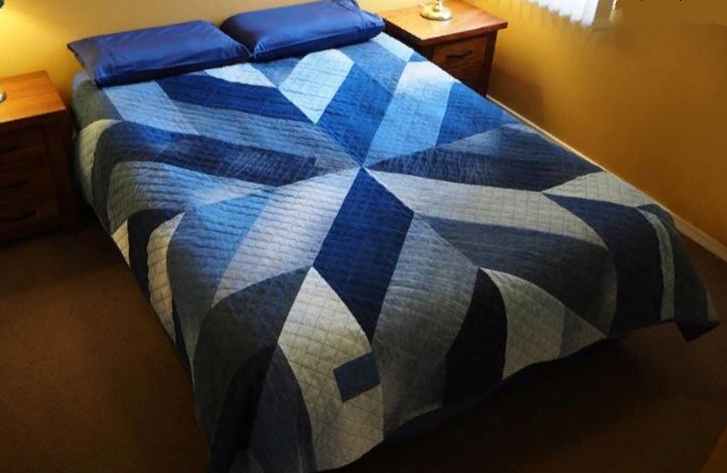
Blanket:
- Do the work, given the allowances of 1 cm at the edges.
- Put the lining under the rags.
- Turn out the workpiece and stitch along the borders.
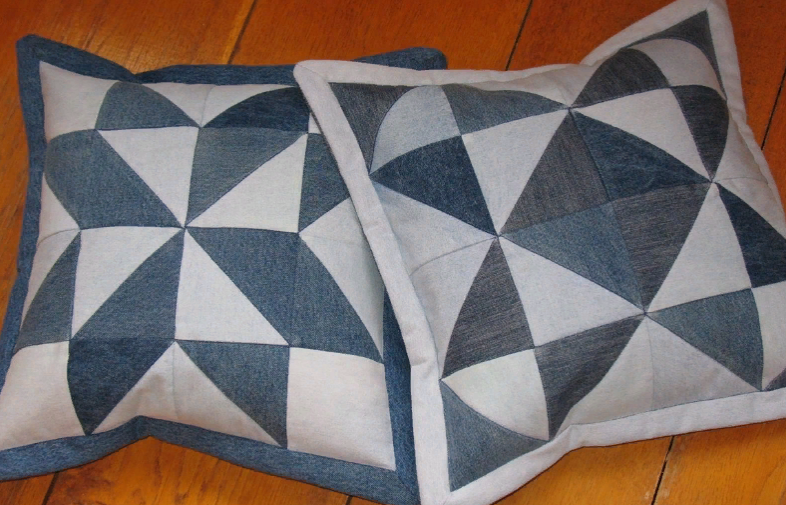
Pillow:
- Make 2 shreds of shreds by analogy with the blanket.
- Fold them and stitch them.
- Turn out the workpiece and fill it with synthetic winterizer. Stitch the rest.
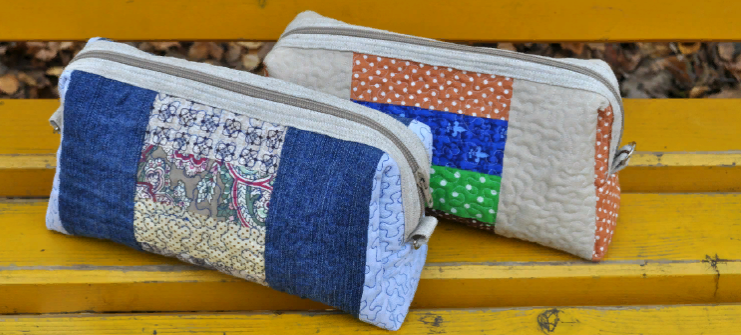
Cosmetic bag:
- 1. Make an analogy with the pillow, but using the internal lining and lightning for the top.
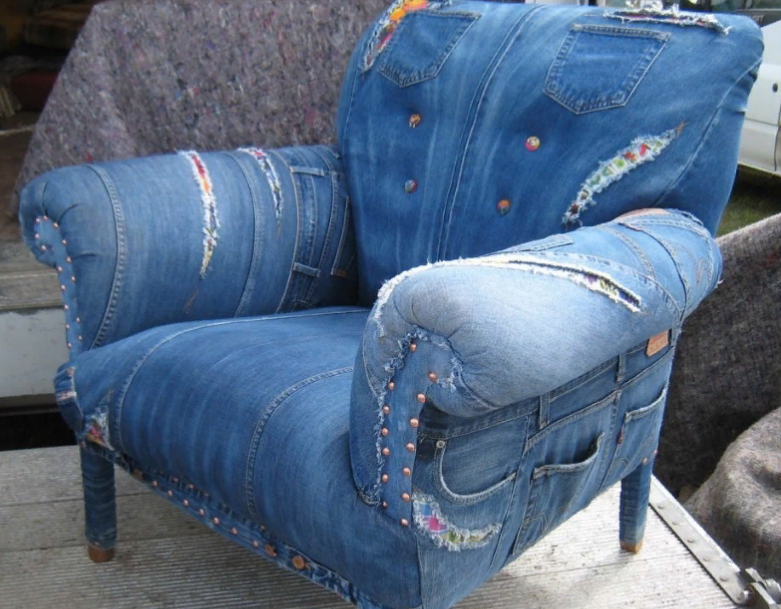
Furniture upholstery:
- Remove the previous upholstery. It will be a template.
- Make each detail and separately beat with a stapler. Furniture upholstery is ready.
As you can see, everything is simple - take and sew.
Patchwork sewing from knitwear: Description
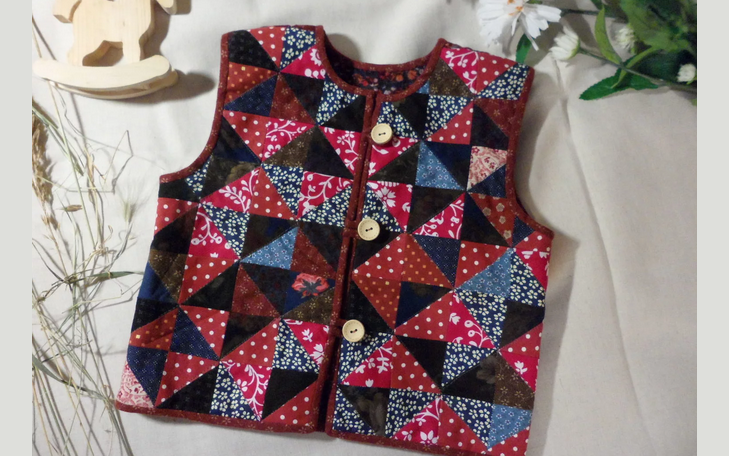
Knitwear is the most popular type of fabric in sewing various products. Pechvork is no exception.
So what can be done? Here is a description of patchwork from knitwear:
Vest:
- Make a pattern.
- Put the back and shelves on a synthetic winterizer with lining.
- Exhaust.
- Cut the excess.
- Process the cuts with a slanting box.
- Sew the zipper and buttons in front. The vest is ready.
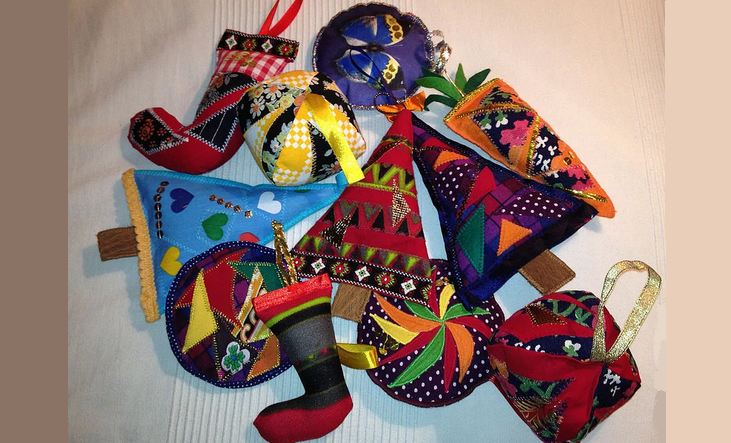
New Year's toys to the kitchen:
- "Onion" - Fold the flap with the face inward, build the workpiece, cut the excess, turn out. Release a green flap from the "neck". Follow a tightly rolled lump of cotton wool. At a distance of 5 mm from the edge, lay the stitches with a “forward needle” with a seam, pull the thread, making 2-3 turns, and fix it.
- "Carrot" - Follow similarly according to your template.
- "Potato". Pull 3-5 tight lumps of cotton wool with a cloth. Fasten the thread, cut the excess. With small stitches, piercing the potato through and through, make “eyes”.
- "Plate" - Transfer the contours of the plate to the fabric base. Stitch with a black thread on the indicated dotted ones.
As you can see, it all depends on knitwear and your imagination. From flaps you can make many different interesting things.
Patchwork sewing from the material with a pattern "Asterisk": Description, video
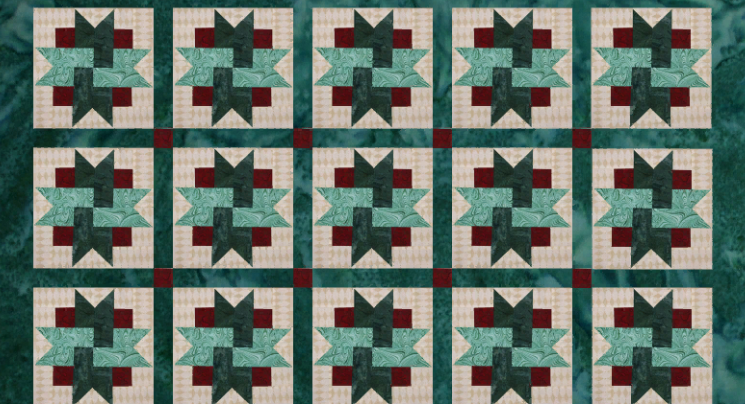
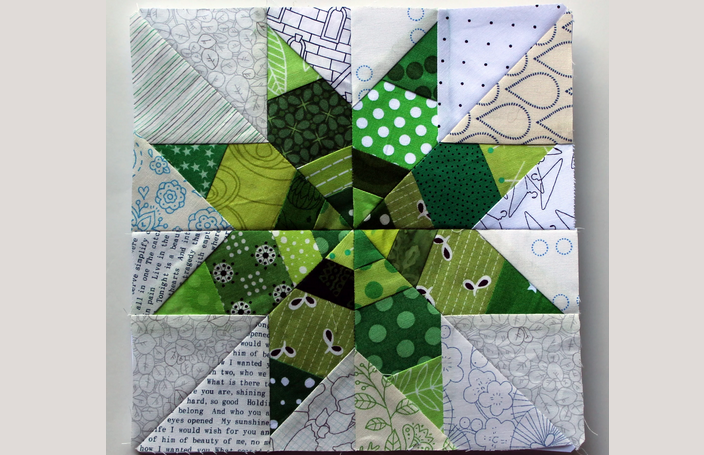
The patchwork block "Zvezda" is a popular ornament in a patchwork sewing of material. It is performed quite simple:
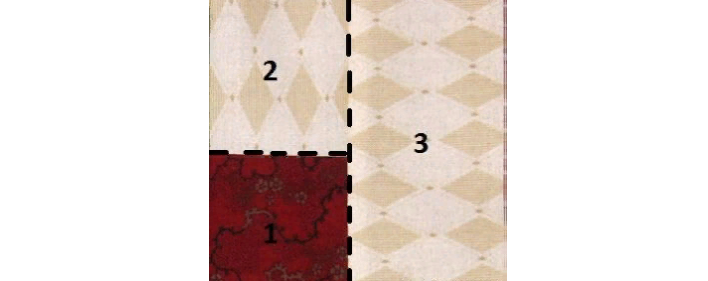
- Prepare the squares and stripes of different colors and dimensions.
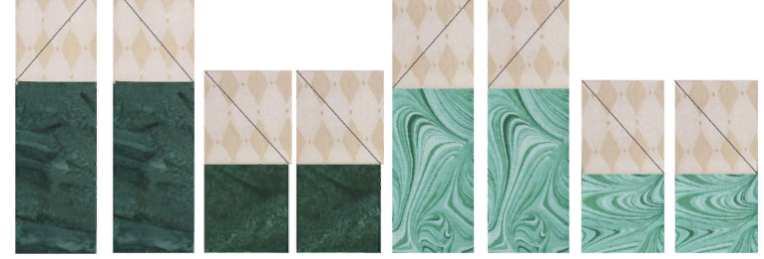
- Collect 4 pieces, as indicated in the diagram above.
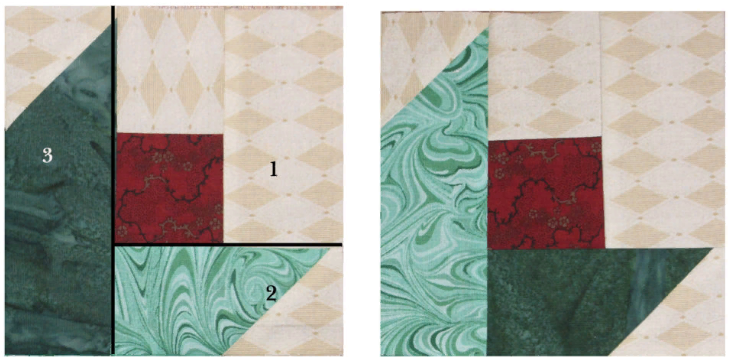
- Make the ends of the stars. To do this, take the green stripes and stitch with light squares diagonally.
- Cut the excess and strengthen.
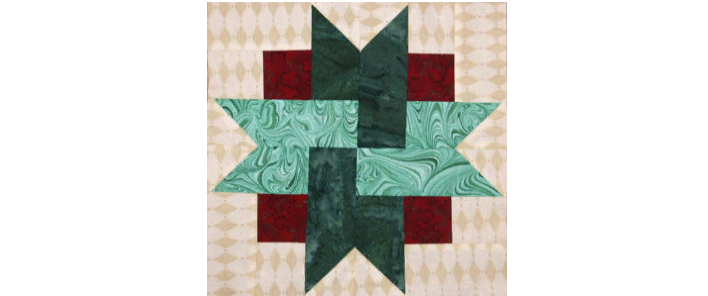
Make parts of the block: attach rays to the squares. Everything, it remains only to sew and the star is ready.
Patchwork sewing from old clothes, socks: beautiful, video
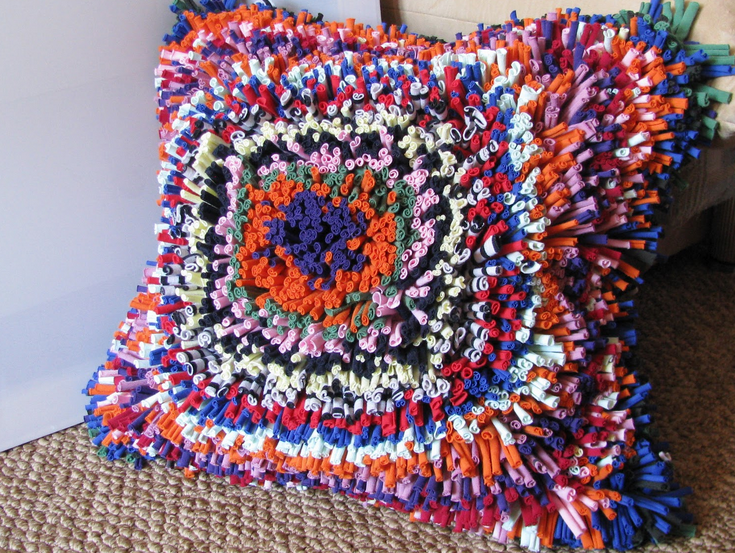
From old clothes, you can also sew pillowcases, blankets, pillows, various kitchen accessories. The technique is the same as for beginners and for experienced craftswomen. This technique is very old and called "Lyapochikha". Everything will come in handy: old T -shirts, socks, etc. Use bright fabrics, and then you will get a beautiful patchwork. Below are options for products:
- Just cut the strips from old clothes and sew it to the base, creating a pattern of flowers.
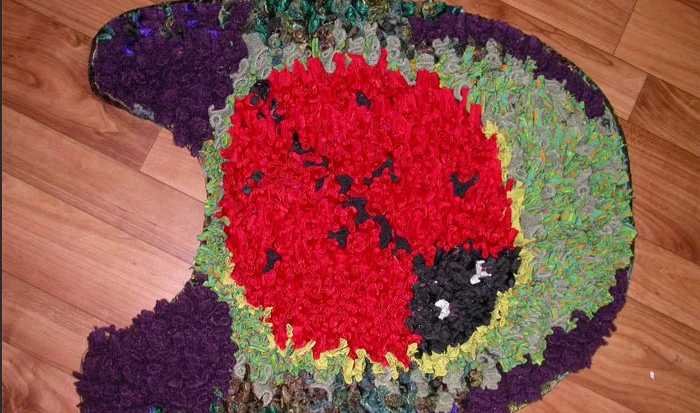
- See how beautiful a rug in the bathroom turned out.
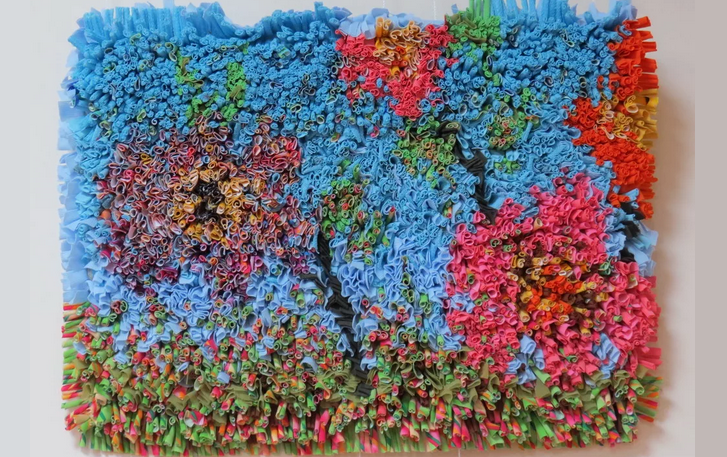
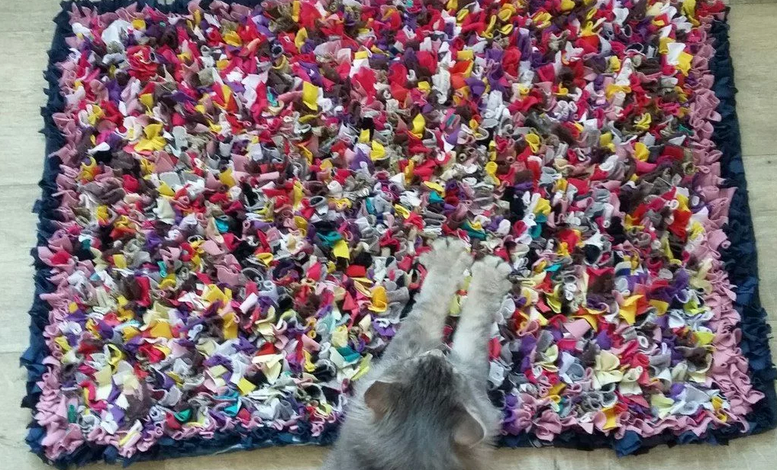
- A rug in the hallway, a cat chose him.
Video: Patchwork Lyapochikha - Lesson 1
Video: Patchwork Lyapochikha - Lesson 2
Video: Patchwork Lyapochikha - Lesson 3
Patchwork sewing from triangles: Description
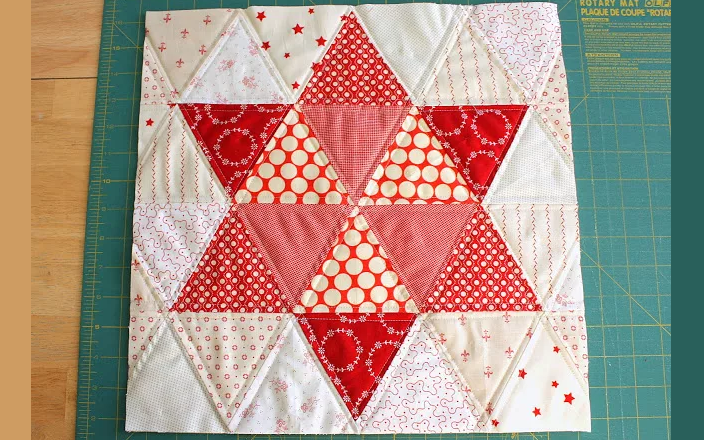
Patchwork of triangles is the simplest and most popular ornament.
You will need:
- Standard sewing set
- Schemes and templates
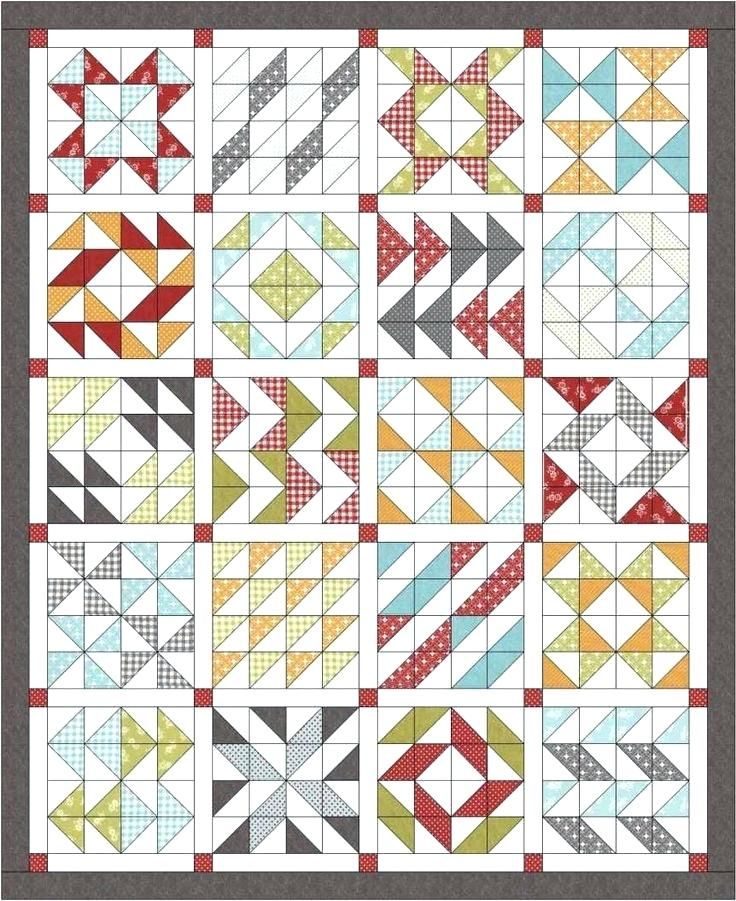
Instructions for creating a blanket:
- Make square flaps using a pre -prepared template.
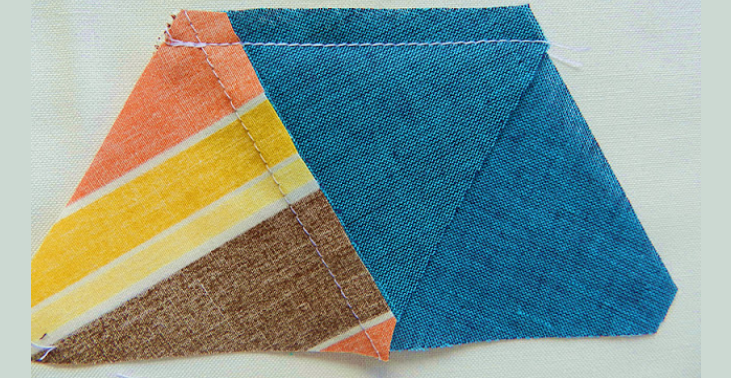
- Cut 25 squares and cut them in half along the diagonal line.
- Sew the triangles in pairs and reward.
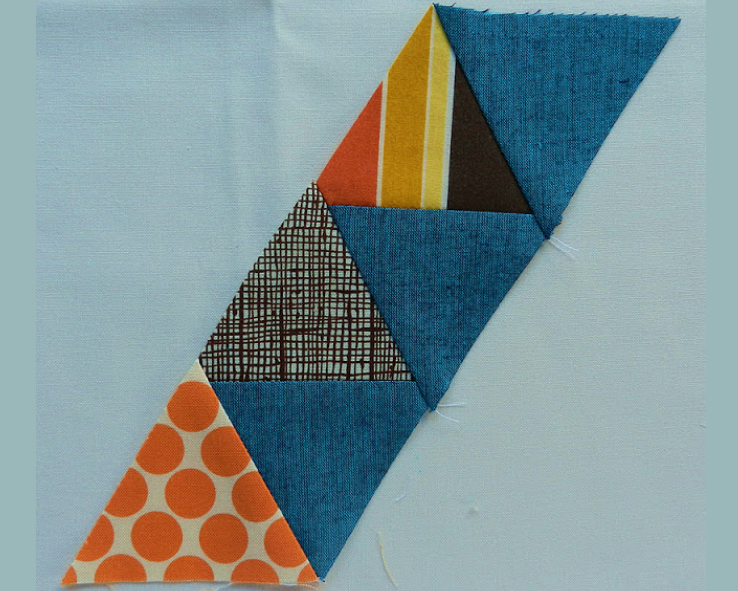
- Fold everything and stitch. It should turn out 25 squares with a mirror reflection.
- Sew the lower edge and strengthen.
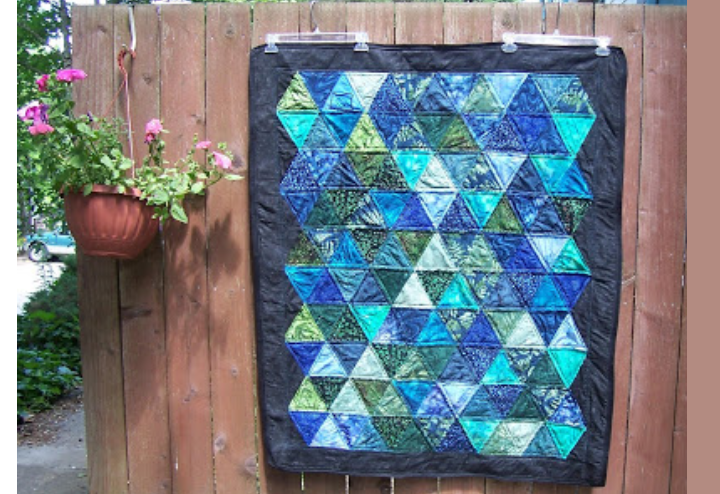
The blanket is ready. Similarly, you can make from the stripes.
Patchwork sewing - Rombs: Description
Multipaths are not so simple in the cut. It will take not only skill, but also patience, efforts.
The most difficult thing is in a simple polygon-room to keep symmetry. That is why experienced needlewomen prefer to work not with triangles (putting them in rhombuses later), but immediately with ready -made templates. So it is simpler, and neat. Actually, the technique does not change. Rombs are more often decorated with bedding, clothes, accessories and kitchen sets.
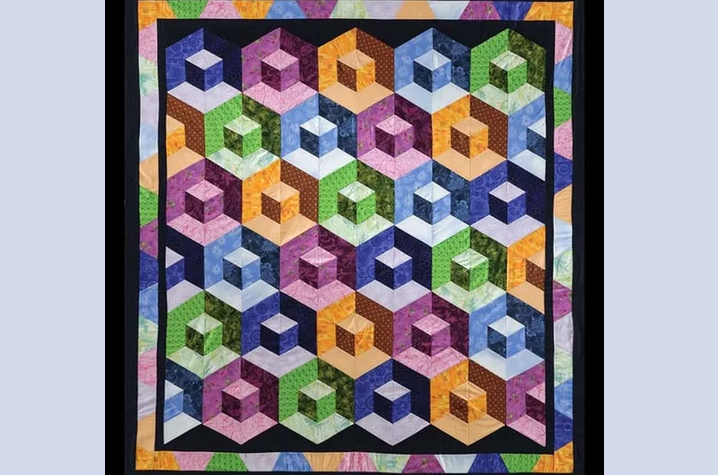
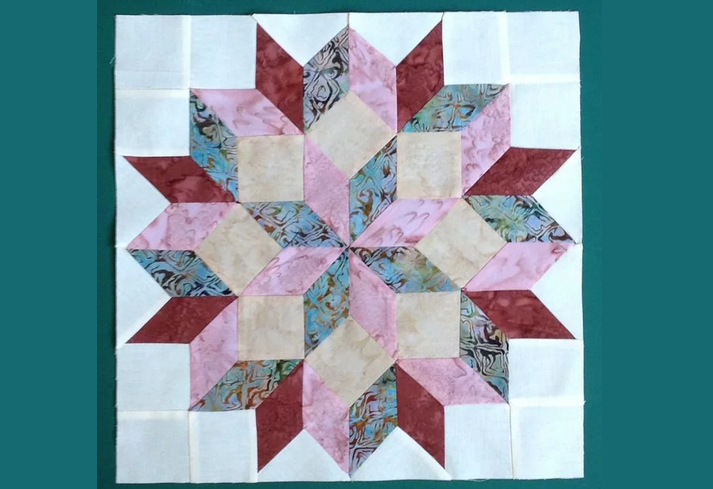
Cubes pattern:
- The cube is formed by 3 rhombs. It is important to correctly correlate the light, shadow and color of the fabric.
- Before creating a template, you will have to make a pattern on millimeter paper.
- Stitch all the elements.
- Then fix the workpiece based on glue.
Flower pattern:
- It is easy to make a hexagonal flower from rhombuses.
- You need 6 rhombuses for 1 plant.
- The sharp angle of the flap should be 60 degrees.
The center of the flower should be a button, which is sewn after fastening of all petals.
Patchwork sewing: block combining
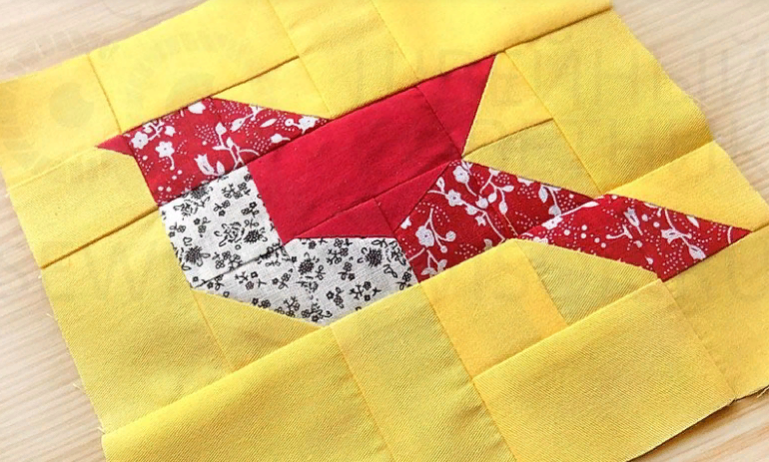
Craftswomen love to make unusual combinations. And this is not surprising, because many simple forms are quickly annoying. Combining blocks is often used in patchwork. The block becomes a popular symbiosis "Bird". Instructions for its manufacture:
Prepare the fabric for the base 15*15 cm. Namely from the background fabric:
- 3 squares 2.5x2.5 cm
- 2 squares 5x5 cm
- 6 rectangles 2.5x5 cm
- 6 triangles with legs 2.5 cm
From the material for the wing:
- 3 rectangles 2.5x5 cm
- 1 triangle with legs 2.5 cm
- 1 triangle with lace 2 cm
From a cut for the breast:
- 2 squares 2.5x2.5 cm
- 1 triangle with legs 2.5 cm
From the material for the body:
- 2 squares 2.5x2.5 cm
- 4 triangles with legs 2.5 cm.
Then do this:
- Connect and sew the triangles, reward the lap with an iron, and adjust the edges.
- Sew to the squares of the part of the cut for the wing: a small triangle and 2 rectangles along the oblique. Pill the allowances with an iron, align the edges.
- Lay out parts of the block in the order you will sew them. A bird should be made of non -eared details.
- Sew together 1/3 of the block. The photo shows the upper part. Combine and sew two parts.
- Middle part.
- Bottom part.
- 3 parts of the block.
- Sew 3 parts along the length.
Debt the allowances. The patchwork of the "bird" is made.
Kayma in patchwork sewing: what happens and how to do?
Accuracy in patchwork gives the edge of the craft. It is differently called a border or edging. It should be suitable both in texture and color.
The following types of edging are distinguished in the patchwork sewing:
- Which blocks
- With corner squares
- With mowed corner seams
Tips:
- So that the thing does not skew, all manipulations with a border are done through the central part of the manufacturing product.
- It can only be cut on a shared or transverse thread.
- If the border is not enough material, then it is overlooked from above.
- It is allowed to make asymmetric bright edges.
- Thin products are best processed with one strip of material.
More details - processing of angles:
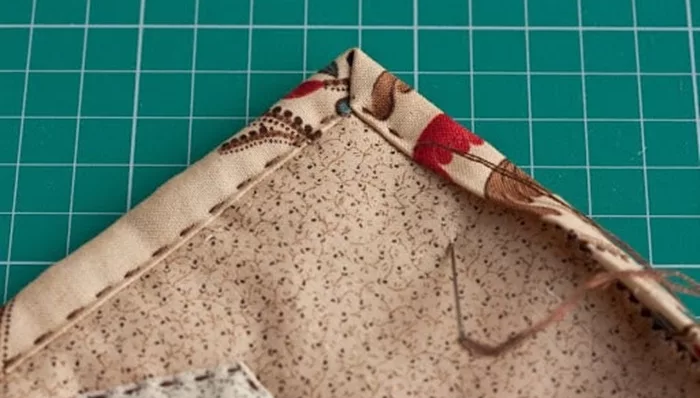
- Stitch the quilted blanket around the edges, retreating 6 mm.
- Then cut the edges of the stuffed part by 5 mm, and the lining material is 2.5 cm, counting from the cut of the stuffed fabric.
- Process the corners according to the type of "envelope".
- Mark and cut the angle, retreating from the stuffed part 1 cm (to the seam). Bend this indent to the patchwork top, and bent the lining cut also by 1 cm and stop so.
- At the end, wrap the lining on the flap so that the bend blocks the machine line, and sew with your hands. The resulting angle is also processed with a hidden stitch.
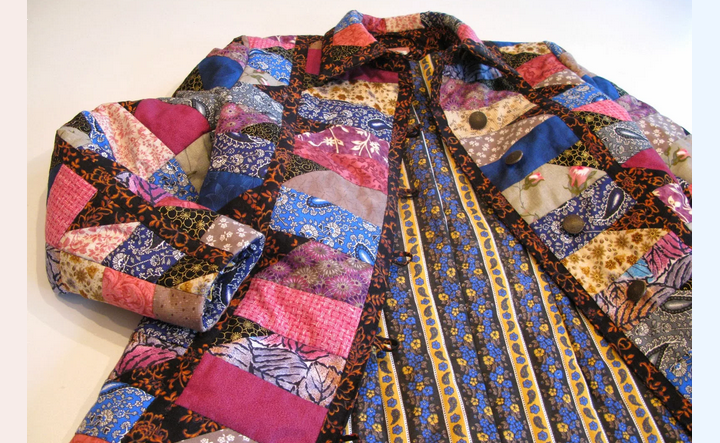
Edging with lining material:
- In this case, the lining must be cut wider than the product to the width of the border plus the allowance for the seam.
- On the lining material, mark the line of fastening of the border. After that, fold in half any of the corners with the front part inward and reward the bend.
- Wrap the part of the bending angle “on yourself”, bend it at the intersection point with the Kayma processing line, stain the angle, unscrew it back, sew it along the fold line and cut it off.
Swore defeat in two sides and cut the excess part of the material. Similarly to make other angles.
Patchwork sewing - tacks, napkins and other small crafts: schemes, video
Patchwork sewing is often used by needlewomen when creating tacks, napkins and other small crafts. Below will be an example of the manufacture of these products. So, let's start with a tablecloth. Here, for example, the scheme:
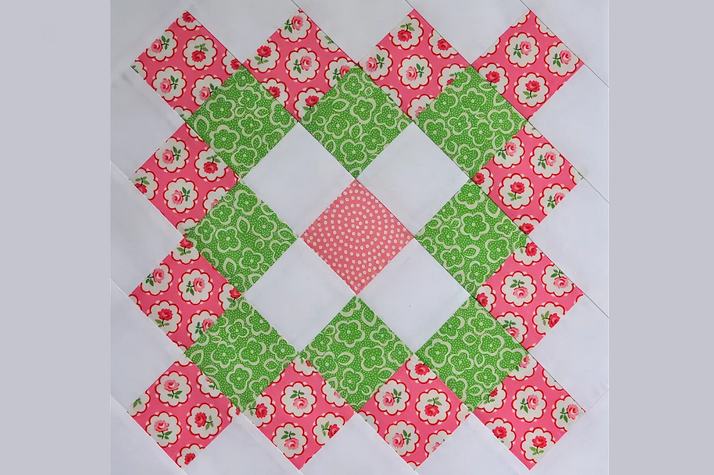
Instructions:
- Prepare the necessary sewing set and materials.
- Determine the size of the product. To do this, measure the length and width of the table surface. Add from all sides by 25-30 cmto get uniform overhangs around the edges.
- If the bend is performed, add by 5 cm from each side.
- For the edging there is enough allowance in 1 cm.
- Draw a sketch, determine the number and size of the blocks. Make stencils of cardboard.
- Make details. Put on the basics and stitch.
- Make a lining and stitch to a patchwork canvas.
- Make a edging. The tablecloth is ready.
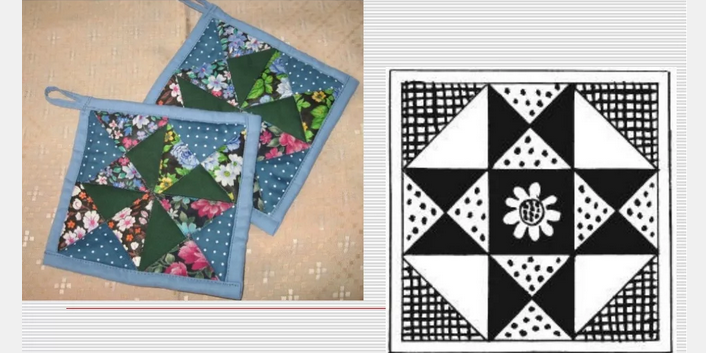
Now let's get down to the tacks. In principle, the technique is no different:
- Make a template
- Cross 2 bases
- Make a lining
- Stitch and decorate
Here are examples of original tacks:
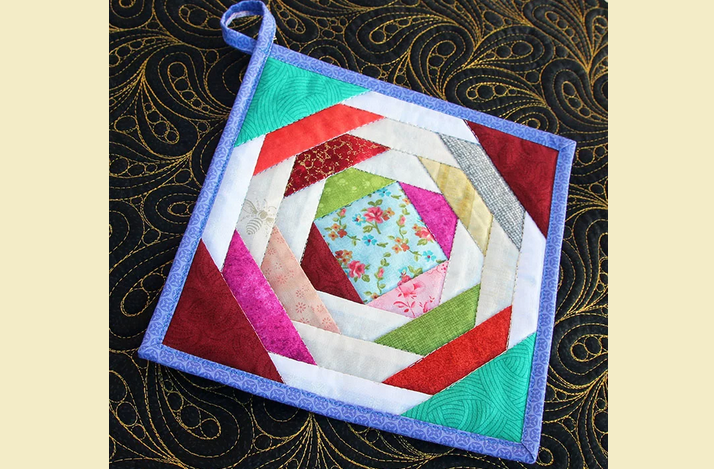
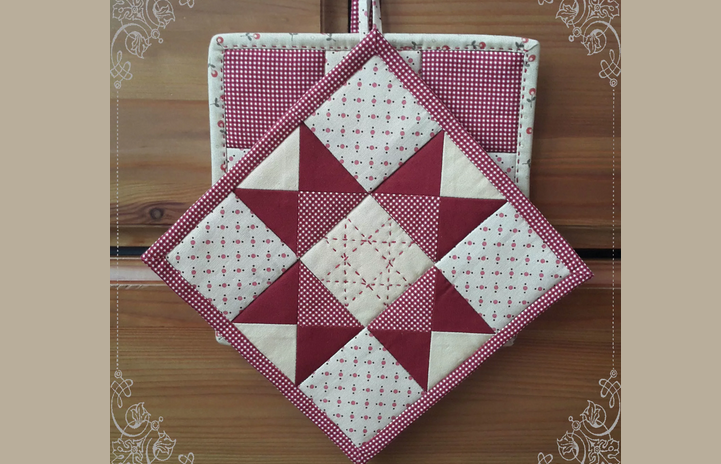
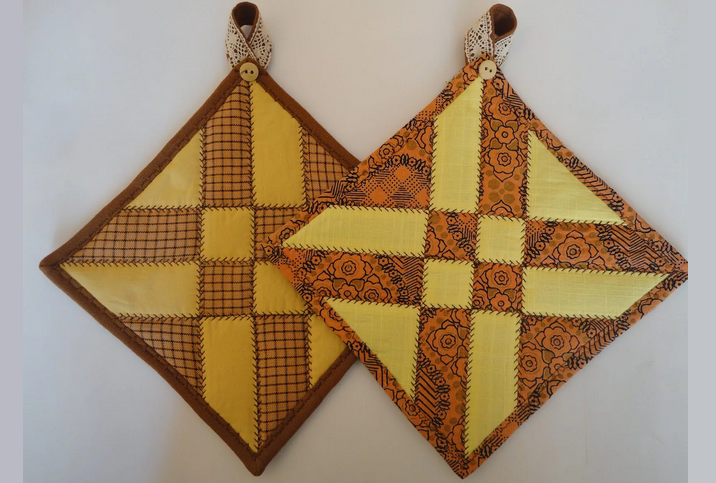
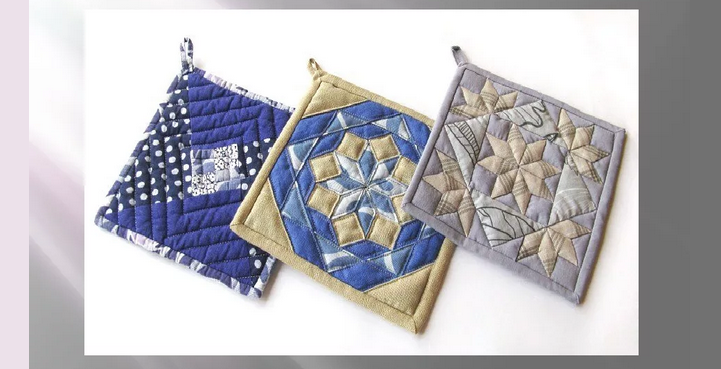
Watch the video how the craftswoman sews such a product of flaps.
Video: DIY patchings. Patchwork. Patchwork sewing
Patchwork sewing - blanket, bedspread: schemes, video
With the help of patchwork, you can create a beautiful blanket or bedspread. You will need flashes of fabric, insulation and tools for sewing. Here are the schemes by which you can sew a blanket or bedspread:
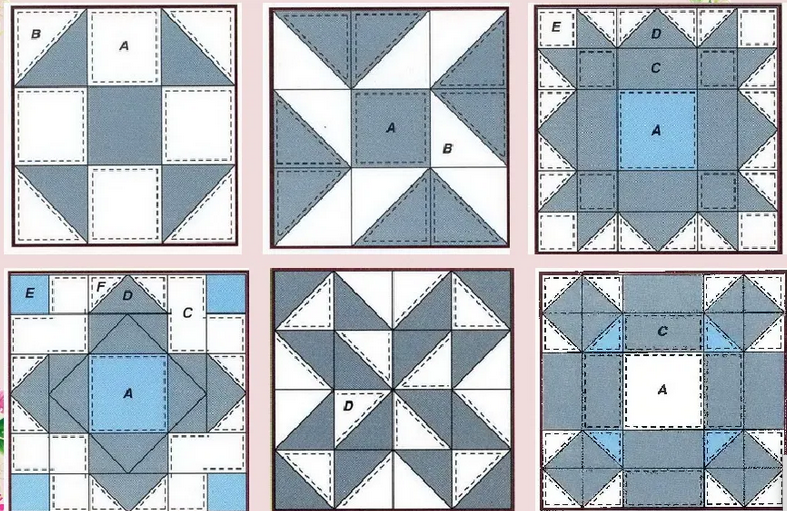
Instructions:
- Lay the squares of 4 pieces per 5 pieces, combining colors.
- Put the blanks in pairs and stitch.
- Start gripping stripes.
- Make a common canvas.
- Raise the seams.
- Stitch the seal under the rags.
- Make the lower workpiece and stitch.
- Cut the extra allowance and turn out.
- Spread the seams and stitch.
- Make a stitch to strengthen.
The volumetric blanket is ready. A few more ideas are shown below.
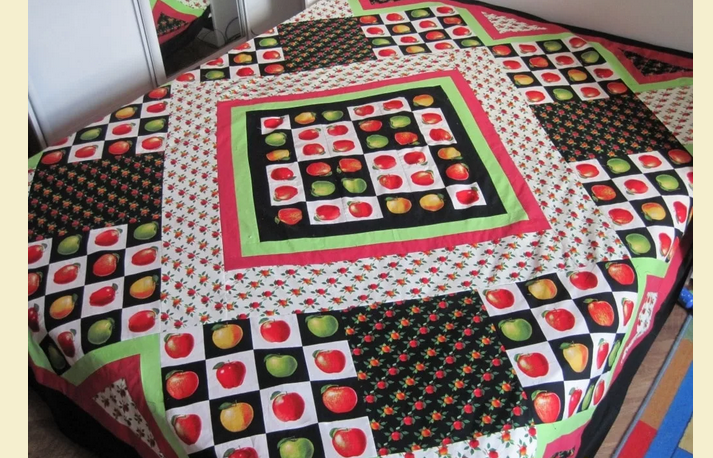
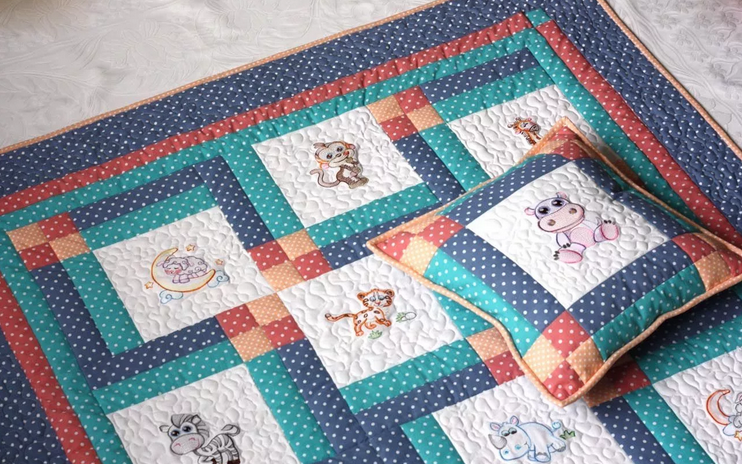
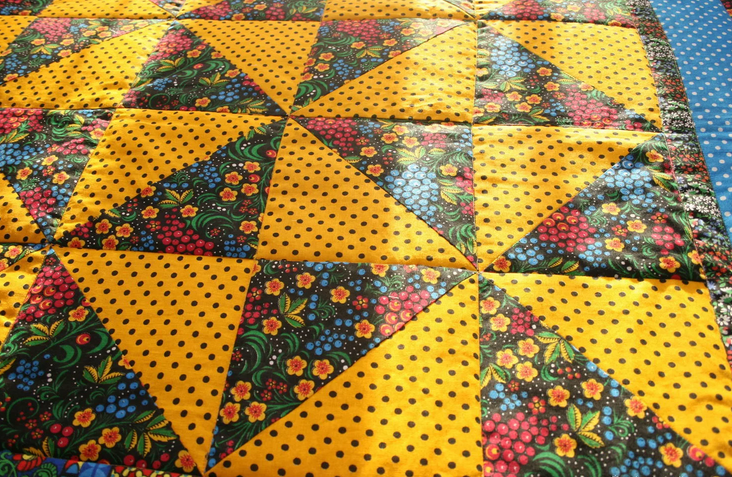
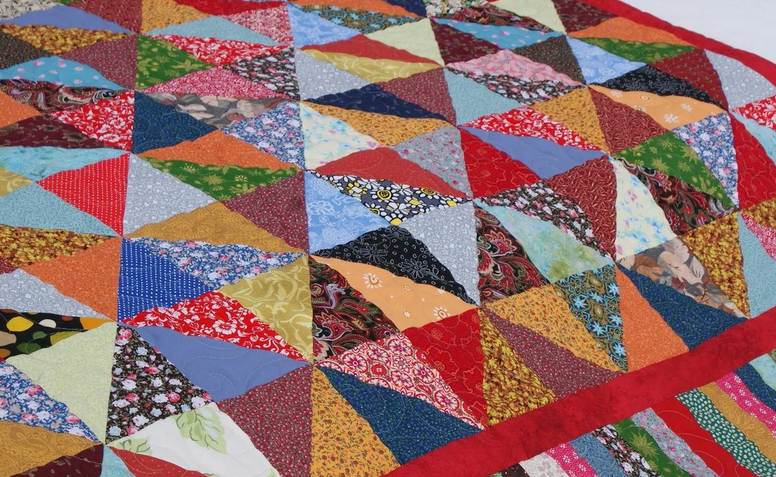
Watch the video how the craftswoman sews a patchwork blanket with your own hands. At the same time, she turns out quickly and simply.
Video: Patchwork. We sew a summer blanket using high -speed assembly techniques. Master Class
Patchwork sewing for children with your own hands: ideas, schemes
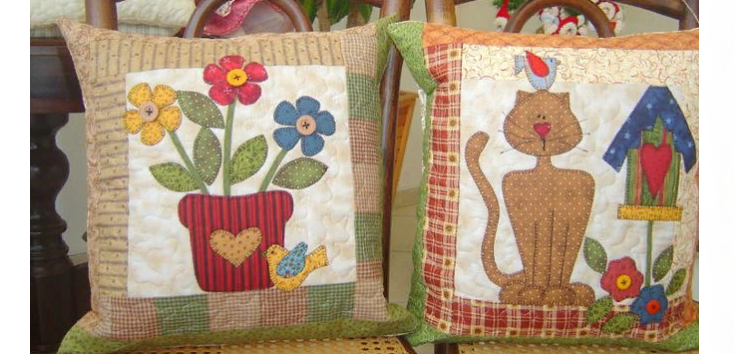
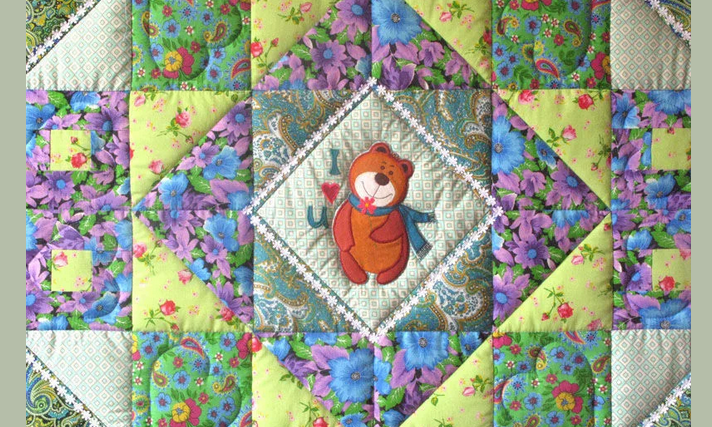
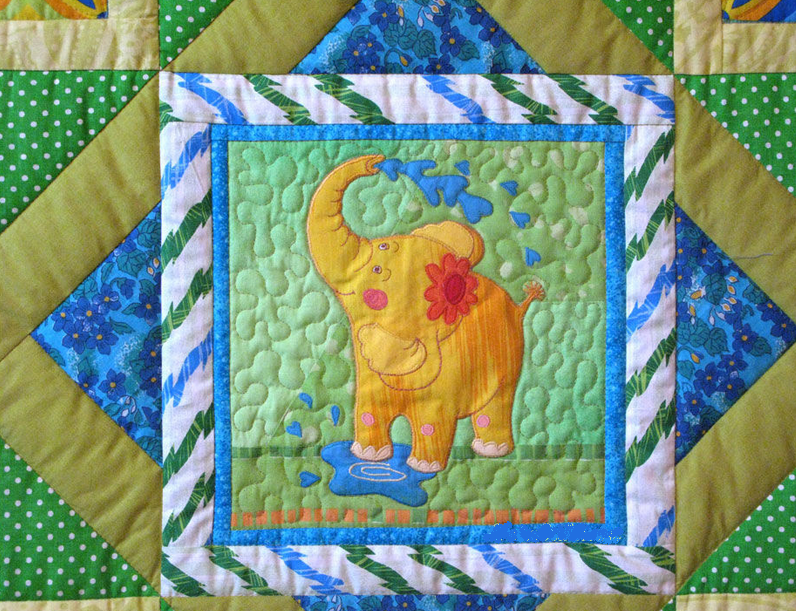
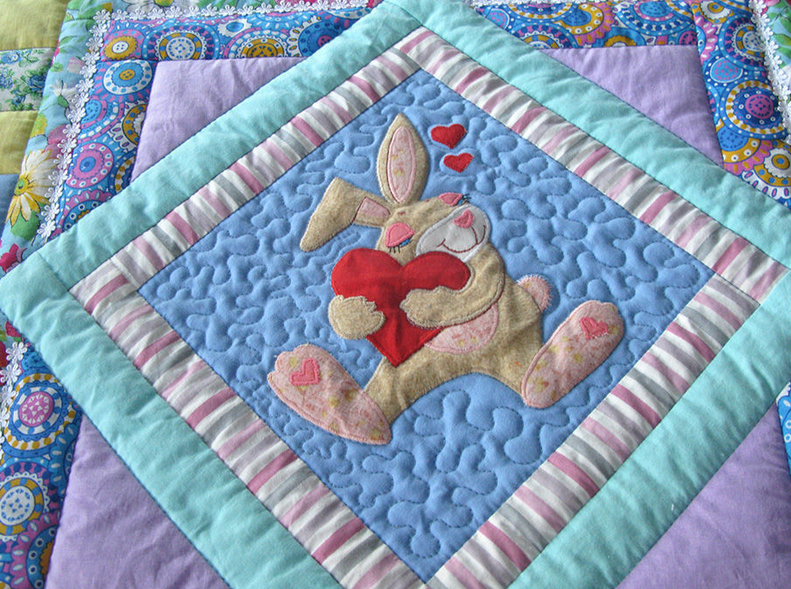
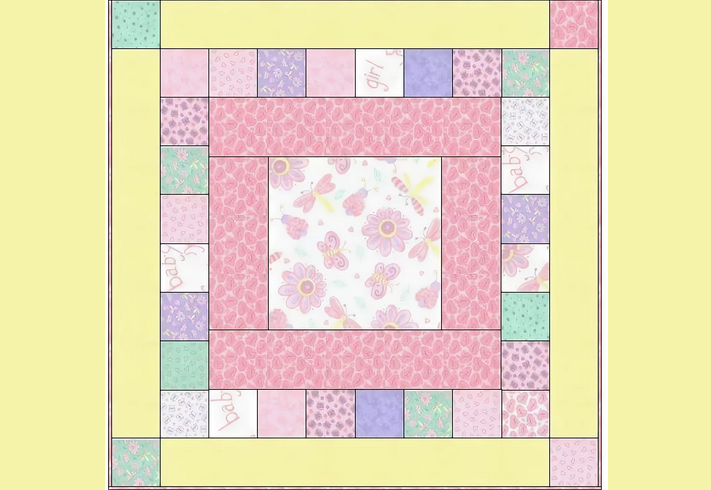
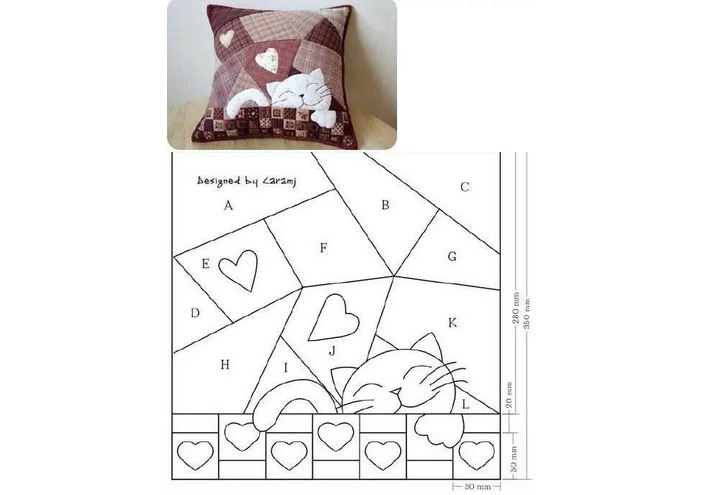
For children, you can also sew beautiful products in a patchwork technique. It can be pillows, blankets, etc. Use, when creating things for kids, images of animals, characters of cartoons, etc. The products should be traced by children's topics. You can perform patchwork in products for babies with your own hands in any technique that you like: patchwork, pizza, etc. Here are ideas and schemes:
Sewed bag of shreds: description of patchwork, video
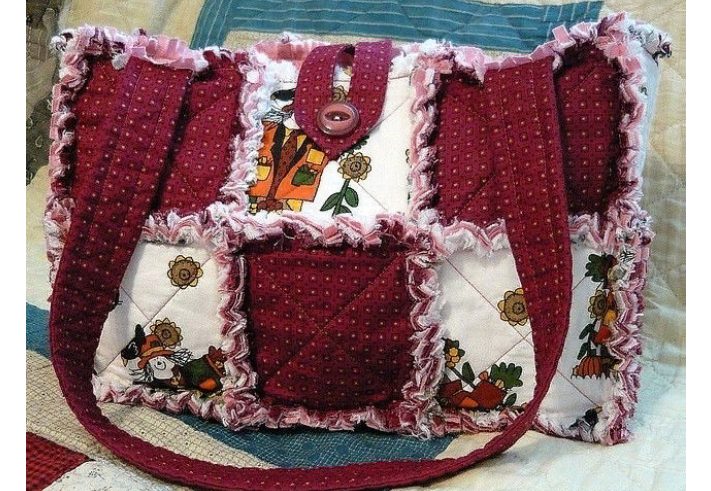
Introductory sewing allows you to make a wonderful ladies' accessory - a bag. One option has already been presented above. There will be another original copy made of shreds. Would need:
- The base is 0.7 per 1.5 meters
- Lining fabric
- Syntephop
- Flizelin
- Rings
- Lightning
- Flaps
Description:
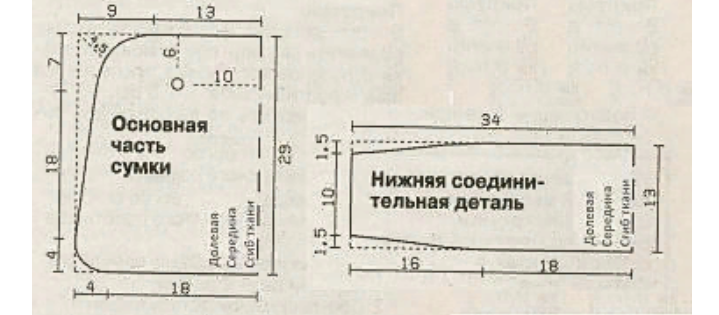
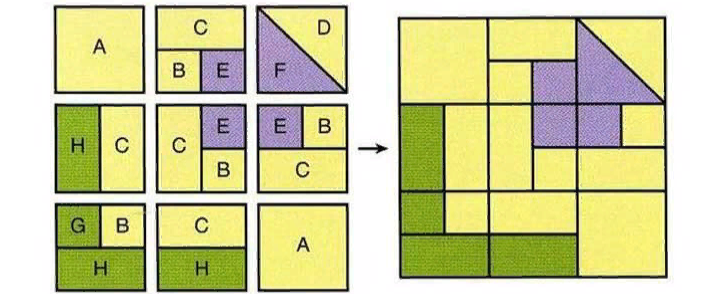
- Cross: the main part of the bag - 4 parts with a bend. The lower part - 2 parts with a fold. Belt - 1 part with a fold. Flips - 2 parts with a fold. Length 10 cm, width 6 cm with a fold.
- Determine the material and drawing, draw a diagram.
- Connect the main details of the bag and lining, stitch. Do not forget about the stitch.
- Make a picture and decorate it with applications.
- Do all the necessary seams.
- Sew the zipper and rings.
- Make a belt.
Put the cardboard into the bag and tighten with the fabric on top. Ready. Watch the video below. In it, the craftswoman tells how she makes a beautiful bag of shreds.
Video: Patchwork. Waste - in income! How to sew a bag from nothing? Patchwork ether
Patchwork: apron
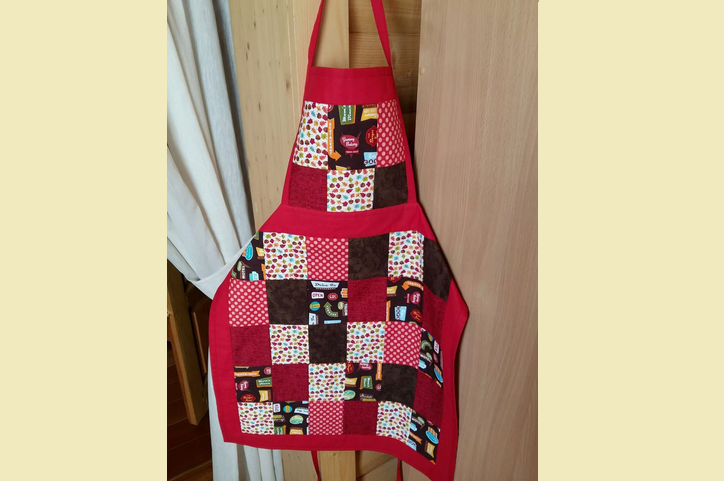
With the help of patchwork, for the kitchen you can make such an original apron.
Instructions:
- Create the top layer of shreds.
- Combine fragments. It should turn out 5 sets of 4 shreds.
- Connect 4 more sets of 4 fragments.
- Lay out 1 set and 2 fragments in rows, 1 set of 4 fragments and 4 sets of 6 fragments.
- Stitch the ranks.
- Make a notch.
- Add the lining by analogy.
- Make a stitch.
- Cut the excess.
- Decorate.
- Make ties.
The apron is ready. Choose bright flaps, and such a product will also be a decoration of the interior.
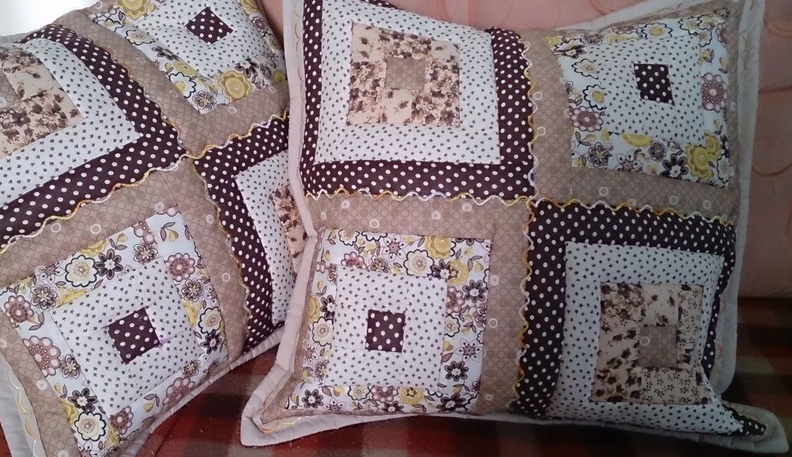
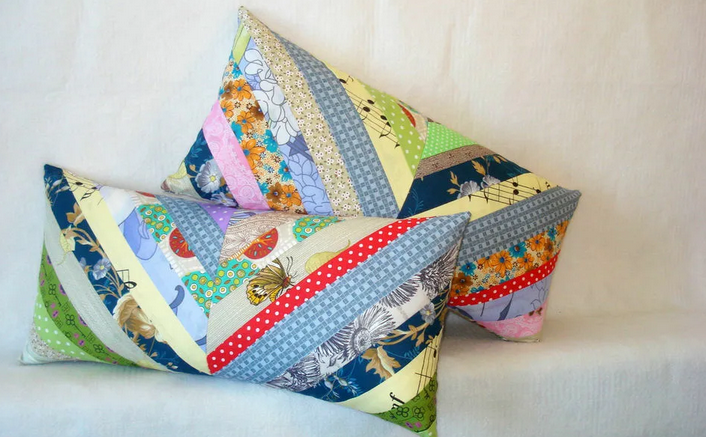
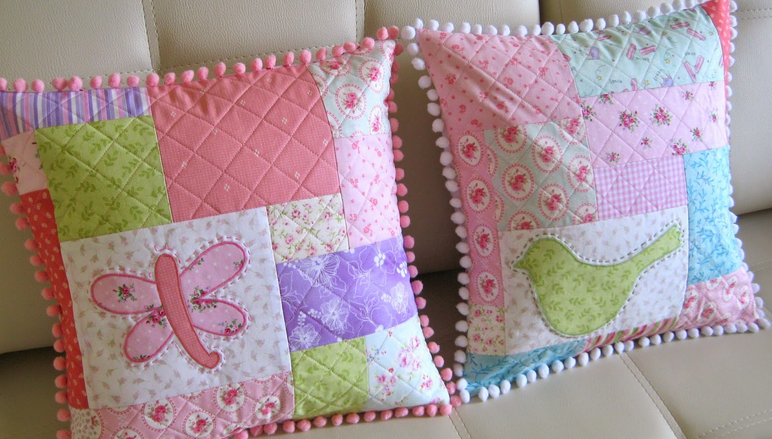
Patchwork: pillowcases
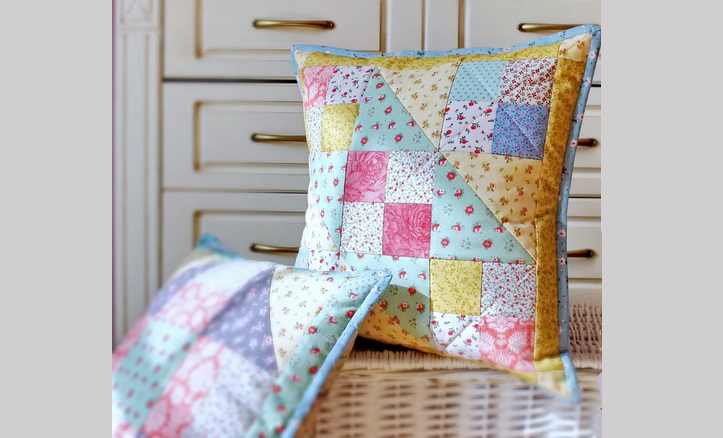
The pillowcase is sewn by analogy with the pillow. Below are interesting ideas of patchwork to create such a product.
Cunning in patchwork sewing: High -speed technique
In a patchwork sewing, an important role is played by a correctly selected color scheme. Casters manually create drawings for the future masterpiece on the basis of templates and schemes. Here are a few tricks for high -speed equipment:
- For cutting, it is worth using tailor scissors, but for opening - manicure.
- Use thin pins, with one wheel at the end.
- Without patterns, the specialized ruler will help to cut the necessary parts.
- To accelerate the assembly based on, it is worth applying a layer of special glue.
Rules for preparatory and basic work:
- Wash and flex the fabric before work. This is necessary to reduce defects after shrinkage and changes in colors.
- Repeatedly used shirts of nachamalt.
- Draw the fabric only with chalk, soap or pencil.
- Cut the cut only in the direction of the shared thread. And in the new fabric for this purpose there is an edge.
- For cutting, you should use templates.
- To create a masterpiece, use schemes.
The selection of tools is simple: you need to sort all things by color and texture, and then proceed to sewing. Creating a scheme and a sketch is an important stage for both beginners and experienced needlewomen. As for sewing, it should be carried out strictly at the stages:
- Sewing fragments
- Creating blocks
- Sewing to the base
- Decoration
Introductory sewing allows you to make not only original crafts, accessories and souvenirs, but also the necessary things from old objects. The technique is quite simple. Even a beginner will cope. It is only a little attention to the methodology of execution, accuracy, imagination and ingenuity.
The best products in patchwork technique: Ideas
If you want to sew something useful and necessary in everyday life from flaps, then you need ideas for inspiration. You can choose any technique from the above. Below you will find the best products in the technique of patchwork:
