In this article you will find several patterns and step -by -step instructions to sew beautiful dolls from fabric with your own hands.
Contents
Fabric dolls will make your interior truly domestic and cozy. To make an interior doll with your own hands, except for colored shreds and knitting threads, a pattern is necessary. In this article you will find several patterns of different interior dolls. We also prepared for you photos and step-by-step instructions that will tell in detail how to sew dolls from fabric, and a master class will help you make a beautiful home-made doll without misses and errors.
Fabric doll - "Josephine"
Our first model is suitable for those who are interested in fabric dolls for beginners. Although these dolls are very bright and interesting, and therefore they may interest very experienced needlewomen.
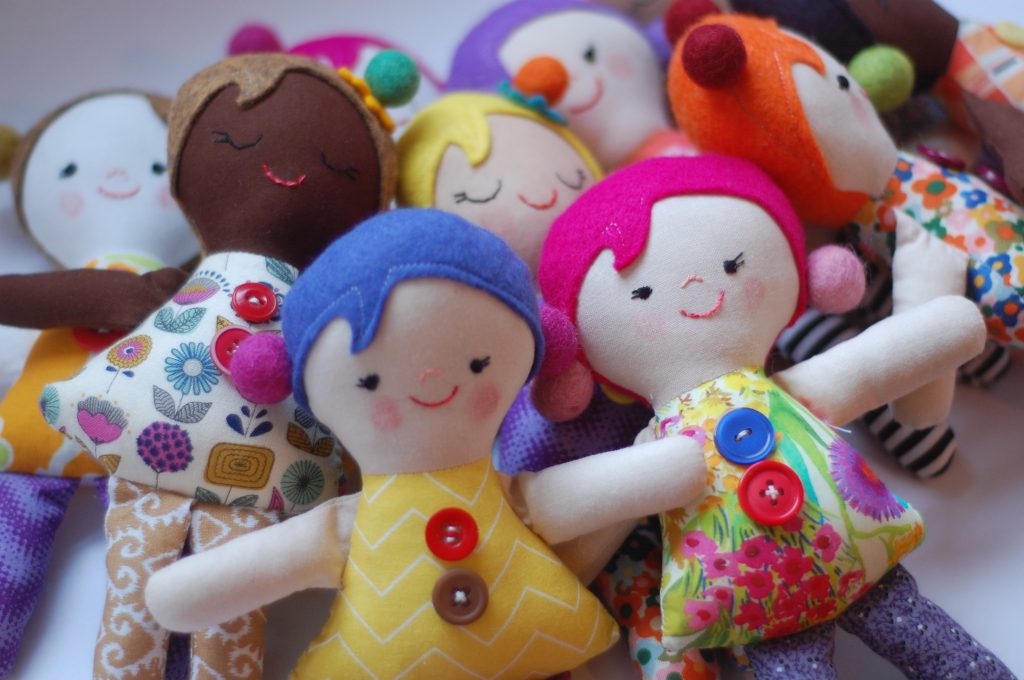
For the manufacture of this doll from fabric with your own hands, you will need the following materials:
- Cotton shreds beige for the face, legs and arms. For dresses and tights, you need cotton shreds with print.
- For hair dolls are suitable for small pieces of felt.
- Filler for stuffing: synthond or Hollofiber.
- Threads muline for embroidery. For such dolls made of fabric as in the photo, you need black, pink and peach threads.
- Bright buttons To decorate the dress. The hair in the example is decorated woolen balls, Such balls can be bought in needlework stores. In order to draw ruddy cheeks doll, you need lipstick.
The pattern of the doll from the fabric in the figure is below, it has allowances for the seams. The holes for turning the parts are indicated by dashes.
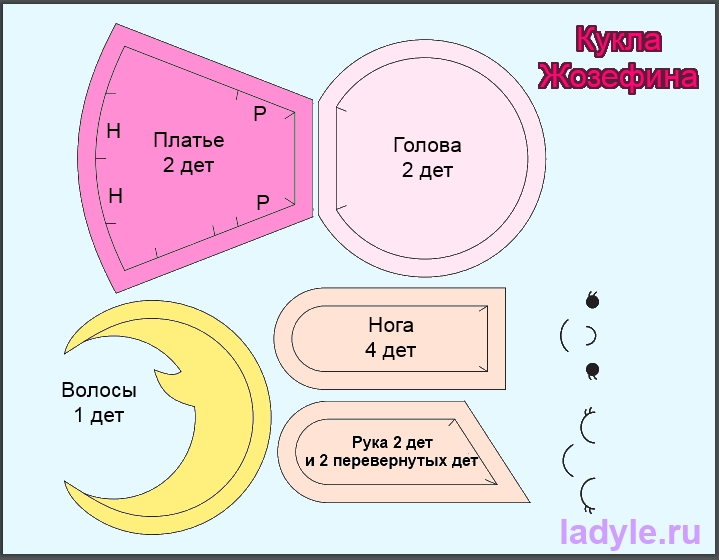
Fabric dolls-a master class with photos:
- The pattern of the doll from the fabric is transferred to matter. It is convenient to do this with a special endangered marker, and if it is not, use a chalk or a pencil.
- Put the doll hair on her face and fix it with needles. The facial features of a doll from fabric are more convenient to embroider immediately. But the face can be embroidered and then, when the whole doll is ready, and it will be possible to reflect on what the face should be at this doll.
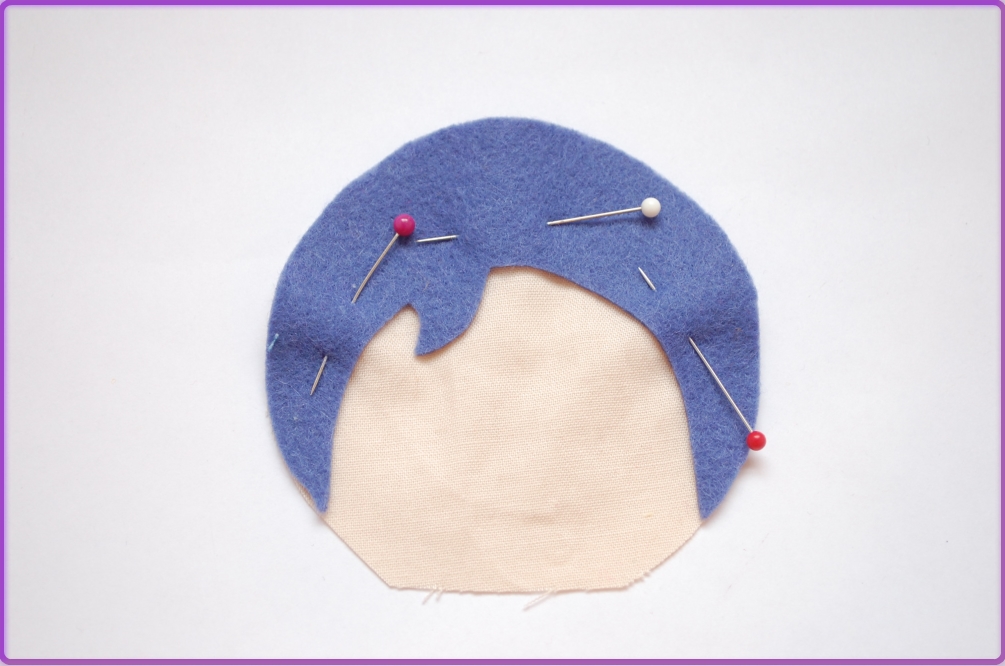
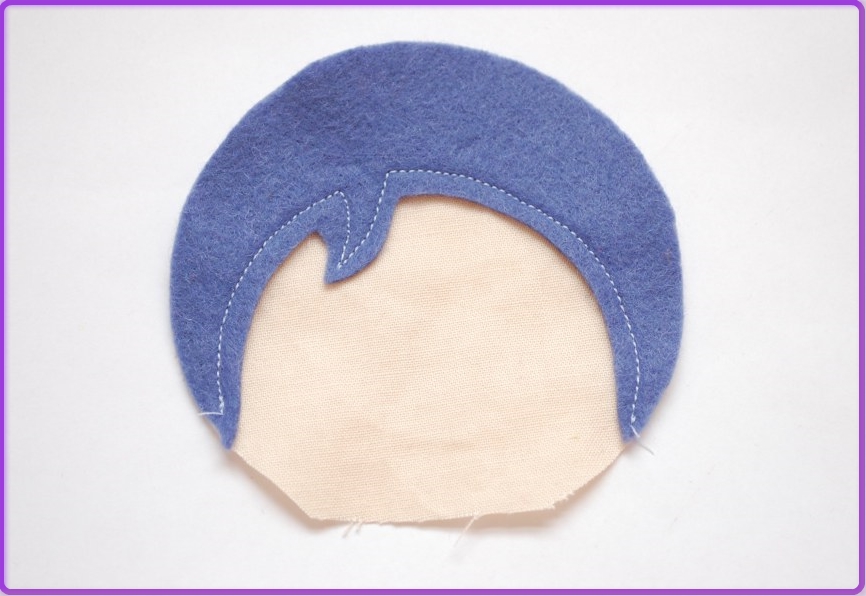
- Spend the hair growth line doll from fabric.
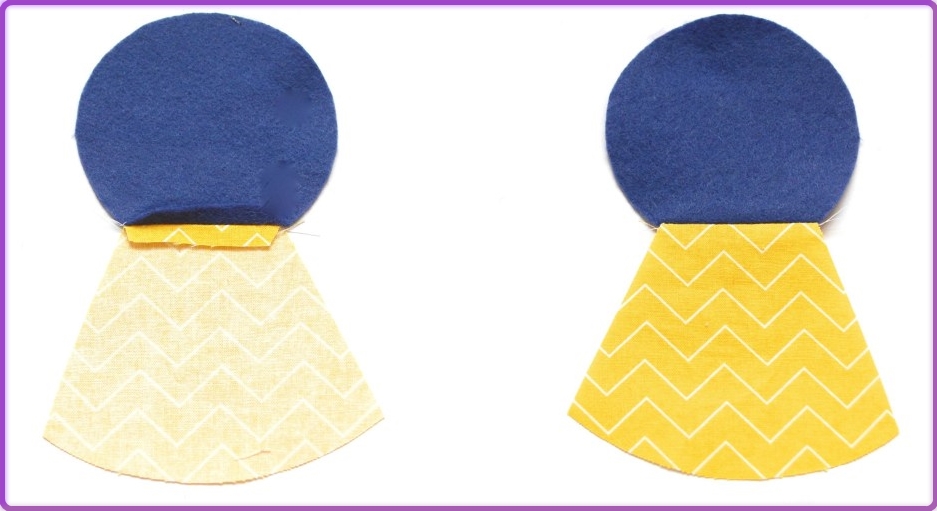
- Sew the face of the doll and half of her dress among you. Fold the details with the front sides to each other, and make a seam in the neck of the doll.
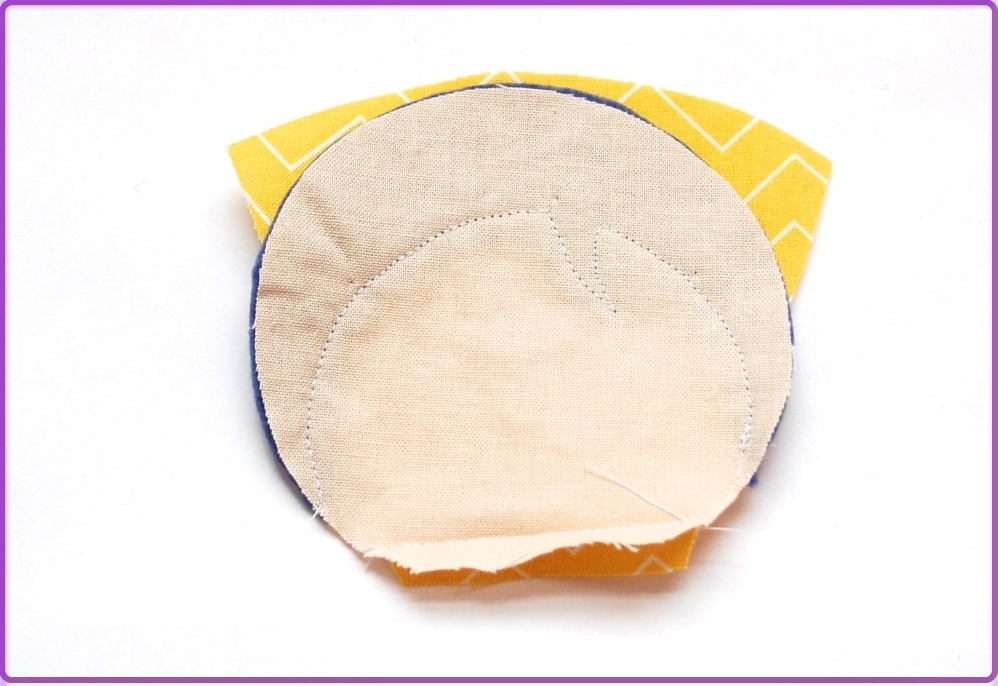
- After stitching these parts, you should get the same design as in the next photo.
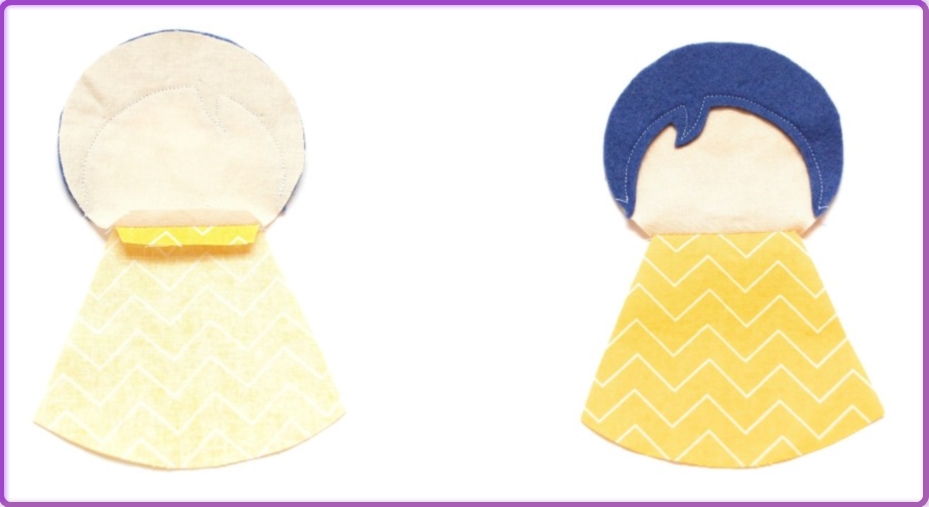
- To the felt nape of the doll from the fabric, we sew the second part of its dress. You should get a second detail that will be the back of the doll.
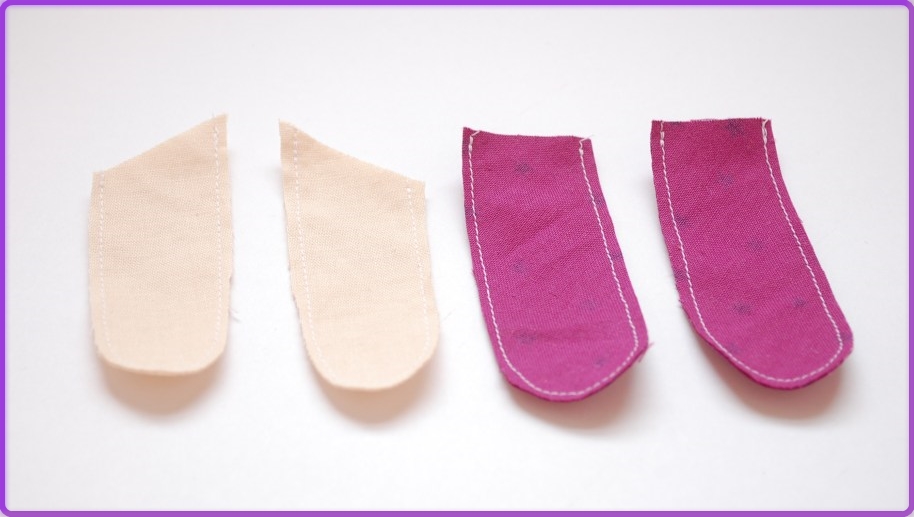
- Sew your arms and legs dolls from fabric. After that, carefully cut the excess fabric for allowances for the seams with scissors.
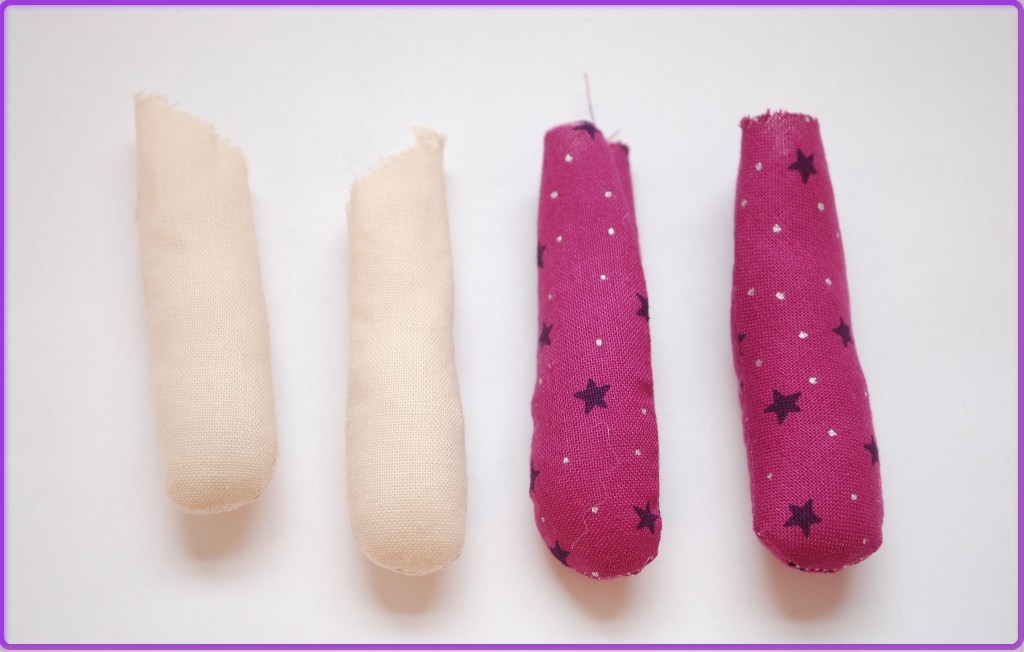
- Now the pens and legs of the doll must be filled with synthetic winterizer. Swipe their lower part tightly, plug the filler inside with a pencil. The middle part is not filled so tightly that the arms and legs turn out soft. And the upper quarter must be left without stuffing, so it will be more convenient to sew the parts to the body.
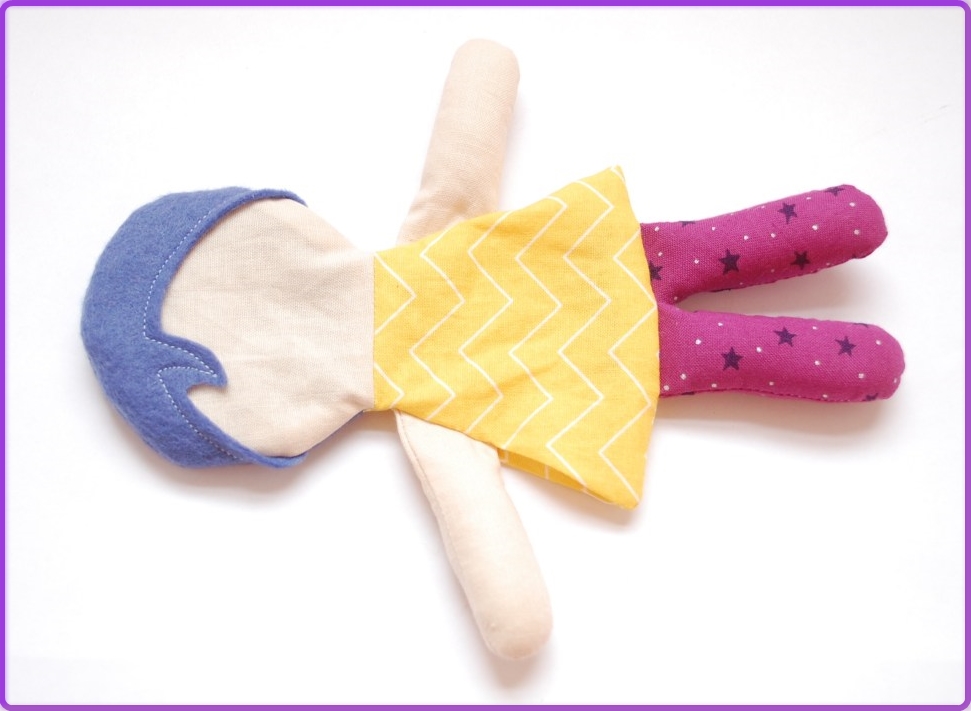
- Take the front of the doll and place your arms and legs on it as shown in the next photo. Fix the details in this position by sewing them with large stitches.
- Please note that the edges of the doll's legs should end below the edge of its dress. This is necessary to hide the unprocessed edges of the legs in the seam.
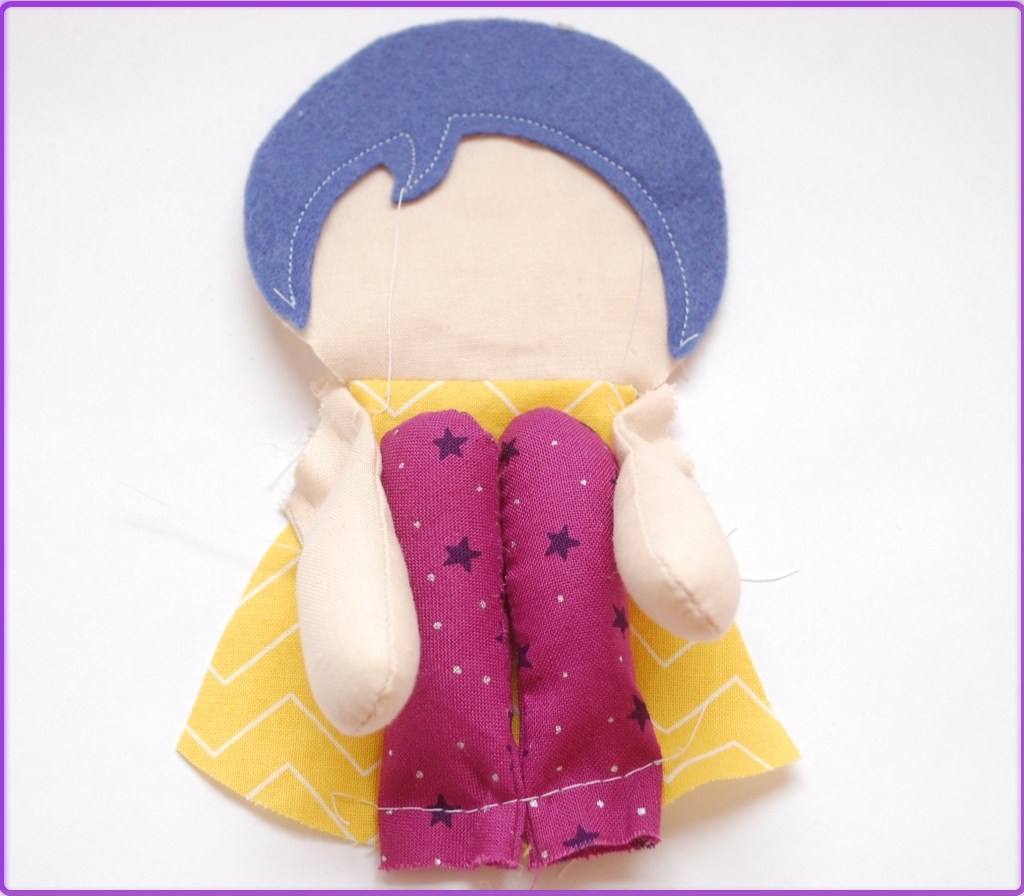
- After that, sew the legs of the doll to the dress on the sewing machine or manually small stitches. After that, your craft should look like in the next photo.
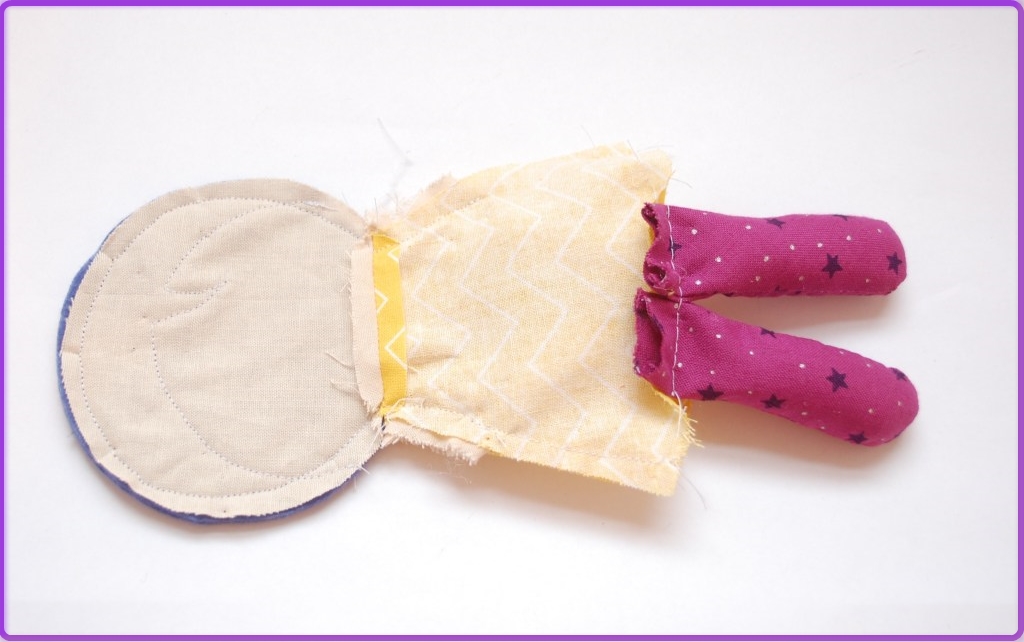
- Now is the time to sew together the front and back of the body of the doll from the fabric. Put your hands in the dolls between the front and back detail and stitch the doll dress on the sides.
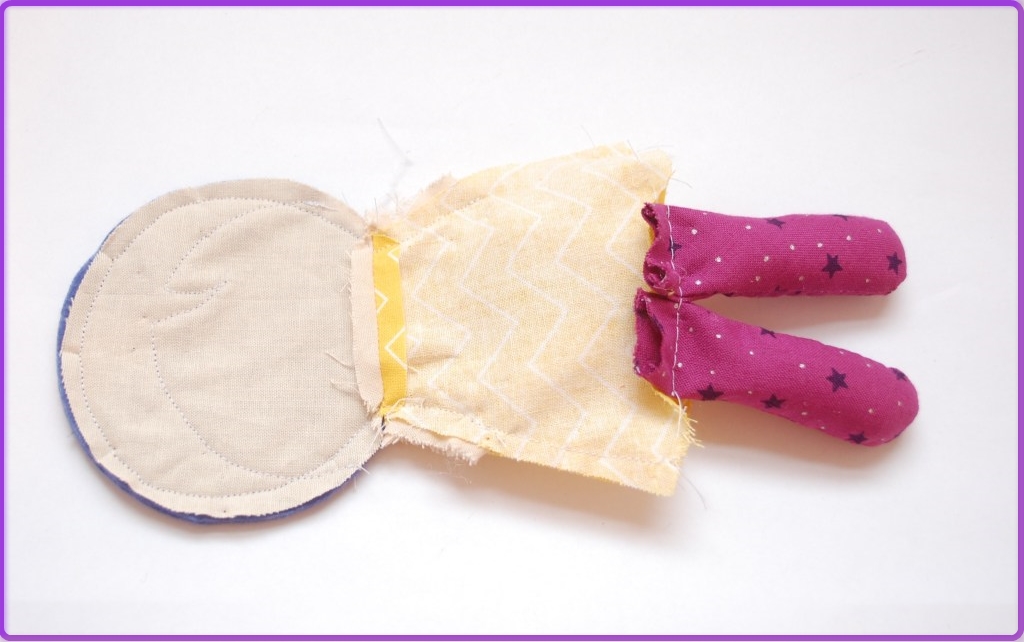
- The legs at this stage should still hang out freely. The bottom of the dress we will put on later.
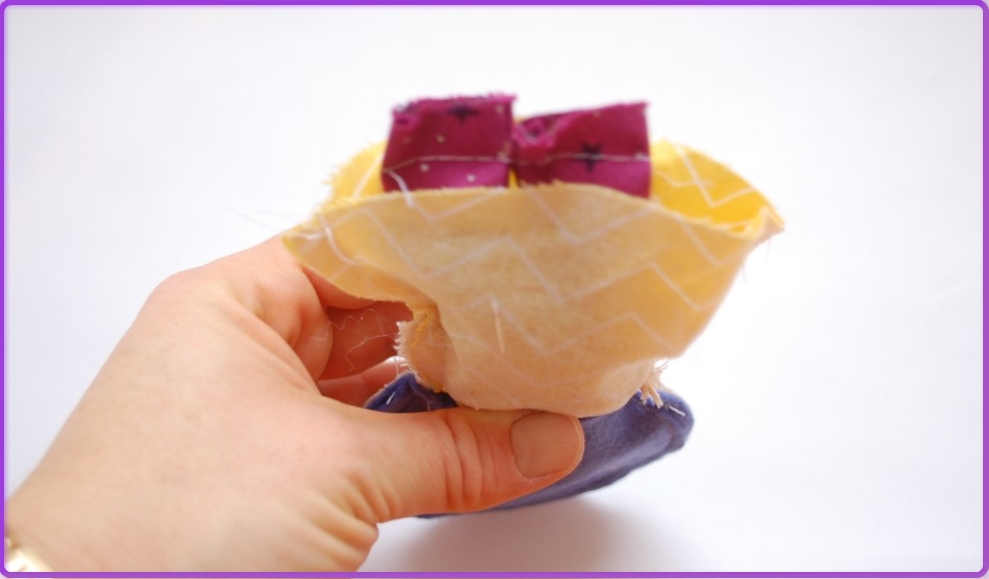
- Leave a small hole in the dress so that the doll can be turned out, and go the lower part of the dress. The unprocessed edges of the legs of the dolls should be sewn into the seam.
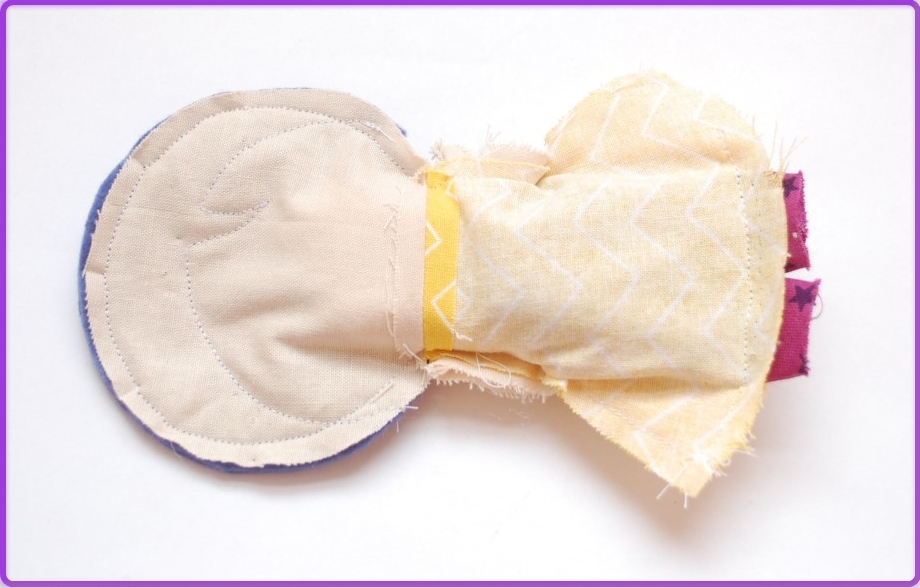
It is important to fix the ends of the seams and their folds, especially not the neck of the doll. Manually make stitches in these places.
- Now the doll is to turn the time. This is how she will look without stuffing.
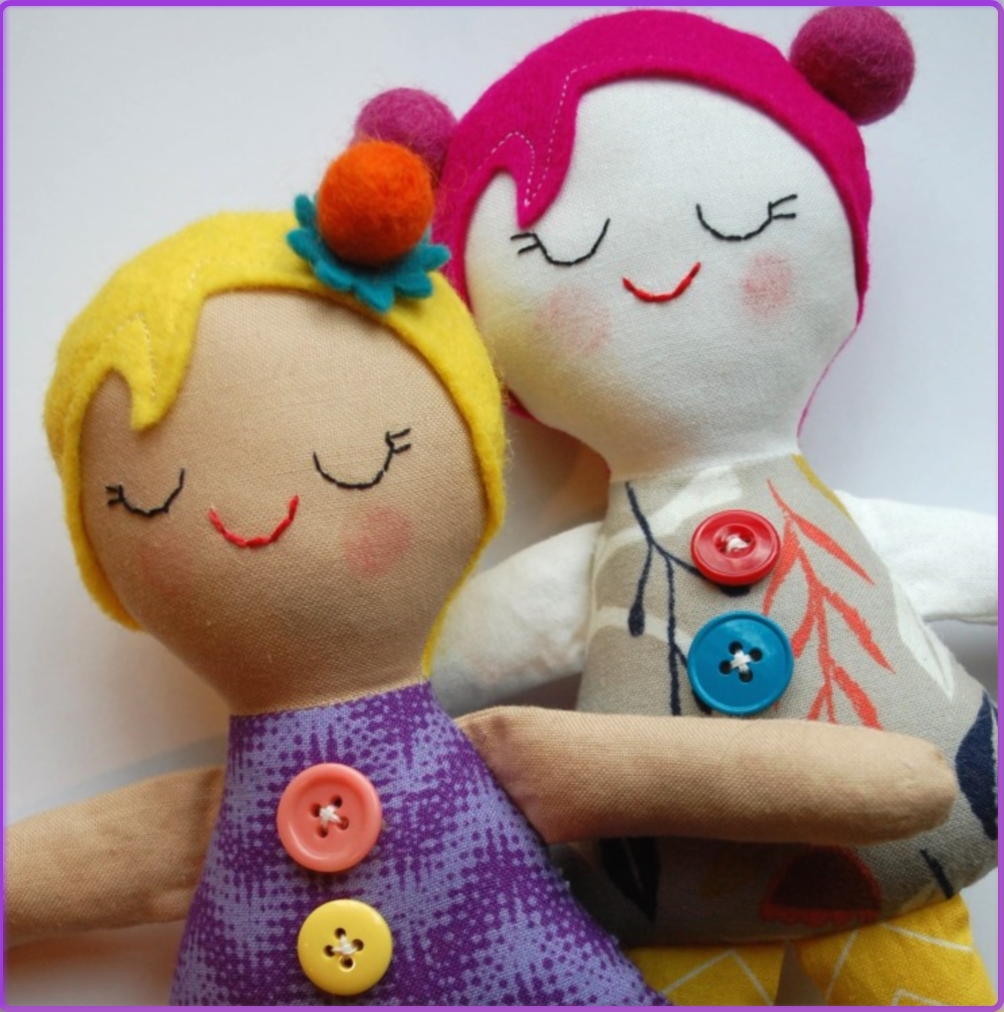
- It remains to fill the body of the doll with synthetic winterizer and embroider facial features. Start embroider eyes from the last cilia. Decorate the doll buttons and woolen balls as you like.
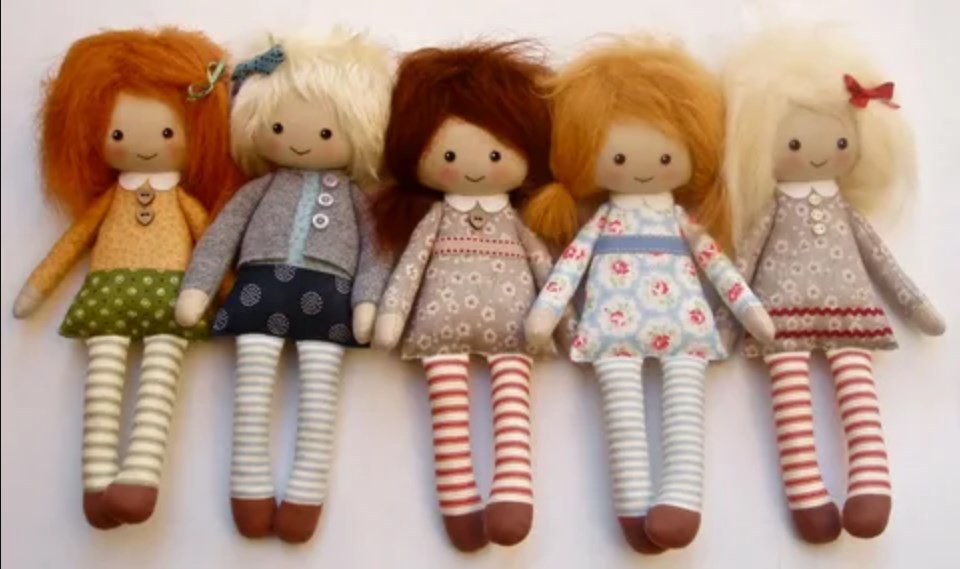
- A doll made of fabric is ready! Below is an example of ready -made dolls with your own hands.
To make a blush doll, get wet lipstick with a wet cloth. And then with this napkin, transfer the paint to the doll cheeks.
Fabric doll for beginners from socks
Such as the next model, fabric dolls for beginners are quite easy to sew. And the materials for work will also need very simple.
The necessary materials for this fabric doll:
- A pair of unnecessary socks of white, beige or light pink.
- Fluffy knitting threads to make hair.
- A piece of bright fabric for a suit.
- Color ribbons for bow and shoes.
- Muline threads to embroider facial facial features.
A doll made of fabric will turn out about the same as in the next photo. Although your beauty can be another, for example, in a dress and with long hair.
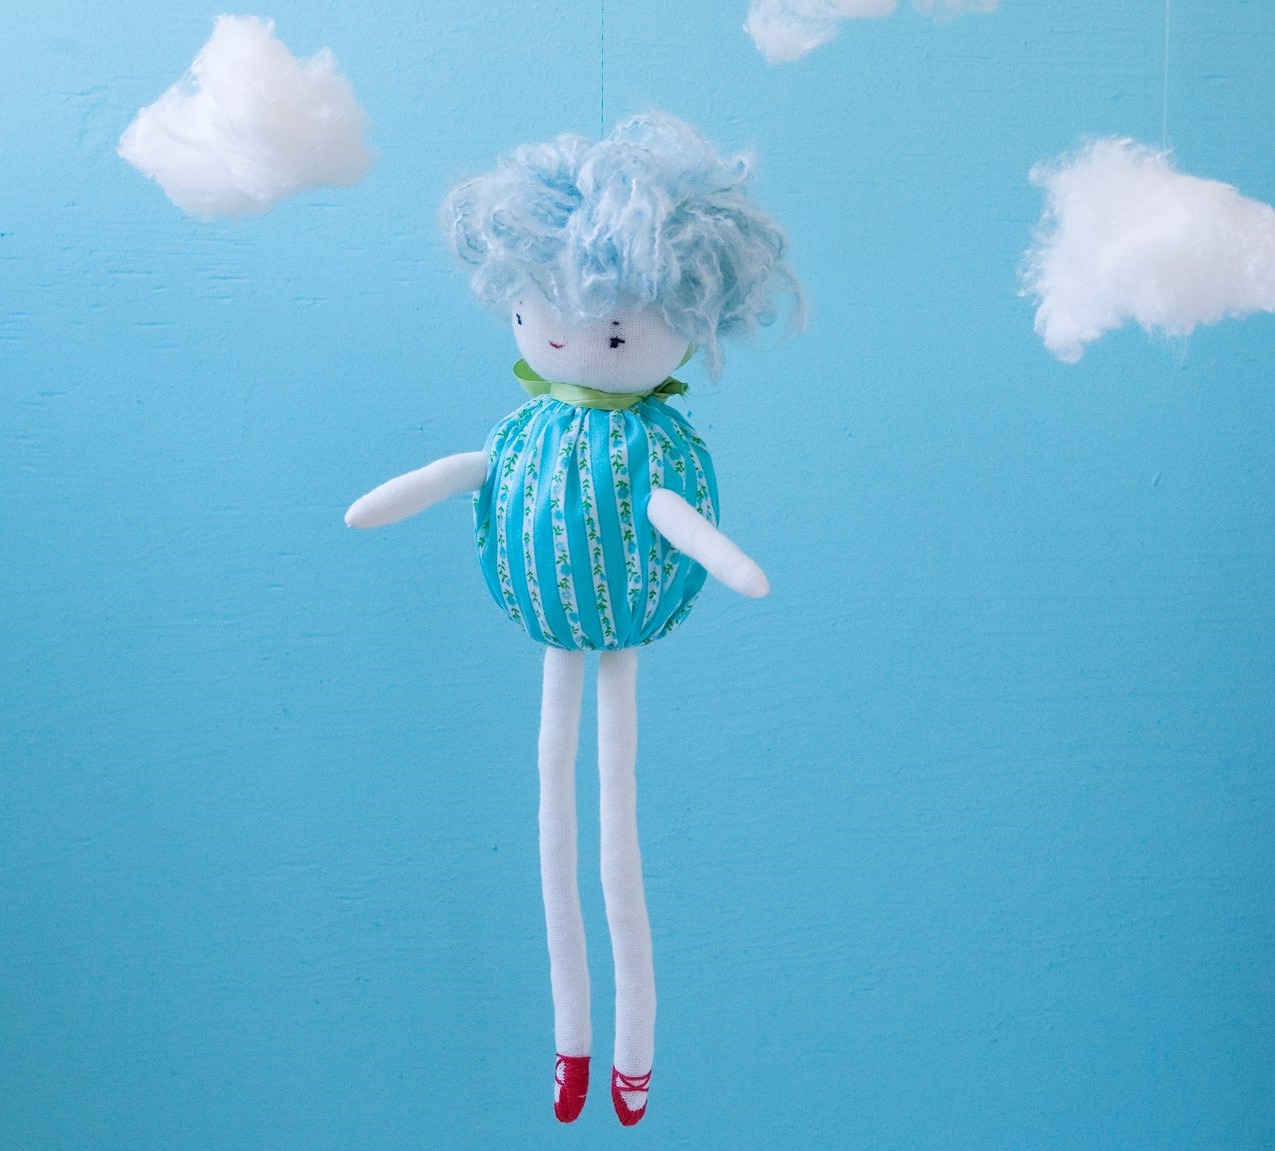
And he will tell you how to sew such dolls from fabric a master class below:
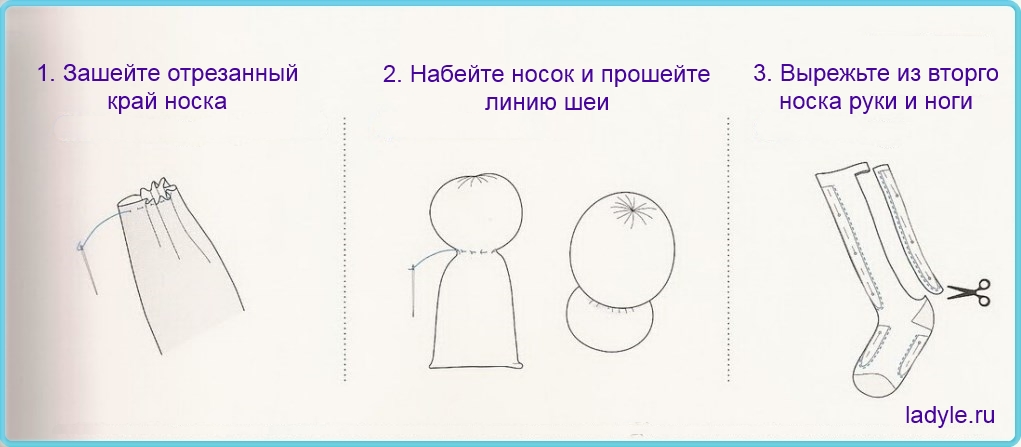
- We take the first toe and cut off the upper part from it, in which the toe is straight. Sew the hole at the top of the toe.
- We stuff the sewn part so that the ball turns out. He will be the head of our fabric doll. And then we take a strong thread and sheathe the future head of the doll in the neck of the neck with large stitches. After that, tighten the thread and tie it.
- From the second sock you need to cut hands and legs. Long details in the third figure will turn into the legs of the dolls, and short ones - respectively in the hands.
- Sew the arms and legs of the doll. First we fasten them with pins, and then manually make several stitches in place to firmly fasten the details.
- From bright fabric we sew a suit for our interior doll. We make slots for the hands and legs as shown in the figure in the middle.
- Embroider the dolls with thick threads. The scheme with the location of the stitches is shown in the figure.
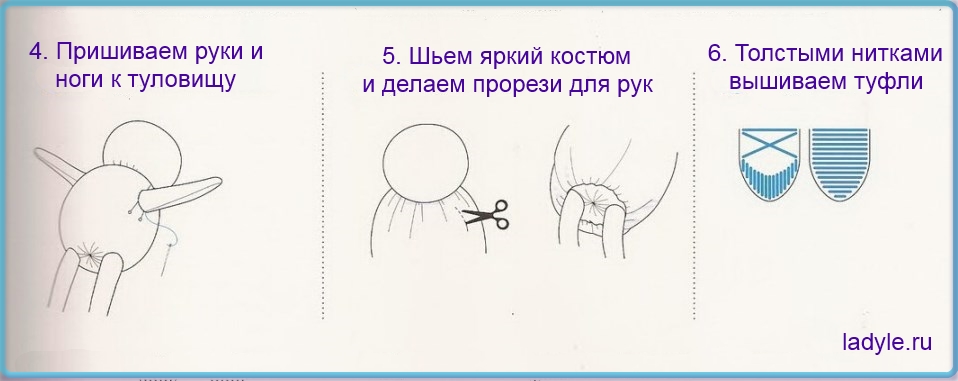
- To make hair a doll made of fabric, a master class offers to use fluffy knitting threads. They need to be collected in motorcycle and firmly bandaged in the middle.
- After that, the hair must be sewn to the head.
- The facial features of the doll are embroidered as shown in the diagram. If you wish, you can make a face a little different - add cilia and blush.
Fabric doll - Fabulous Mashenka
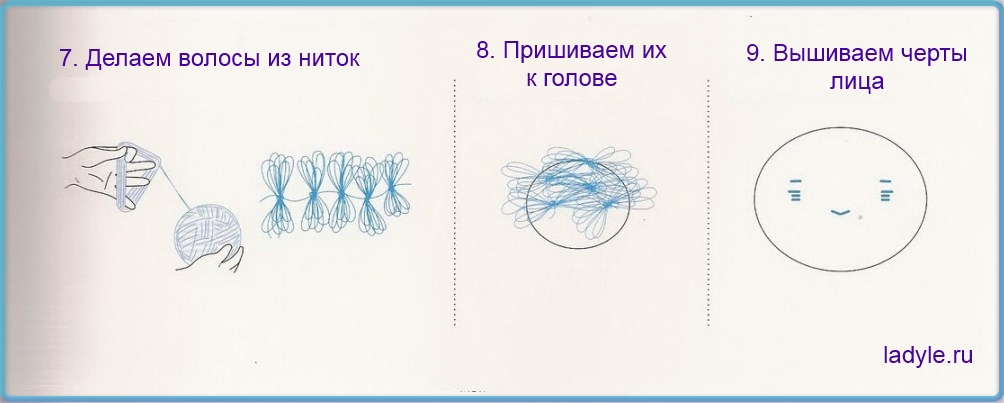
Our next doll made of fabric made a body, and hair, and a dress with an application. Sewing such a “girl” is a little more difficult than previous fabric dolls for beginners. But the result is worth it, the doll is similar to a fabulous heroine from the fairy tale "Masha and the Bear." If desired, you can make another costume, and turn this interior doll into a red cap or princess Snow White.
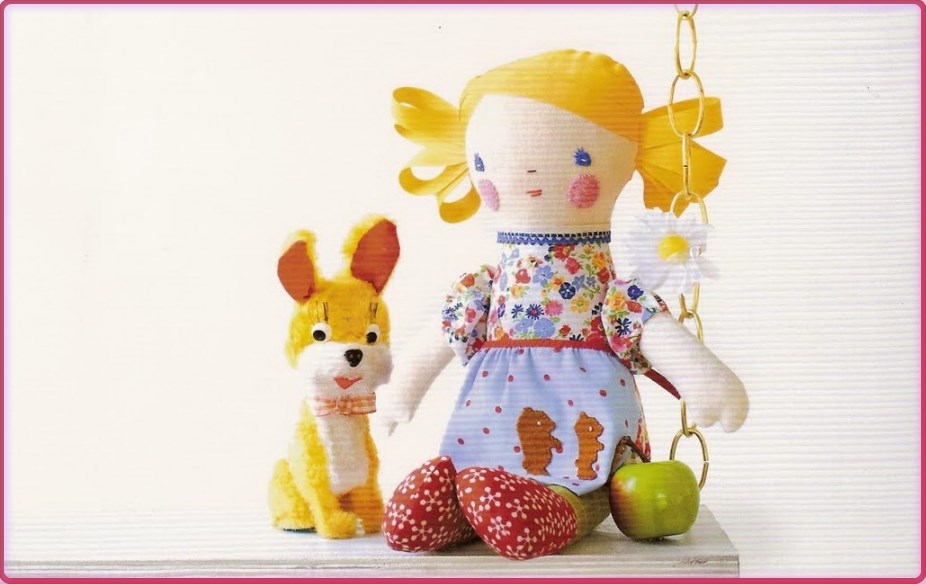
Patter of fabric dolls:
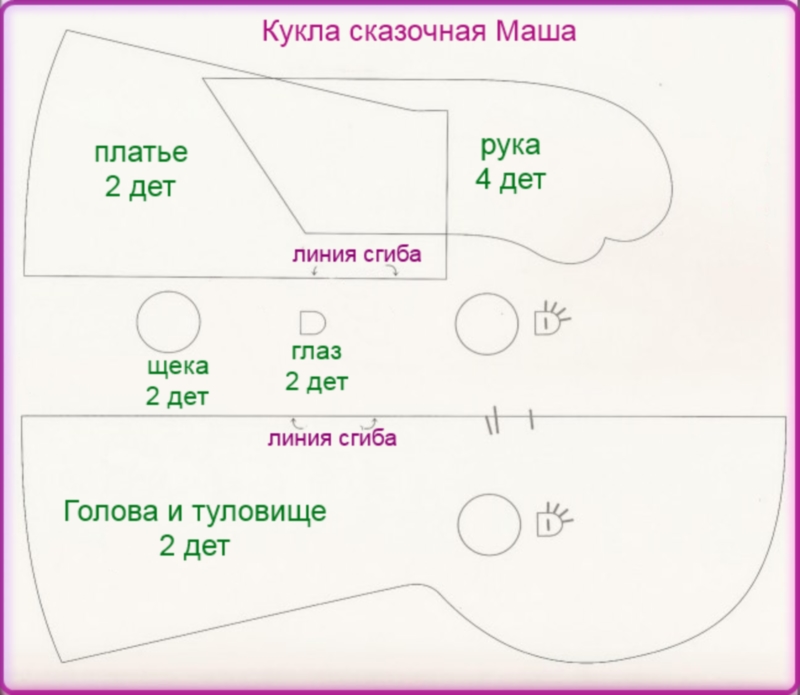
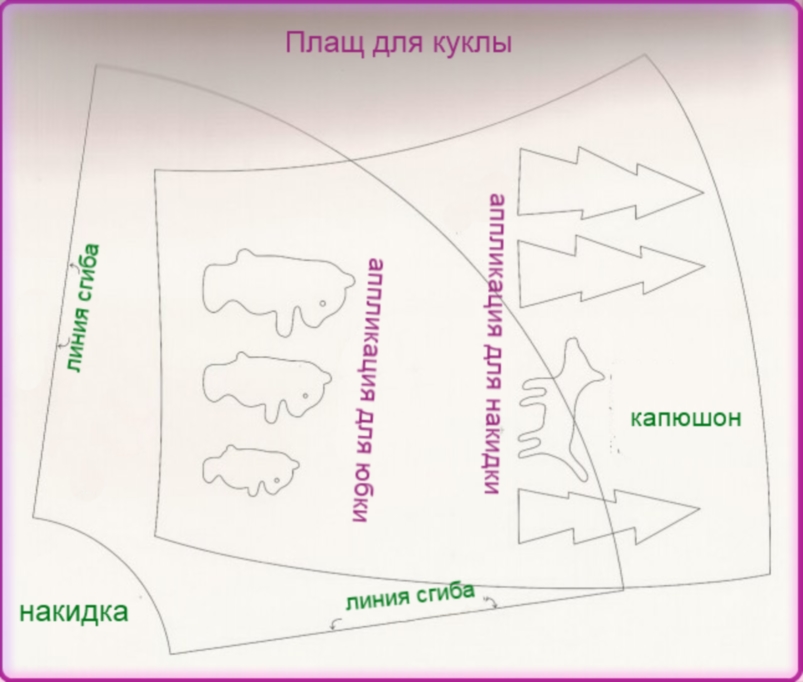
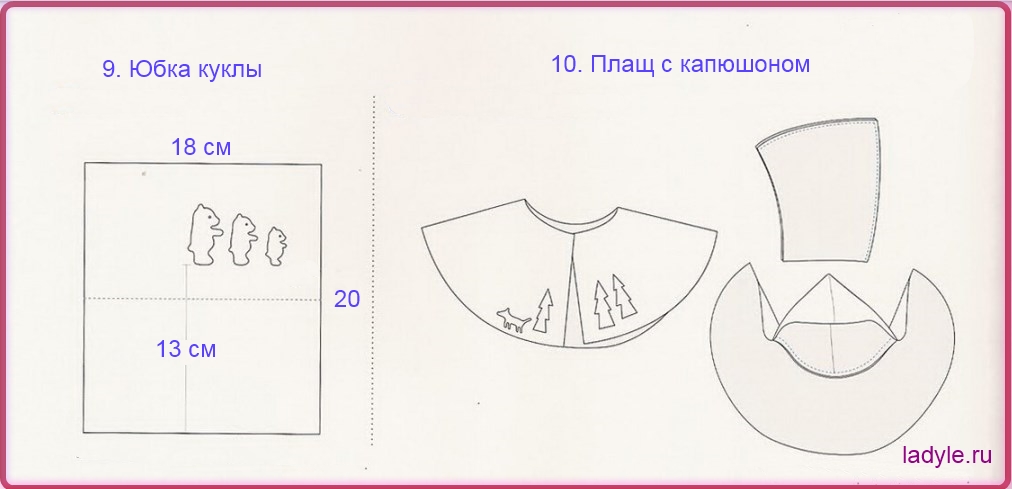
We offer to supplement the image of the doll cloak With a hood and application. Its pattern is lower.
Sewing fabric dolls-master class:
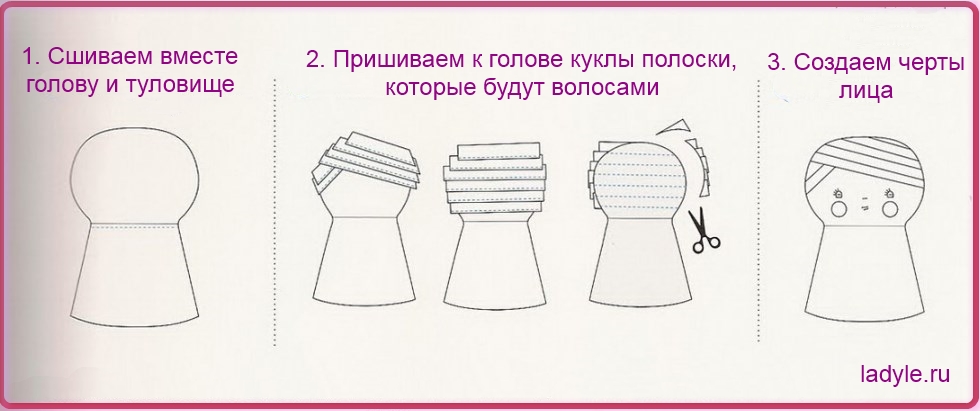
- First of all, we sew together together for the head and details for the body. The body of the doll will be simultaneously the upper part of its dress. Therefore, we take for him a fabric with a bright pattern.
- To make hair a doll made of fabric, it is convenient to use the finished fabric base that is sold in skeins. We sew the fabric strips to the head as shown in the figure. Cut excess fabric with scissors.
- Facial features of the doll are embroidered with the surface of the muline threads.
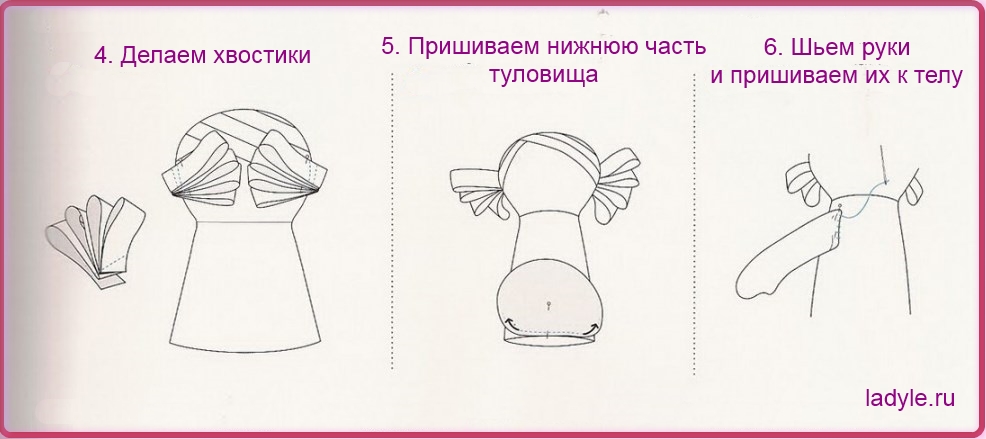
- We continue to work on a doll made of fabric with our own hands. From strips of fabric, we make it pretty tails.
- To the bottom of the body you need to sew a circle of the same fabric.
- We sew our hands and sew them to the body.
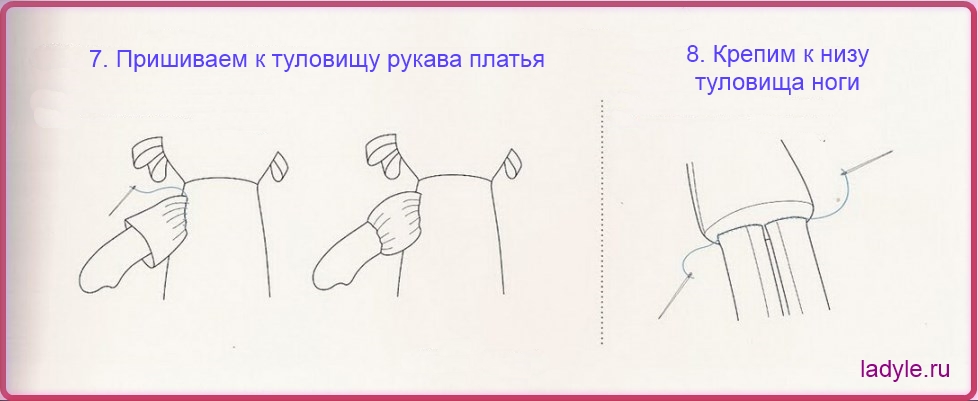
- Now, from pieces of bright fabric, you need to make the sleeves of the “flashlights” and sew them to the body and pens of the doll.
- The next step to the bottom of the body you need to sew your legs.
- Our doll is a girl and, of course, she needs a beautiful dress. We already have the upper part of the dress, and the skirt can be made from such a rectangular piece of fabric as in the figure below.
- To supplement the image of a fabulous Mashenka will turn out to be a cloak with a hood. Let it be fastened in front of one big button. The cloak will be more beautiful if you decorate it with applique.
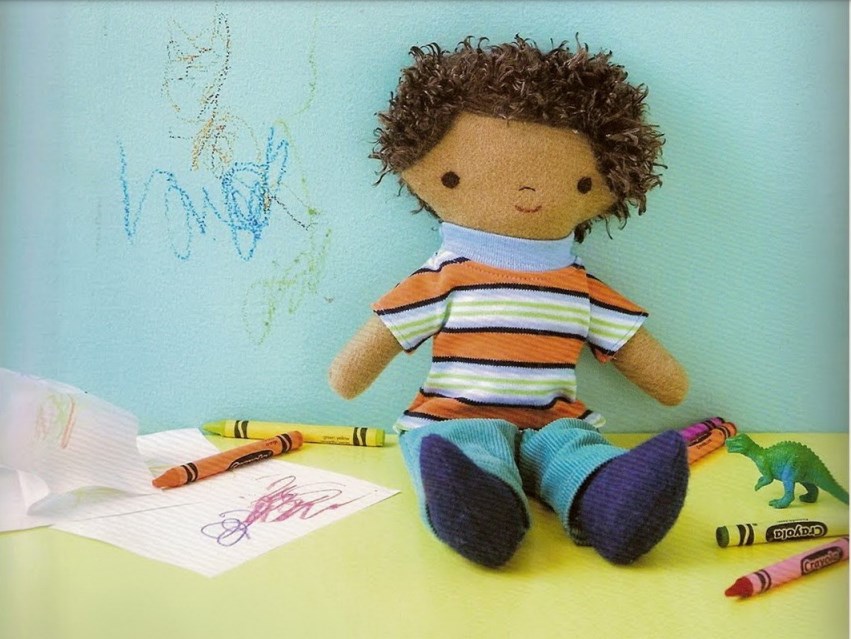
Takan's doll - Eddie boy
Our last doll made of fabric is Eddie's boy. He will have artificial fur, pants and a real knitted sweater.
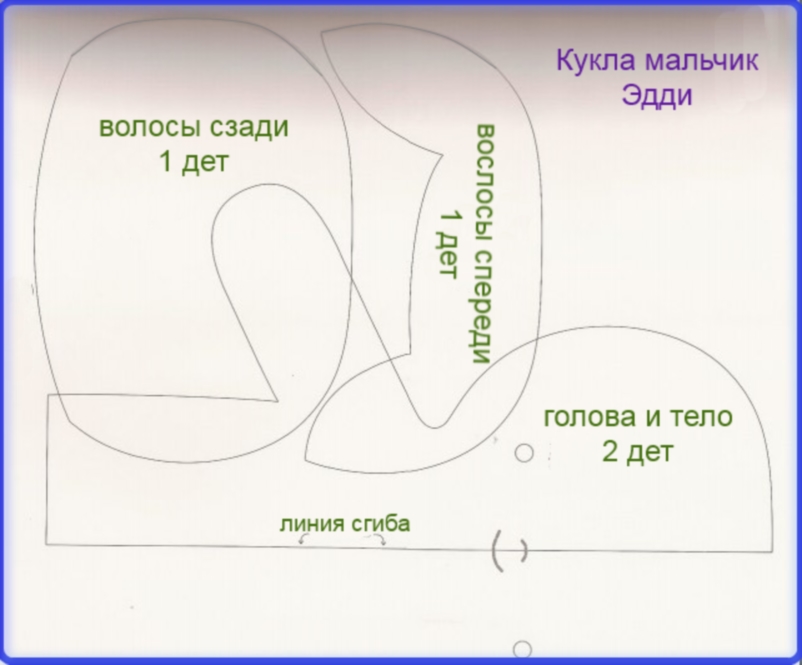
And the pattern of this doll made of fabric will be the same as in the next figure. The head of the doll is combined with the body, the handles are also combined with the body, and the hair consists of two details: bangs and a nape.
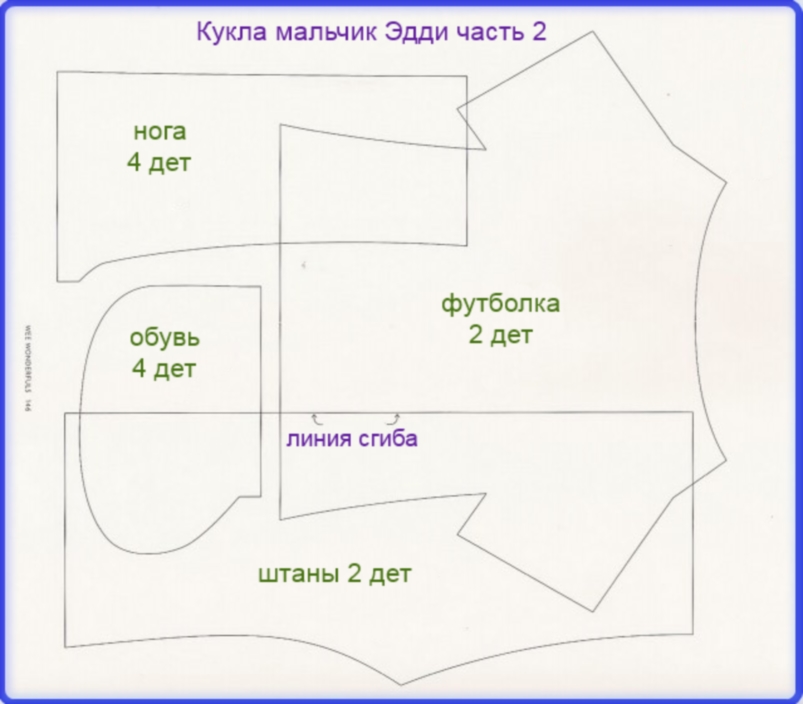
On the second part, the patterns of the doll, her legs, pants and boots. The sweater can be sewn from your unnecessary sweater, cut the parts from it and sew a knitting thread. Instead of a sweater, you can use your old T -shirt.
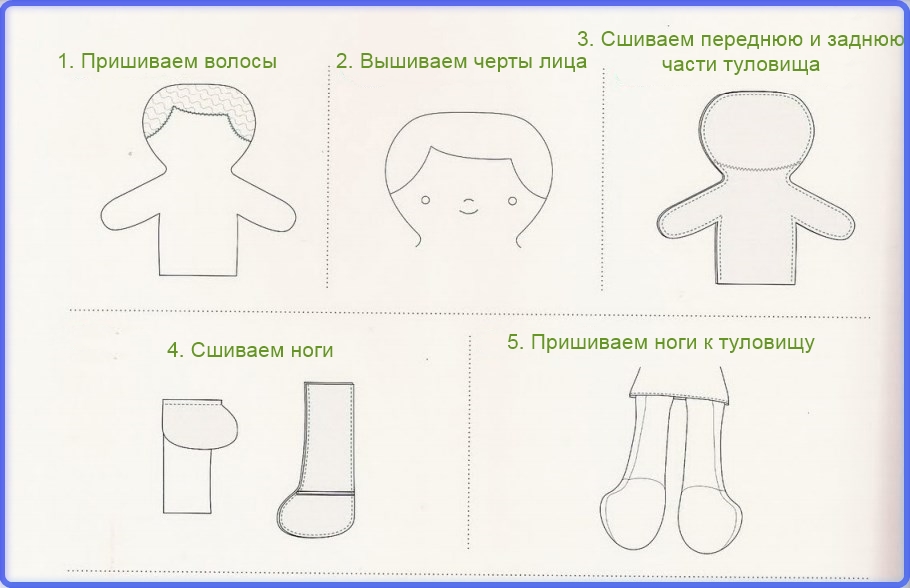
For this doll from fabric, the master class on sewing will be as follows:
- Sew the bangs to the head of the doll. You need to make a seam along the hair growth line.
- Create the face of the doll. The eyes can be sewn like an application, or you can embroider with threads.
- After that, sew the front and back of the body.
- To the details of the legs, sew the details of the boots of the doll from the fabric, and then sew the legs of the doll.
- We sew our legs to the body.
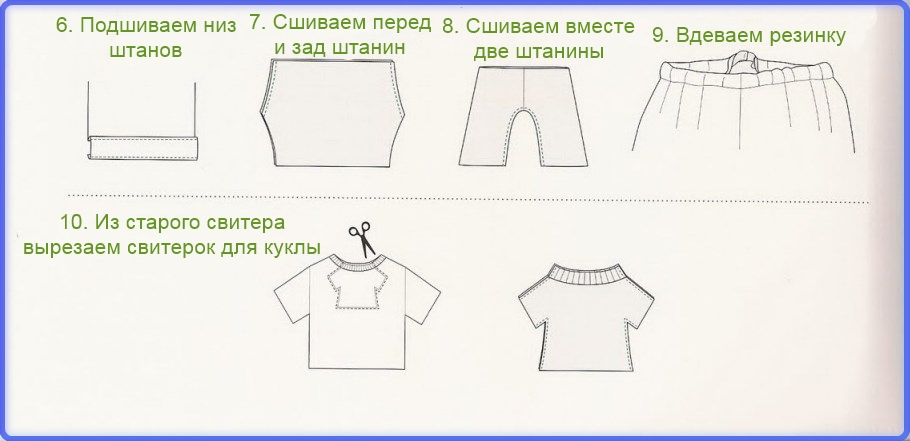
- At the next stage, you need to do clothes for Eddie. The bottom of the pants needs to be bent, like the bottom of real trousers.
- Sew the legs along the lines that are shown in the figure.
- After that, we sew two trousers together.
- It remains to sew the gum in the upper part of the trousers.
- A sweater or t -shirt for a doll can be cut out of your unnecessary things, as shown in the figure below.
