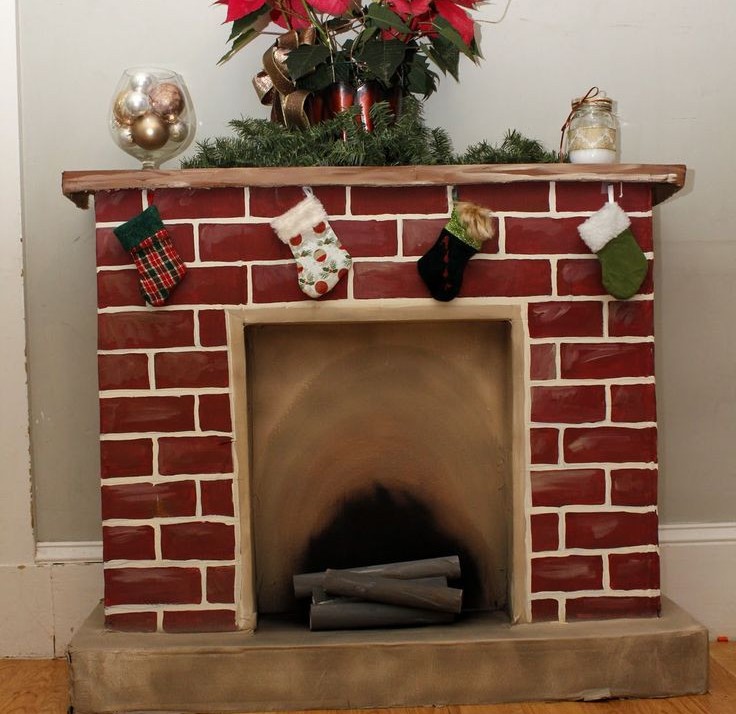
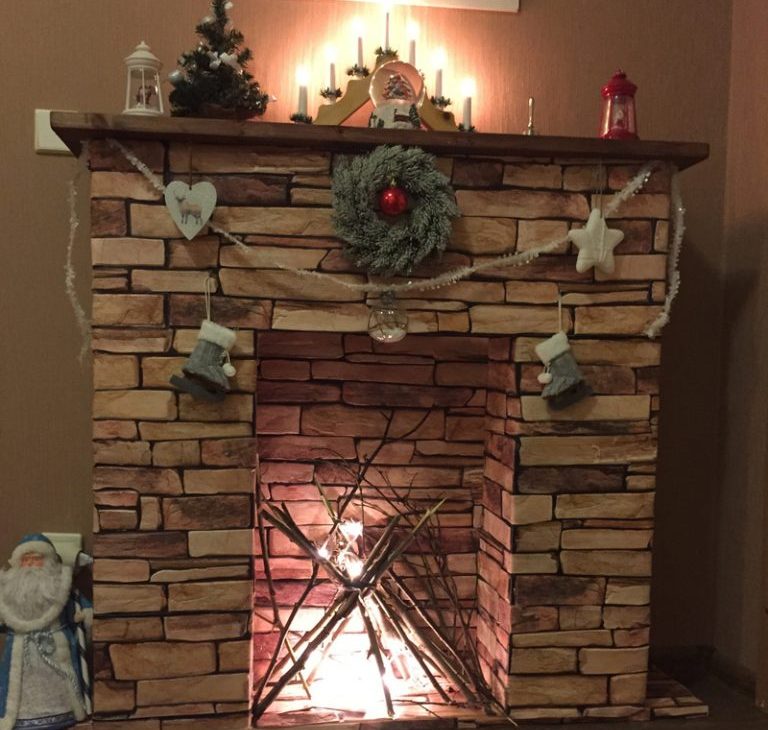
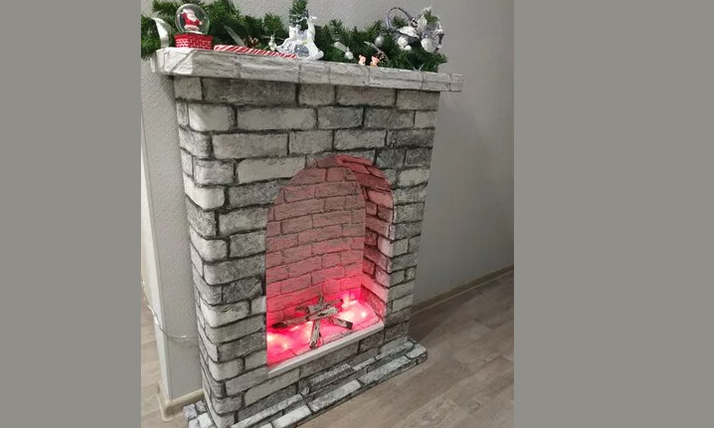
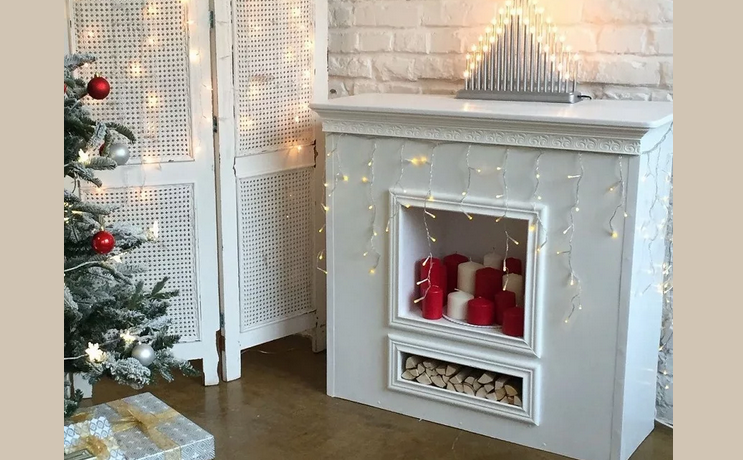
In this article you will find a lot of instructions and ideas for creating a cardboard fireplace with your own hands.
Contents
- Decorative fireplace - where to start?
- A decorative fireplace from a cardboard box from under the TV with your own hands: step-by-step instructions, template, drawing, dimensions
- Video: with your own hands fireplace
- How to make firewood for a cardboard fireplace?
- Bricks for fireplace fireplace: dimensions, manufacturing
- Cardboard fireplace grille: DIY
- Fire for a fireplace fireplace: manufacturing instructions
- How to paint a cardboard fireplace?
- How to glue a cardboard fireplace?
- Folls made a fireboard fireplace for New Year, Christmas: Ideas, Description
- Video: Fallen-stone from boxes. New Year's fireplace from cardboard
- Volumetric fireplace from cardboard and napkins: manufacturing, description
- Video: DIY decorative fireplace from a TV box + decoration ideas
- A fireplace and foam fireplace: how to do it?
- A small fireplace fireplace in white: with your own hands
- Video: desktop decorative fireplace from cardboard. Cardboard crafts
- DIY corner fireplace from cardboard
- The most beautiful fireplace fireplaces with your own hands: photo
- Video: with your own hands fireplace fireplace
Each of us sooner or later wanted change - surrounded or in ourselves. The creation of a cozy corner where it will be possible to spend time will be a successful idea. And do the redevelopment or new repair is too expensive? Then we turn on our own imagination and move on to the creation of the most beautiful fireplace from improvised materials.
The whole day of work and already in the evening the whole family will be able to gather with him. In this article we will talk about the features of the installation of different types of fireplace, and show how to make all the components of the elements in stages. Let's start.
Decorative fireplace - where to start?
The embodiment of the idea of \u200b\u200binstalling a decorative fireplace begins with the choice of a place and its parameters. Go into the room and look around. The presence of free space near the wall, an unoccupied corner or space between the windows is empty, then this is the very thing. We take a tape measure and measure it. We take away from the resulting size 4 cm (Freedom of installation) and we get the length of the finished product.
Next, we decide what height and depth I wanted. These indicators are relative, because at the time of assembly of the fireplace we will focus on the size of the raw materials (cardboard boxes) and try not to violate the indicated values.
Now we move on to the most important thing - the creation of a fireplace. We have developed 12 practical ideas related to the selection of material and fireplace assembly technologies. Read further.
A decorative fireplace from a cardboard box from under the TV with your own hands: step-by-step instructions, template, drawing, dimensions
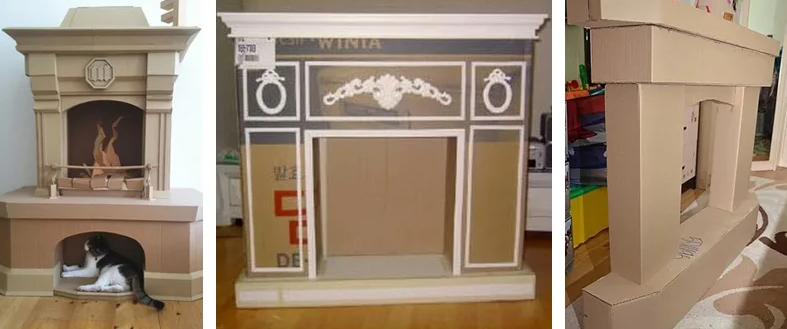
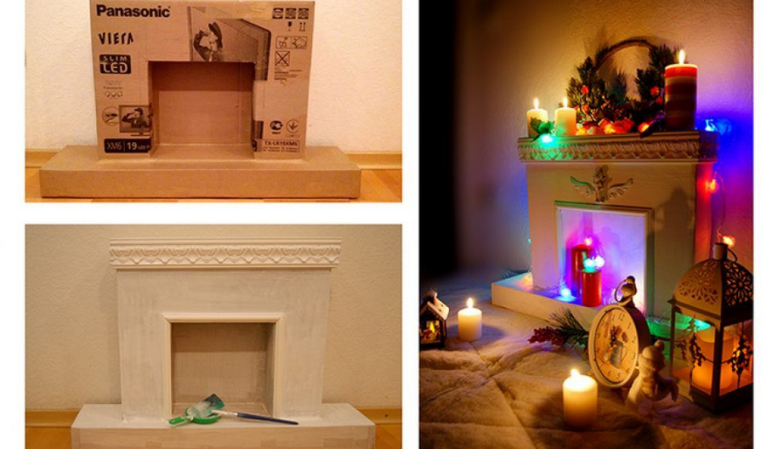
If you have a depth restrictions, the use of a cardboard box from under the TV will be the most successful option. So, we make a decorative fireplace with our own hands. For this we need:
- An empty box from under large household appliances (plasma TV)
- Cardboard from other boxes or sheet
- Construction tape and glue
- Scissors, ruler or roulette, pencil
- Primer or paint
- Decor elements
From such a box you get a rectangular fireplace. The hole in it can be made both semicircular and directly proportional to the box. Decide to your liking, but remember:
- It is more difficult to work with rounded edges (to cut, glue and decorate evenly).
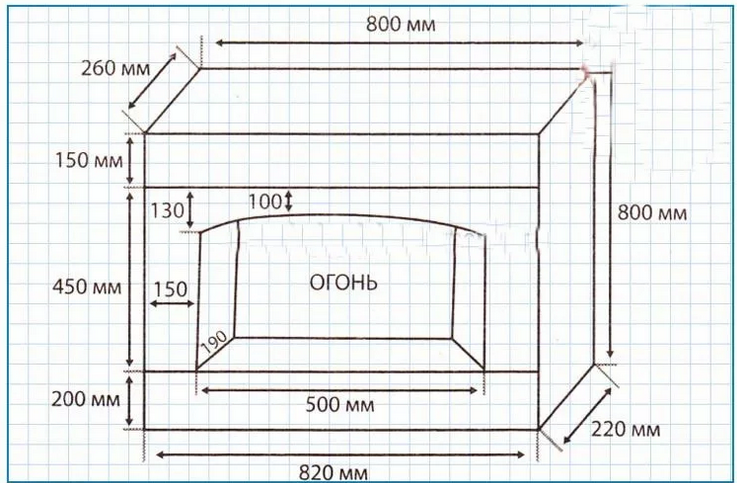
The internal portal should not be very large and occupy no more 50% from the front side. So the design will be more stable, and the walls will not pass over time. Here is a template, drawing and dimensions:
Step-by-step instruction:
- We begin to collect a decorative fireplace from the central part, namely, from the bending of cardboard into the columns.
- It is necessary to make a flat fold and not to break the top ball.
- To do this, take a ruler and a pencil, measure the bending place, apply a ruler and do not draw a rod, but turn the pencil.
- The reverse side is drawn along the ruler and get a recess. According to it, you will easily flex the cardboard and do not damage the rest.
- Next, cut the walls for the inner bed to the entire depth of the fireplace and fix it with painting tape. Try to use paper, because it can be easily painted. If you did not find this, then it is not worth it, PVA glue and strips from office paper width 10 cm They will replace it no worse.
- The back wall of the box will also serve as the back wall of the cut through the opening. Do not forget, if you plan to install the backlight, then at this stage you need to do it: make holes for light bulbs or prepare a place under the LED tape.
- According to the need, we make a shelf for storing things. It is larger in size (it can appear in front and sides no more 5 cm).
- If the design is stable, then use even a sheet of plywood.
- But basically, you can do several times folded by cardboard, and glue the edging from the same material to the edge.
- If in the idea of \u200b\u200bthe fireplace it was to create the effect of masonry, or other rejection, then we glue the selected elements around the perimeter and let it dry well or dry a hairdryer.
- Next, go to the primer and painting. Since the box from under the TV has a grayish color with large brand inscriptions, you need to get rid of them.
- The easiest way will first be painted in white, and then repaint in the desired one.
- The field of how the paint dries, you can take a sponge for washing dishes and walk (hard side) in separate parts. Such discreet scratches will create the illusion of antiquity and the fireplace will fit into any interior.
In conclusion, we fasten the decor elements and, if desired, cover the finished product with varnish. So your fireplace will serve longer and will not be spoiled by moisture.
Video: with your own hands fireplace
How to make firewood for a cardboard fireplace?
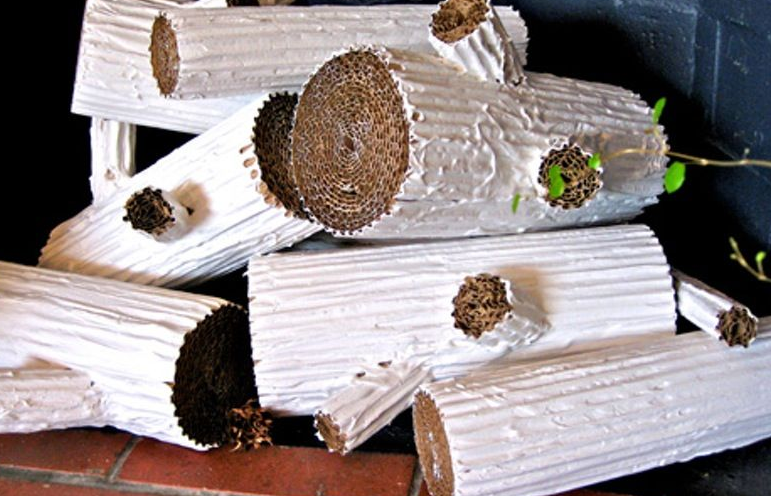
In order for the decorative fireplace to be more realistic, you need very little - create the effect of its work. For this, firewood can be made from cardboard. We will need:
- Corrugated cardboard
- Gypsum or decorative plaster
- Chancellery knife, ruler, scissors
- Island or masking tape
For a small fireplace, there is enough firewood in quantity from 3 to 6 pieces, and more naturally will look if they are of different sizes.
Completing of the work:
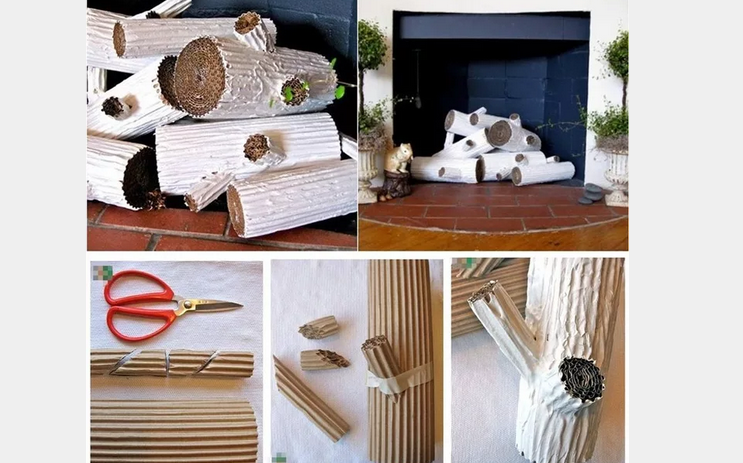
- We take a segment of corrugated cardboard width 15-20 cm And tightly twist to the desired thickness. This will be the basis of the timber, so we do at least 8 cm in diameter.
- We fix the edge of the material with glue and wait until it dries.
- You can rewind it for the duration of the drying with a rope. So in the future nothing will definitely be revealed.
- In parallel, we twist several thin pipes of similar width.
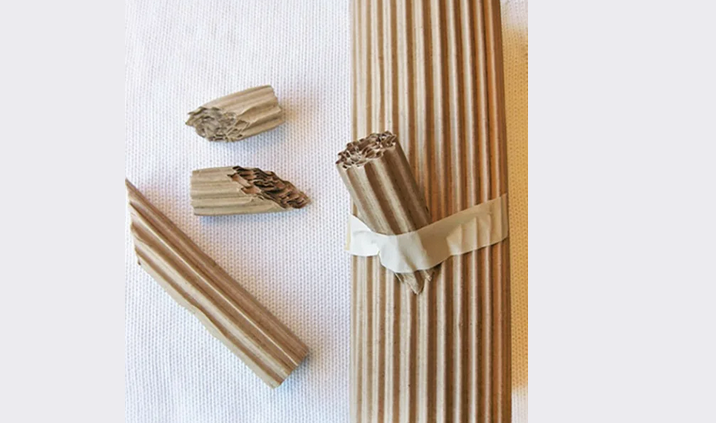
- Two types should turn out in diameter: up to 2 and up to 3 cm each separately.
- Now from the thin tubes of two types we make a workpiece: cut in half at right angles, and then each of the resulting halves - at an angle 45 degrees.
- Thus, from one thin cylinder you will succeed 4 pieceswho will be “uncouth branches” of logs.
- With the help of construction adhesive tape, we fasten the twigs to the base in a chaotic order. There should not be too many of them - 1-2 pcs. will be sufficient.
Decorating:
- Natural firewood has a very uneven surface. It can be achieved using gypsum or plaster. To apply the texture, you can also use paper towels moistened in plaster.
- At this stage, improvised means can be brushes, cutlery, your hands. The main thing is not to try to make a smoothed even surface.
- The edges are also abundantly smear and make the texture of the rings (as on the cut of the tree).
The resulting blanks need to be well dried and only after starting staining. We recommend using several shades of brown and green colors. This will turn out more similar to the natural color, and you will achieve the necessary effect.
Bricks for fireplace fireplace: dimensions, manufacturing
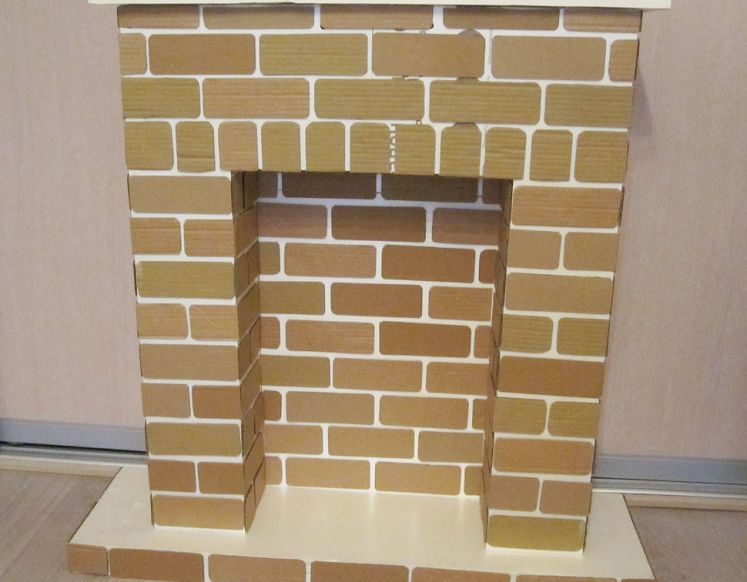
A fireplace that decorated with facing brick always fits into any design plan. For a false stone, you can apply two technologies:
- Glue the wallpaper on which there is already a pattern for wild stone or brickwork
- Make bricks and glue them on a fireplace
Since the wallpaper needs to be bought (and this time and additional financial costs), we propose to consider the process of making blanks from the materials that are in the house. Here is the manufacture of bricks for a fireplace fireplace indicating the size:
- To do this, we need a thin cardboard, a ruler (triangle) and a stationery knife.
- Depending on the size of your fireplace, you need to cut the blanks.
- Important: measure the width of the column and plan - how much I would like to place bricks there (2 or 3). If 2, then its size must be divided into 2 and taken 0.5 cm into the seams. For example, the column part was 21 cm, which means that the brick should be no more than 10 cm In the width and 5 cm In height (1/2 of the width is the standard).
- Next, proceed to cutting the blanks for the desired amount: you can glue the entire surface or decorate individual elements.
- Please note that when cutting, you need to observe a right angle and even edges. For this, a triangle and a stationery knife, which will not tear the edge, like scissors, is best suited.
- Before gluing, harvest a strip in size from cardboard 12 cm x 0.2 cm for seams. So the distances will be even.
- Using very simple: glue the first brick, then apply the strip from the desired side and immediately see where to place the next element. So the process will go much faster and more even.
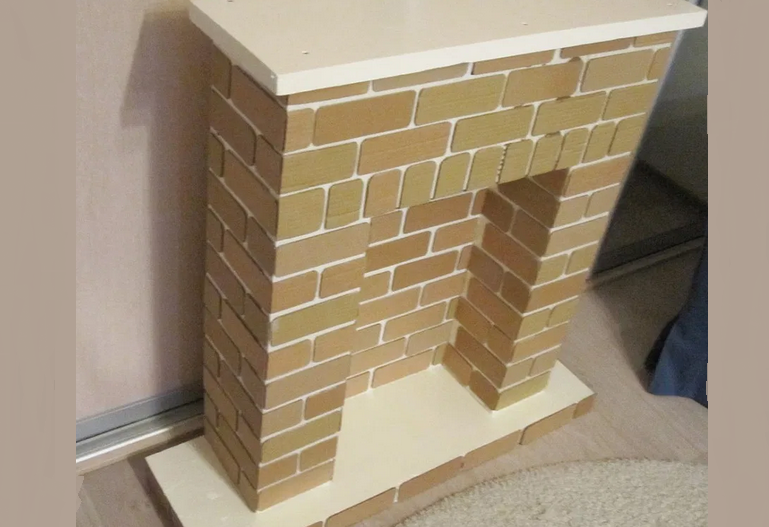
Such decor elements are perfectly painted. For a brighter effect, the seams can be made white, which will allow you to beat any idea.
Cardboard fireplace grille: DIY
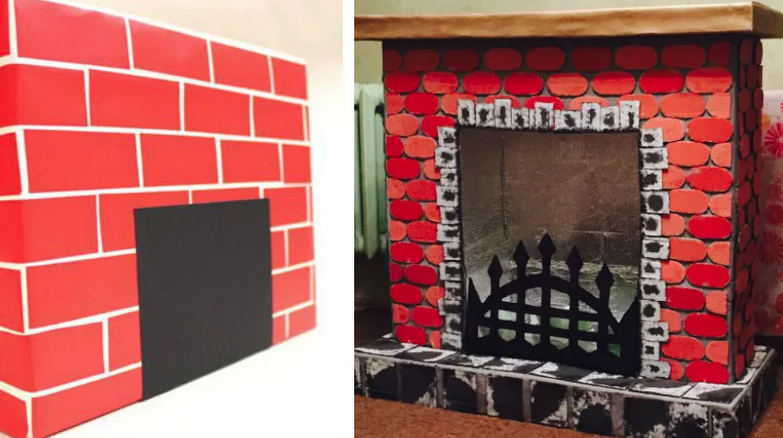
A decorative fireplace is a design in which an imitation of burning fire is created. And from it you need to create "protection". Cardboard grill is the easiest way to decorate the furnace, which does not require special time spent. How to create gratings for a cardboard fireplace with your own hands?
Let's prepare the necessary materials:
- Sketch - a drawing drawn on a sheet, in the form of which I would like to perform a protective structure
- Scissors, stationery knife
- Ruler, pattern (if any)
- Dye
In the original fireplace, the lattice is made of metal. To achieve such a result is simple. Do the following:
- We cut out a workpiece, rods or monograms from cardboard - not wider than 1.5 cm.
- Do not make thin either, since such a design will break very quickly.
- If you want to do for forging, it is better to use the pattern to perform rounding. So the lines will be more rounded.
Features of painting:
- The lattice is a metal product that is covered with soot over time.
- Therefore, it is not necessary to look for steel or gray paint.
- It is enough to paint in black several times.
The grill is ready, now you can start making fire. Read further.
Fire for a fireplace fireplace: manufacturing instructions
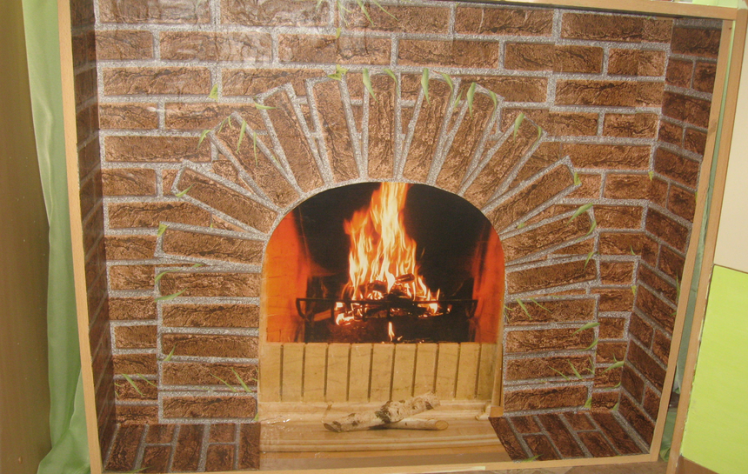
When the fire burns in the fireplace, it blows from it with warmth and comfort. If you do not have the opportunity to put a real fireplace in the room, then do not be discouraged. A false stone can also be with fire, and this is real. There are several ways to create it:
- Carry out backlight
- Fabric
- Perform 3D imitation From cardboard
Since the first two methods are very difficult to execute and require more costs, let's dwell on the latter. So, we make fire for a cardboard fireplace. Here are 2 ways to embody this plan:
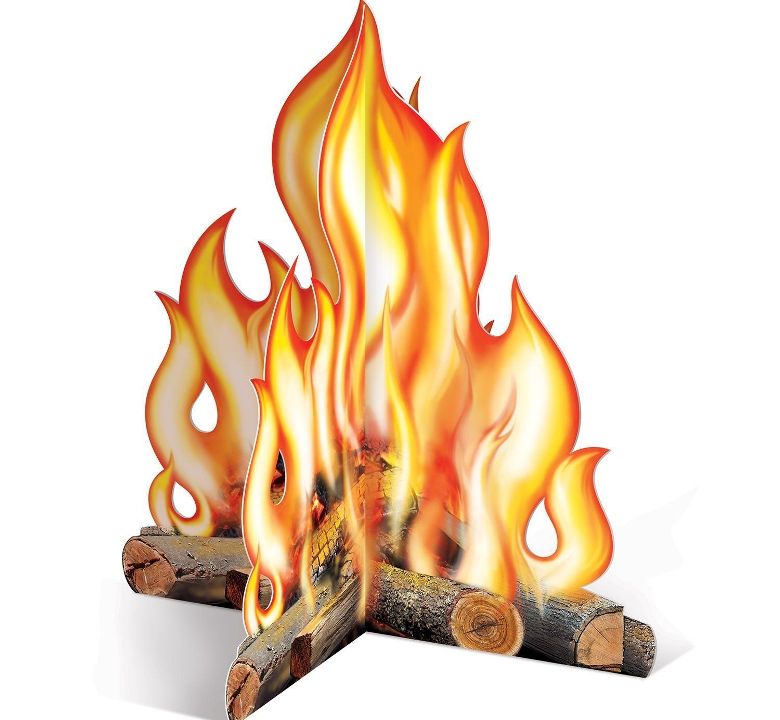
Method 1:
- Print a picture of fire on a colored printer.
- Cut the necessary parts and glue it onto the cardboard.
- Next, circle the drawing with a clerical knife and get a flame from several parts.
- At a distance of 1-2 cm From the back wall, attach the elements of the flame in a chaotic order.
- Before fire, put firewood and get ready -made visualization.
Method 2:
- With a pencil, draw a silhouette on the cardboard of the fiery composition (whole or separate rays of flame).
- Cut, stain white and let dry. So the picture will be more bright.
- Next, take the colors of red, orange and yellow and begin to draw, not forgetting about color transitions.
Such a fire will serve you for a long time, and will not be faded.
How to paint a cardboard fireplace?
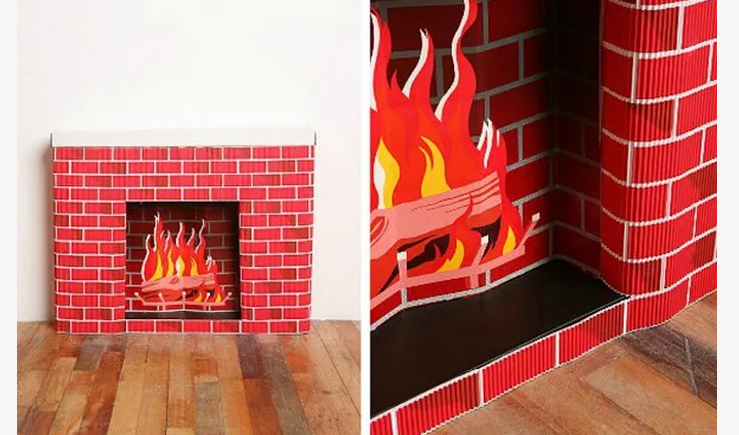
There are many ways to decorate cardboard fireplaces. From improvised materials, the remaining paint or primer after repair is used. How to paint a cardboard fireplace? The issue of the safety of materials remains important.
- Will the fireplace be in the hall or bedroom? Then, when stained, take into account that the materials should be for internal work.
- If you have a water -based paint for staining the ceiling or slopes, then this is ideal for priming and painting the box.
- For uniformity of color, do such a process several times, and you will get a perfectly even white.
- After completely drying the cardboard workpiece, we go to painting in the main color or drawing individual elements.
Important: The use of colors for external robot can be unsafe for you and your family members.
How to glue a cardboard fireplace?
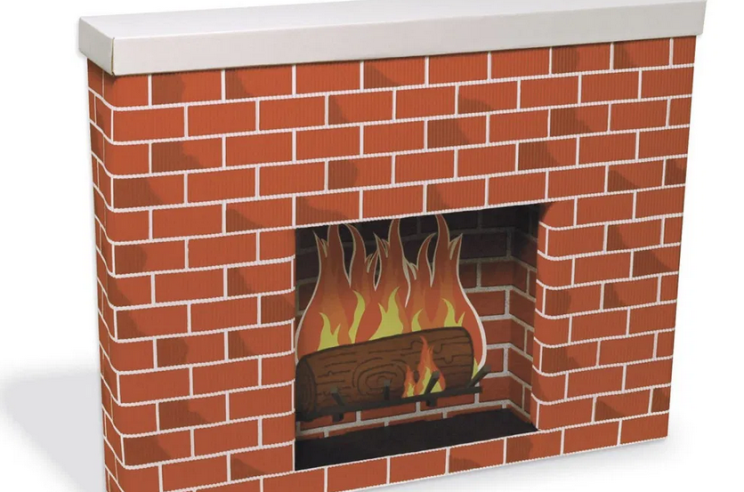
A cardboard fireplace decoration can be done differently. The main rule is that the decor should not be heavy (gypsum or metal blanks). You can glue the fireplace:
- Wallpaper
- Cardboard bricks
- Crumpled paper wipes for texture or decoupage
- Foam bricks, plinths and stucco molding
Decorations for the fireplace are glued, and then painted in the desired color. For a greater effect, you can form the composition symmetrically and do not try to use all techniques. A complement can be a game with color: paint the stucco molding in bronze or gold color - it will turn out stylishly.
Folls made a fireboard fireplace for New Year, Christmas: Ideas, Description
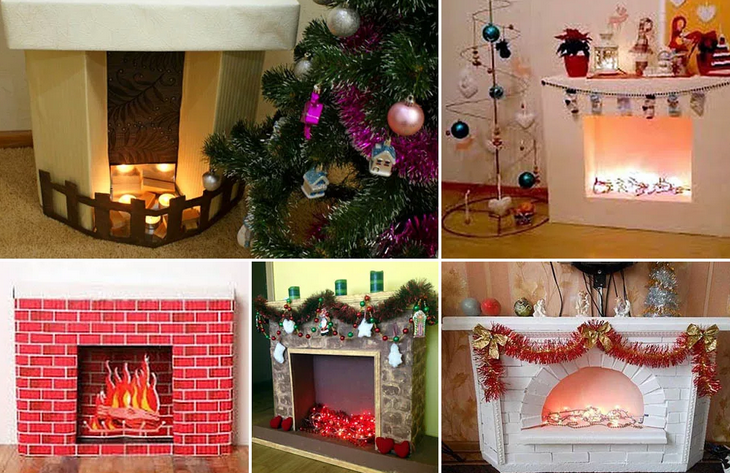
On New Year's Eve, the desire to create miracles is sharply aggravated. And this is not surprising, because New Year's toys and garlands have already taken out of the closet, the house is full of smells of spruce, homemade baking and gifts have already been bought by everyone. But how to make this holiday special and memorable? We offer you to create a decorative fireplace, which will become part of the New Year's jewelry, and after the holidays it will remain, and will delight with its beauty. Here are the ideas and description of the processes of decorating a fireplace from cardboard for the New Year, Christmas: Christmas:
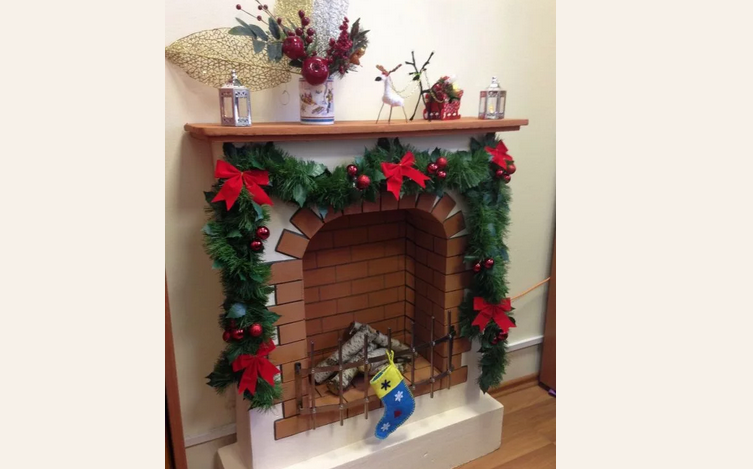
Red, green, white, gold - these are the main colors of the New Year and Christmas. And this must be used in full:
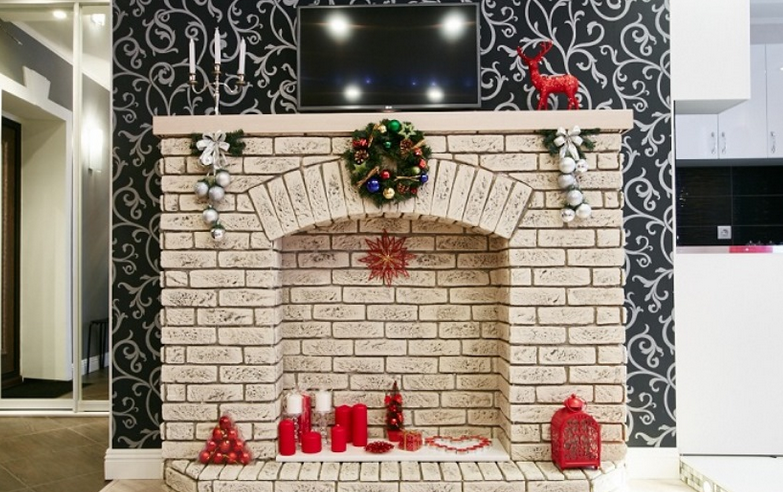
- We decorate the fireplace with red bricks with white seams.
- We attach a fluffy green rain to the end of the upper shelf, which hides cloves clogged on an equal gap.
- Fabric boots for each of the family members (do not forget about the pet), who are hung on a nail for a loop.
- On the central side walls, we fix the luminous garland, which will shimmer with all the colors of the rainbow.
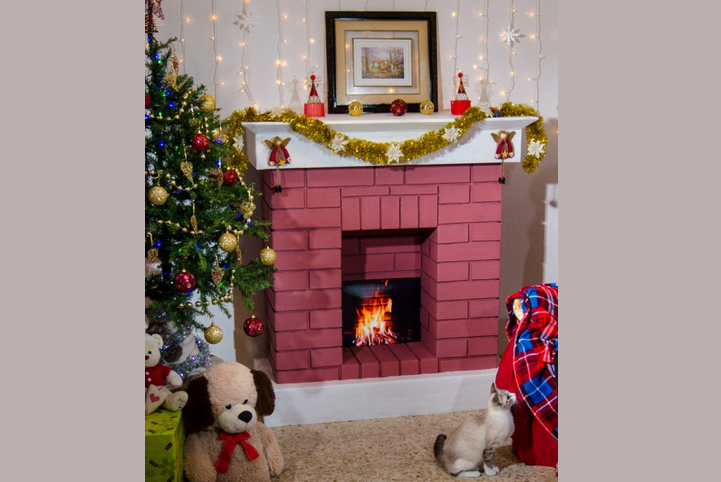
Imital fire:
- Such an attribute of the decor will be remembered by all guests, and the main topic for conversation at the festive table will be "Where did you get such beauty?"
- In decor stores today you can buy electronic candles, which are just suitable for our purposes.
If the recess under the hearth is glued with a mirror, then you will get an infinite number of candles, although they will stand only 3-4 pcs. different sizes.
Video: Fallen-stone from boxes. New Year's fireplace from cardboard
Volumetric fireplace from cardboard and napkins: manufacturing, description
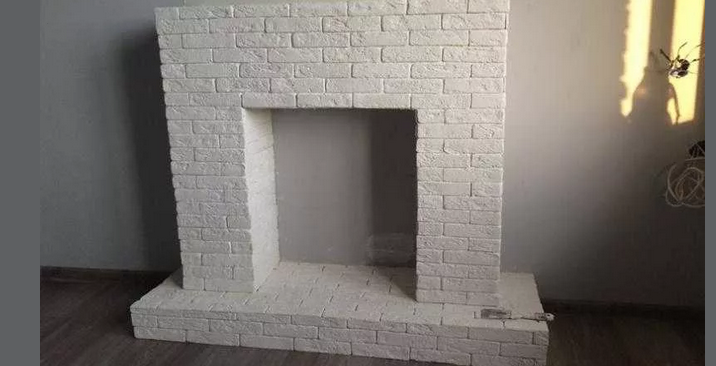
Making a design fireplace that will be unique and unique is very simple. It is enough to turn on the imagination and think over to be embodied. Decoupage, imitation of stone or rough plaster? All this can be done from napkins.
If on the fireplace fireplace you need to make the texture and there was no putty at hand, then we take it:
- Napkins
- PVA glue
- Water
- Bowl and big coarse brush
Here is a description of the manufacture of volumetric fireplace from cardboard and napkins:
- Make a fireplace on the described instructions above. Then proceed to decorate. This is the most important part of the creation of such a product.
- First, dilute the glue with water in the proportion 1:1.
- Take a larger bowl and feel free to pour all the glue (200 - 300 gr.). It will take a lot of it for the finish.
- Next, we tear the napkin on pieces, and, soaking in such a solution, we attach the desired density on the walls of the fireplace.
- Gently brush the mass to the walls so that it does not slide.
- If possible, then during such a procedure the fireplace should not stand, but lie. So it will be much easier for you.
- After the end of the work, let the product dry well so that the water completely evaporates (all night).
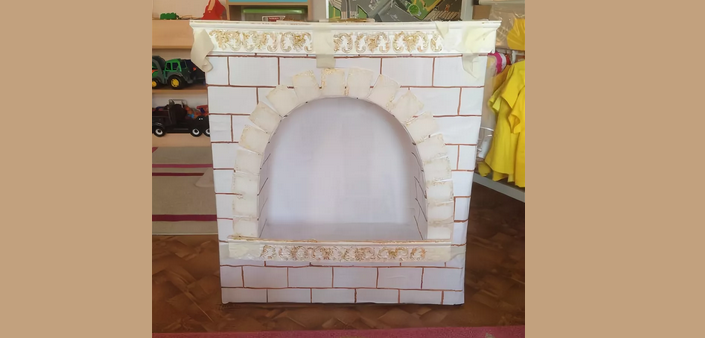
- Then we proceed to priming and staining in the desired color.
- To simulate a wild stone, it is better to apply paint with a sponge for washing dishes with large pores (holes). Do not try to make them painted one tone. Do everything with chaotic blunders and mix different colors.
- If you liked the drawing on the napkin, then it can easily be transferred to the fireplace. Separate all the lower layers (most often napkins are made three -layer: the top layer with a printed pattern, and the two lower are just white) and lean it in the right place.
- Go through a brush moistened in a solution of PVA and water throughout the figure. Be careful and do not break the picture.
After drying, you will get a fireplace painting.
Video: DIY decorative fireplace from a TV box + decoration ideas
A fireplace and foam fireplace: how to do it?
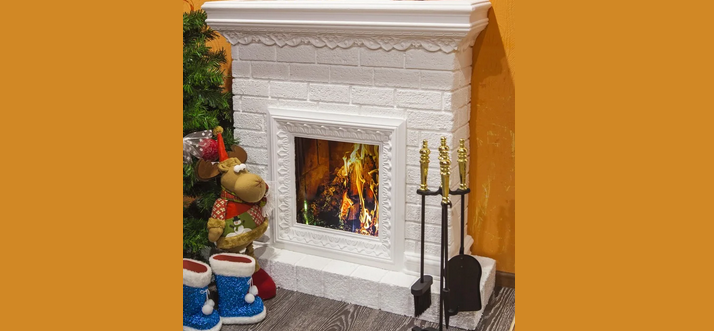
A fireplace made of a cardboard box is a budget option. But it can be made visually richer. To do this, use foam in the decor. In construction stores you can find such products from foam:
- Stucco for walls and ceiling
- Baguettes of various widths and angle of gluing
- Artificial brickwork
First make a fireplace according to the above instructions. Then glue the foam decor. This is convenient, since you do not need to come up with something unusual and in an original way to decorate the product-the foam will do everything for you. You only need to glue the details in your place - ready.
Such elements help to simplify the work of decorating a false stone and speed up the assembly process. They paint perfectly in any color, and dry for 30-40 min. Here are a few ideas how you can make a fireplace and foam fireplace:
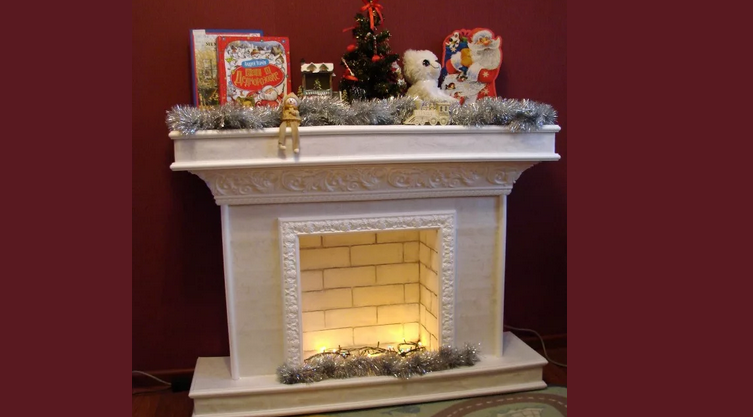
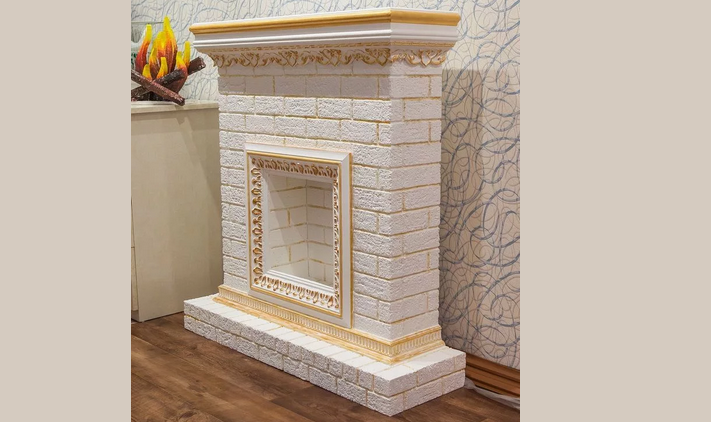
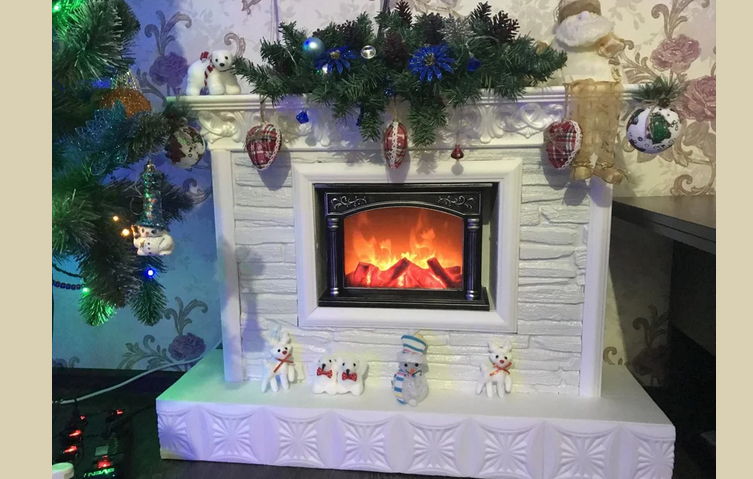
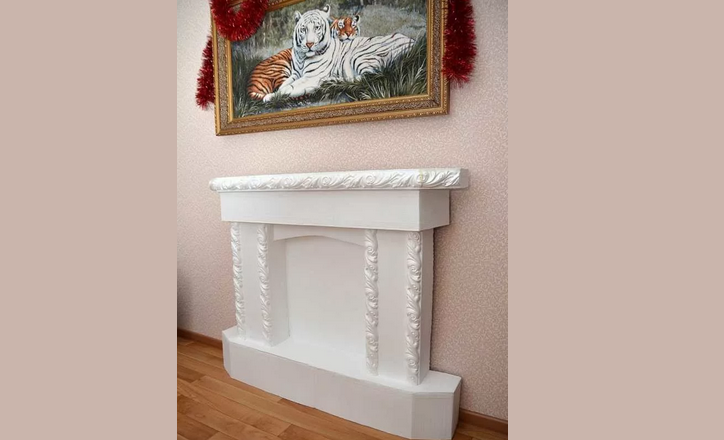
Note: You can glue the decor of polystyrene with a glue gun or on silicone glue. For these purposes, it is better not to use PVA glue, since it will quickly peel off and spoil the finished product as a whole.
A small fireplace fireplace in white: with your own hands
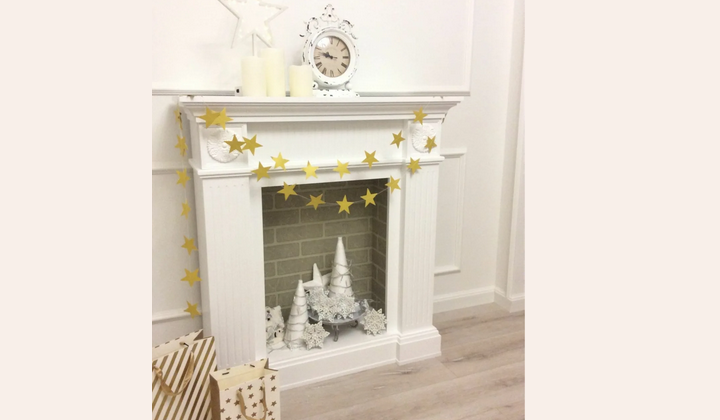
Want to surprise children and yourself in an unusual way? Has the routine of its interior has already fed up? Then let's take ourselves in your hands for a couple of hours and build our own favorite place for everyone - a small fireplace from cardboard in white.
We take out all unnecessary cardboard boxes from the upper shelves of the pantry and begin to build a fireplace from them. The principle is this:
- Two symmetrical columns that are at a distance 50 cm From each other, should be glued together.
- Next, cut out the “upper shelf” from improvised materials (cardboard sheet, plywood or a small piece of drywall).
- Do not forget to close the cardboard and back of the fireplace.
- We tightly fasten all the parts together with glue, construction tape, island. Remember the main thing - ordinary adhesive tape is used exclusively for internal fasteners.
When the design is stable, we proceed to painting:
- Take a water -based paint for internal work of white color and well paint all the details.
- This procedure will have to do 3-4 times.
- After each painting, let the fireplace dry.
That's all - the fireplace is ready. By evening, we call all the households and do decorating: we do false-two, fire or just take out the New Year's garland and put it on in the place of fire.
Video: desktop decorative fireplace from cardboard. Cardboard crafts
DIY corner fireplace from cardboard
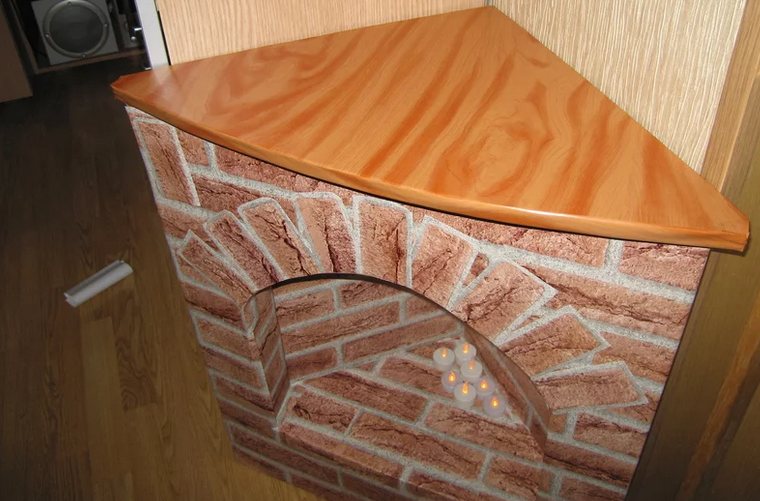
- Not every room has the opportunity to find a free wall.
- But the desire to put the fireplace from this becomes only stronger? Then we offer to think about the corner fireplace with your own hands, as a source of embodiment of an old dream.
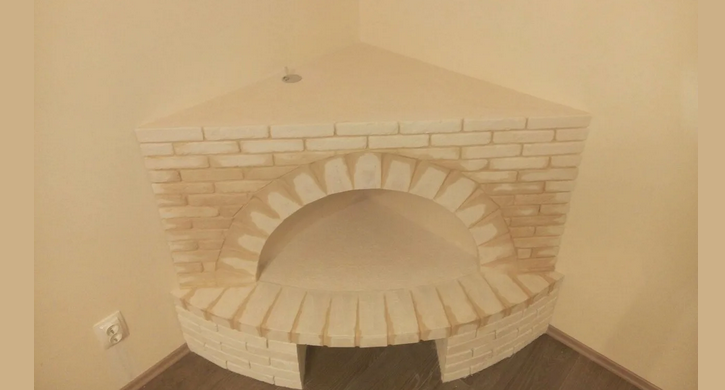
- The advantages of its placement in the corner zone are that it will turn out to be deep, and no one will interfere.
- Also, the upper shelf of the fireplace will be more stable, since the ribs of the support will be much closer, and you can easily use it for the necessary things.
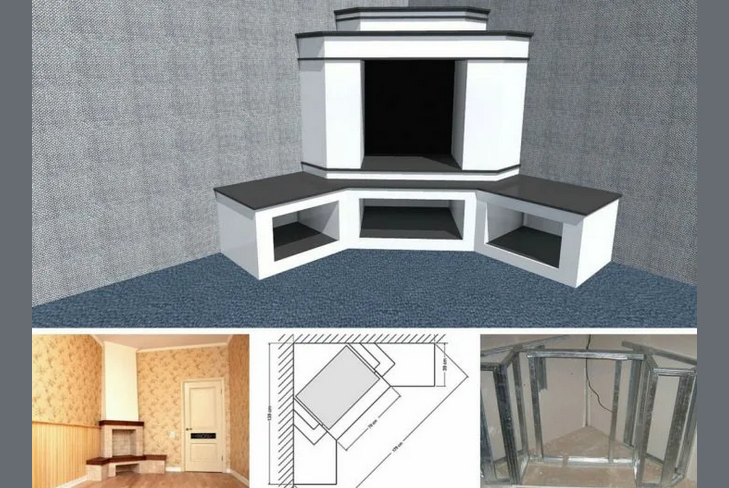
- For the installation of such a corner fireplace, a cardboard from large household appliances will be needed.
- You need to build an isosceles triangle.
- The front side with a neckline will be larger and therefore do not try to make the hole too large.
Such corner fireplaces are decorated with facade stucco molding, since the columns are much wider and there is a place where to arrange them. The pluses include the fact that you need to decorate only the front side, because everyone else will be hidden.
The most beautiful fireplace fireplaces with your own hands: photo
A cozy atmosphere in the house is built on the interaction of all family members. In this article, we showed that the process of installing the fireplace and its decoration is not complicated. Invite everyone to participate in his assembly and contribute to each of the elements, and you will see - the positiveness of emotions is guaranteed to you. Here are a few photos of the most beautiful fireplace fireplaces with your own hands: 