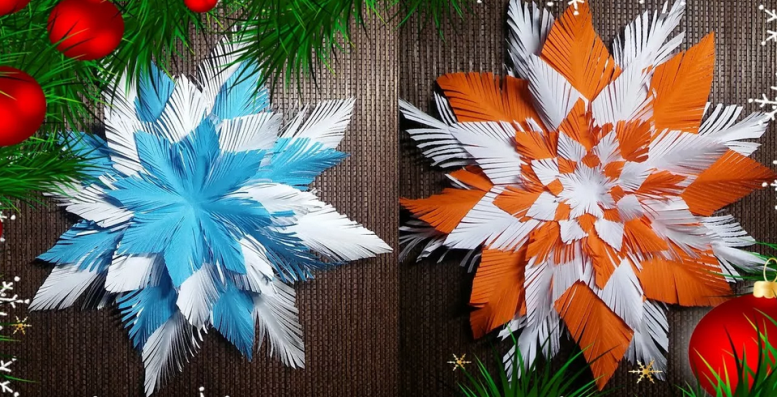
Folding a snowflake from paper or napkins is simple. Study the instructions published in the article and create an interesting decor for the New Year.
Contents
- How to fold a sheet of paper for snowflakes correctly: Snowflake-Veer
- Video: chic snowflakes from openwork napkins
- How to fold a snowflake-scruff: instruction
- Video: DIY Snowflake
- Snowflake folded from a napkin 8 rays: step -by -step instructions in stages with a photo, video
- Video: Snowflakes
- Snowflake, composed of paper - 8 rays: step -by -step instructions in stages with photos, video
- Video: New Year's snowflakes. How to make a beautiful snowflake of paper is easy?
- How to fold a snowflake and cut out of napkins, papers of 6 rays: step -by -step instructions in stages with photos, video
- Video: how to fold paper for snowflakes 6 rays:
- How to fold and cut a snowflake with 5 rays: step -by -step instructions in stages, video
- Video: 5-angle snowflake. How to fold paper for 5 coal snowflakes?
- Fluffy snowflakes made of folded paper: how to fold paper for cutting?
- Video: fluffy paper from paper with your own hands
- Fluffy folded snowflake for cutting from napkins: instruction, photo, video
- Video: We make a beautiful snowflake in 5 minutes
Decoration of the house to the New Year - Entertaining lesson. And it is not entirely childish, because for adults the process of creating festive self -useings itself can also become very exciting and interesting.
The most famous element of New Year's decor is a snowflake. It can be made of paper or soft napkins. Variations of such crafts are completely different, but each of them requires a special approach. If everything is done according to simple instructions, then all decorations for the interior of the apartment or house will come out unique, diverse and, of course, unusually beautiful. In this article you will find several instructions to create such an original decor. Read further.
How to fold a sheet of paper for snowflakes correctly: Snowflake-Veer
Such decoration can be cut according to different schemes, which exist a lot. But the simplest algorithms for making such figures are very popular. How to fold a sheet of snowflake paper correctly?
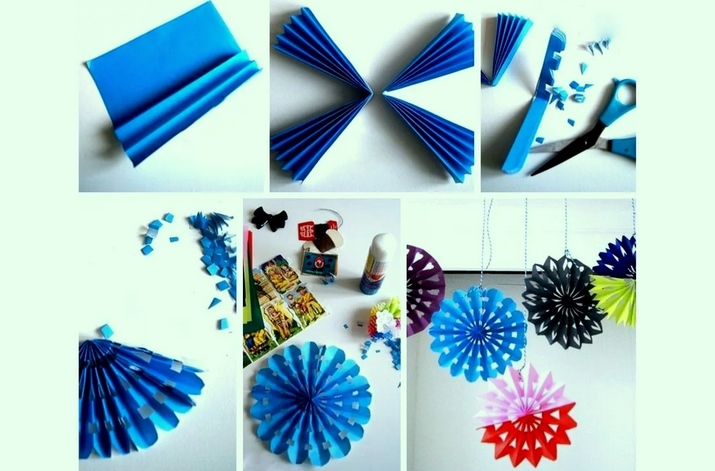
Snowflake fan- It will just make such a decor if you use ordinary wipes for the table or cent. paper. Shade - any, size too. What do we have to do:
- Two napkins (or 2 A piece of paper sheet) turn the accordion. Bend to get half and glue from the inner sides in the lower part 2 cm.
- Glue the outer edges of the workpieces.
- Expand the resulting application - the fan is ready.
Decorate the resulting snowflake in any available way. You can use the rain for this, or apply any drawing on the paper. You can cut it in advance, and then fold the snowflake.
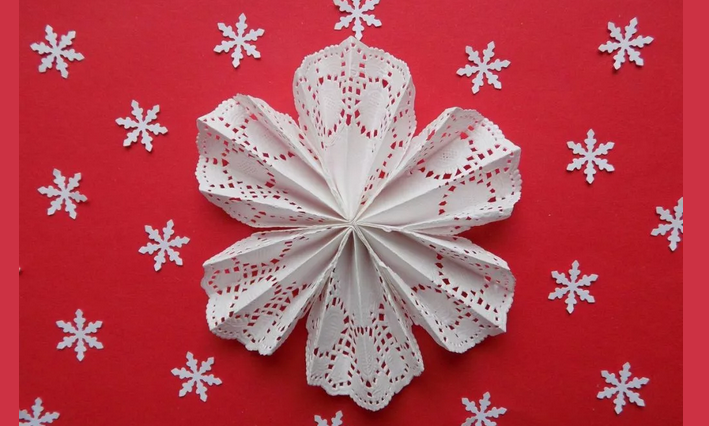
A snowflake in the form of a fan with openwork decor looks no less original. To do this, you need to buy napkins - round or oblong. But they should have patterns made during the production of the product at the edges.
Next, use the above manufacturing scheme of snowflakes, only slightly improved:
- Fold three napkins in the form of an accordion.
- Glue them at the base on the inner edge.
- Collect from 3 details A single composition. Close the outer edges of the napkins.
- Expand the finished snowflake.
As you can see, the process of making snowflakes from napkins or paper does not cause any difficulties. Such crafts are quite simple, but very beautiful, cute.
Video: chic snowflakes from openwork napkins
How to fold a snowflake-scruff: instruction
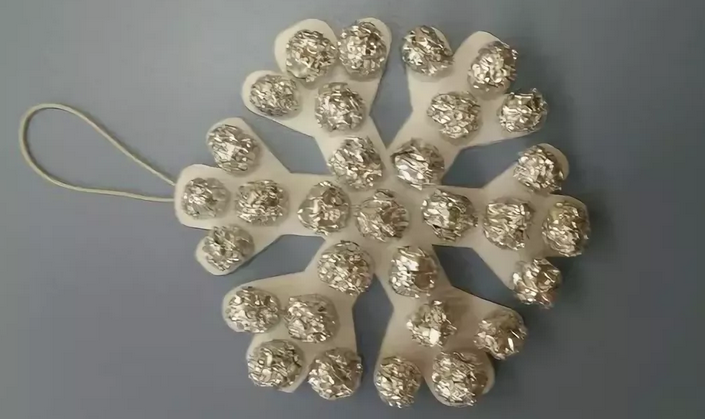
There is nothing simpler and more interesting than making a snowflake. Even a two -year -old child will cope with this task, and its implementation with the family will be an excellent entertainment for everyone. What do you need for such a craft? Here is an instruction that will help to correctly add such a product:
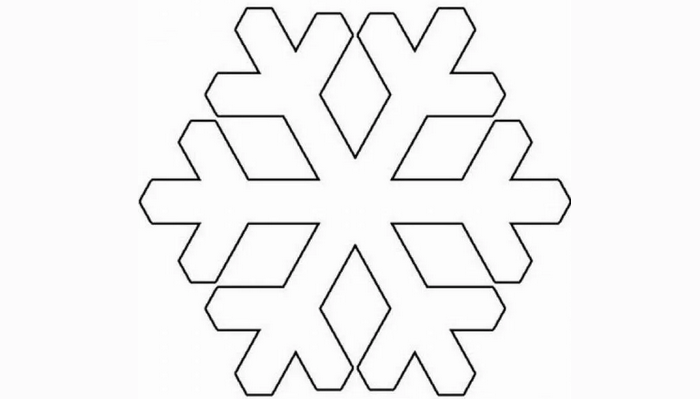
- Cut out of colored cardboard 1 or several simple snowflakes. To do this, use any diagram you like.
- Tear multi -colored napkins to small shreds. Instead of them, you can use foil, but it should be dumped into balls.
- Glue the additional elements of the decor to the cardboard snowflake. This can be done in any order. It is best to entrust this work to the child - he will be very pleased.
- A beautiful decoration for the house is ready. Now you can proceed to the manufacture of other snowflakes or fans.
Perform all the steps together with the child. This is a very cheerful process, which, moreover, well develops fine motor skills of children's fingers. Therefore, the independent manufacture of such decoration for an apartment or other room is not only an exciting, but also a useful occupation.
Video: DIY Snowflake
Snowflake folded from a napkin 8 rays: step -by -step instructions in stages with a photo, video
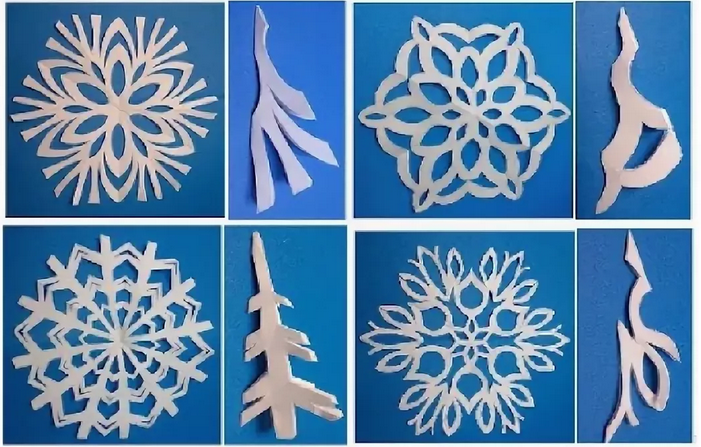
From col. Napkin can be made a voluminous and original snowflake. To do this, you need to prepare only the napkins and scissors themselves.
Step -by -step instructions in stages that will help make a snowflake folded from a napkin:
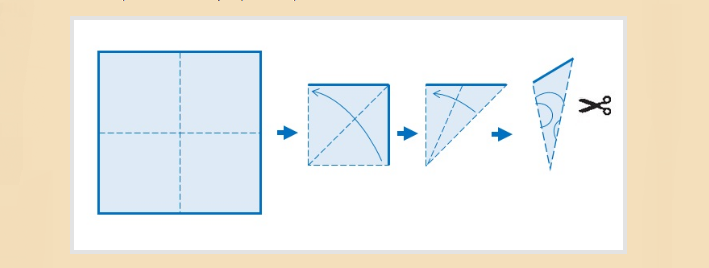
- Take a napkin and, without unfolding it, bend along the diagonal line. You should get a square with three corners, as in the photo above.
- Still fold the formed figure in half. Do this so that the side with the bend is combined with the side without that (as in the diagram).
- With the help of scissors, remove all the extra details.
- The snowflake is ready, now you can unfold it.
It turned out a very beautiful product, right? Your child will definitely be satisfied with the results of joint works. The video, which is lower, tells in detail how to make such a decor.
Video: Snowflakes
Snowflake, composed of paper - 8 rays: step -by -step instructions in stages with photos, video
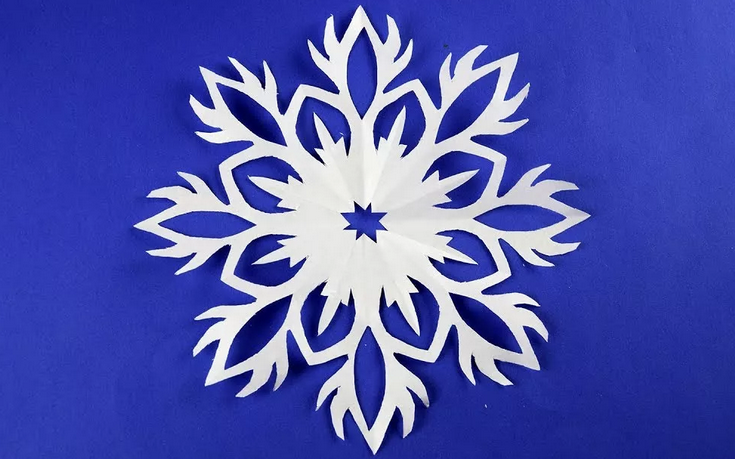
Such beauty can be made not only from table or decorative napkins, but also from a thin paper sheet. The algorithm of action is very similar to the previous one, only the process will take a little more time. Here is a step -by -step instruction in stages, which will help to make a snowflake folded from paper:
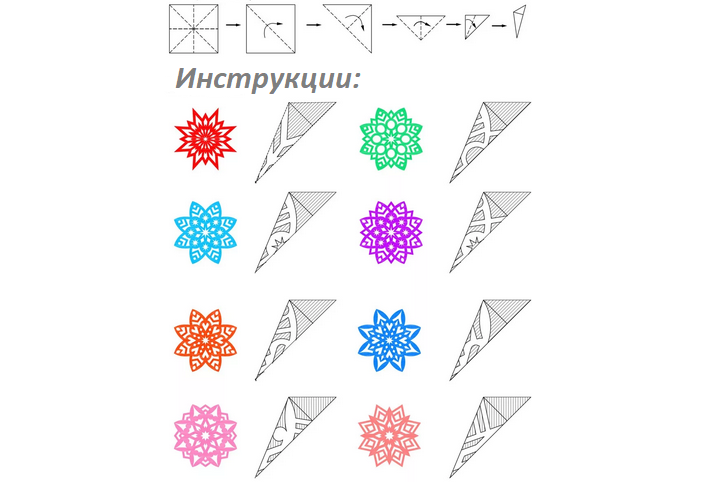
- Fold the paper square on the diagonal line. It will turn out a triangular figure, as in the photo above.
- Fold the product again in half. A smaller triangle will come out.
- Bend the paper sheet once again, and then - once again do the same manipulation. Only in this case, one side adjacent to the second should be with a bend.
- By cutting with scissors, remove excess shreds of paper.
Expand the figure. Your snowflake s 8 rays Ready, you can start decorating the house. You will clearly see in the video below.
Video: New Year's snowflakes. How to make a beautiful snowflake of paper is easy?
How to fold a snowflake and cut out of napkins, papers of 6 rays: step -by -step instructions in stages with photos, video

How to fold the snowflake and cut out of napkins, papers of 6 rays: step -by -step instructions in stages with photos, video. You can make no less beautiful snowflake from a thin paper sheet or soft cloth with 6 rays. How to fold it correctly? To make such decoration simply with the help of the following step -by -step instructions in stages. For this:

- Expand the napkin. There should be a rectangle in front of you.
- If you make a decor from a thin paper sheet, then it must be folded in half. Again, you should get a rectangle.
- The upper corners of the wipes or paper bend at an angle of 60 degrees.
- Fold the formed figure and cut all the extra details.
- Now the snowflake can be deployed.
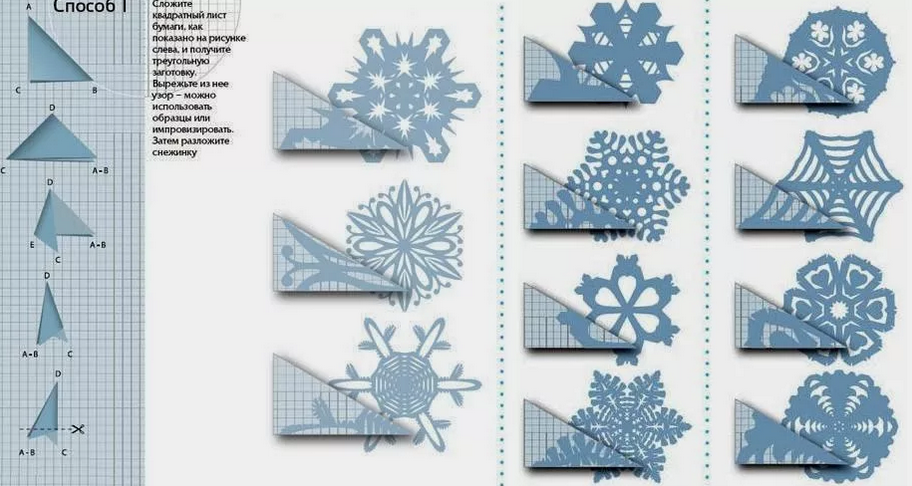
Follow the descriptions described, there is nothing complicated in this. If you correctly perform simple manipulations described in the algorithm, you will have a very unusual, but beautiful decorative decoration with six rays. You can fold such a snowflake, as well as the previous one with 8 rays, bending the paper sheet first to get a square with three corners, and then proceed to the creation of the jewelry.
Useful advice: If you first make such a decoration from a paper sheet or napkin with a child, you can facilitate the task. To do this, you can download ready -made templates of such jewelry (there are above in the text), print them and attach them to a paper sheet or napkin. It will be much easier to cook crafts on them.
You can add a paper sheet for the baby, and show how to cut. Let him cut, as he wants, the snowflake will still turn out beautiful, because thanks to the correct folding, the rays will turn out symmetrical and with interesting patterns. Look clearly in the video below.
Video: how to fold paper for snowflakes 6 rays:
How to fold and cut a snowflake with 5 rays: step -by -step instructions in stages, video
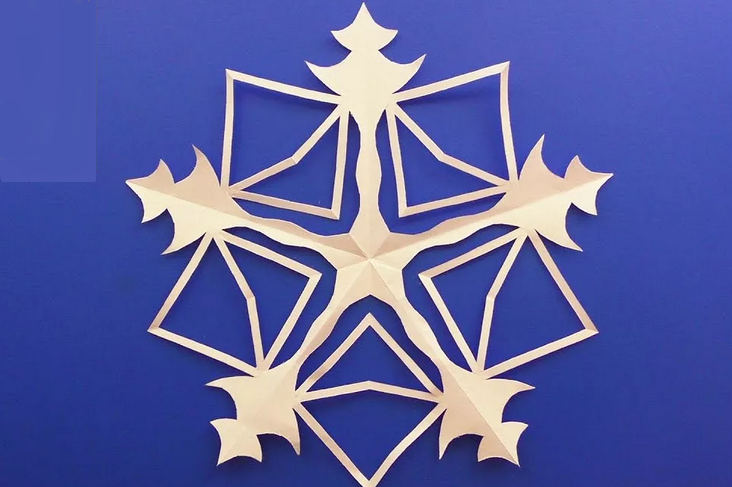
A five -beam snowflake is made as quickly as its previous variations. For work, as always, you will need a paper square. Take white or color - the decision is yours. How to fold and cut a snowflake with 5 rays? Step -by -step instructions in stages - perform all actions according to this algorithm:
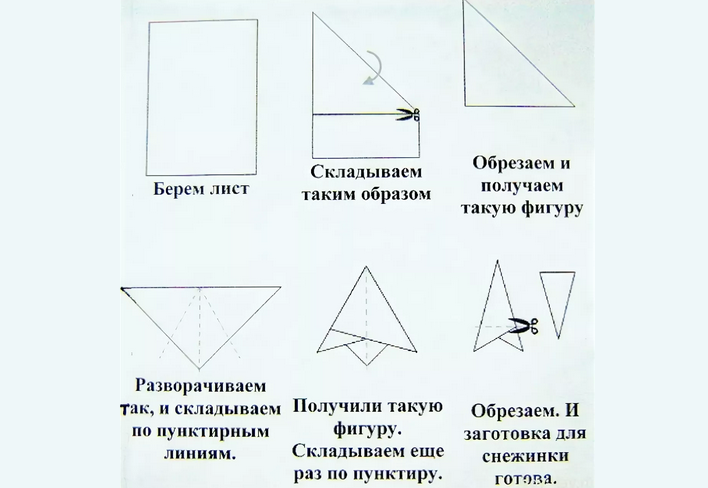
- Bend the paper square along the diagonal line. As in all previous cases, you should get a triangle.
- Fold the formed figure again in half.
- Back straighten the bend made. Bend the top so that its top coincides with the bottom.
- After that, straighten the made corner again.
- Now bent the corner again, but its edge should reach the line that formed during the last bending.
- Take the right corner of the resulting figure and bend it so that the line on the side fully coincides with the point of intersection of the side section of the square and the previous fold.
- According to the same scheme, perform manipulation with the left side of the product. However, in this case, bend the paper in the opposite direction.
- Now bend the left side to the right. Both faces must fully and clearly coincide.
- Repeat the action, but this time bend the right side back.
- Using any template of a five -beam star, draw it on a folded workpiece. You can use an arbitrary sketch invented yourself.
- Draw lines for cutting, as in the photo. It is better to do this with a simple pencil, so that, if necessary, to erase extra lines or elements.
- After that, cut a paper snowflake pattern along the line.
Expand the craft - and admire the beautiful five -pointed snowflake made with your own hands. Read more in the video below.
Video: 5-angle snowflake. How to fold paper for 5 coal snowflakes?
Fluffy snowflakes made of folded paper: how to fold paper for cutting?
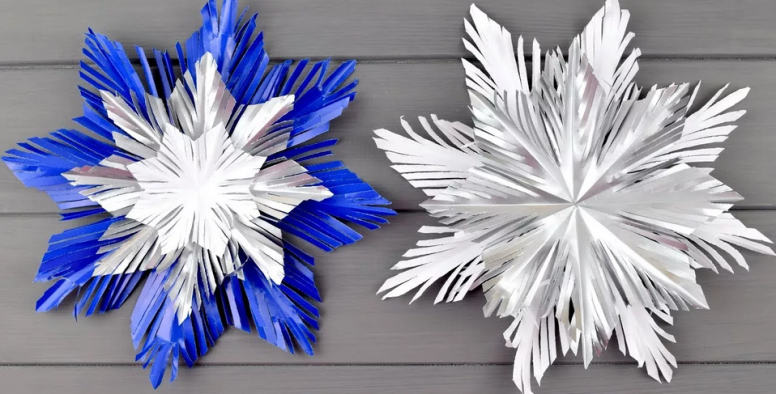
Fluffy snowflakes made of folded paper perfectly complement the overall decor of the house before the New Year holidays. For their manufacture, take colored or ordinary, white paper. Such jewelry is made according to the same principle.
Step -by -step instructions on how to fold paper for cutting:
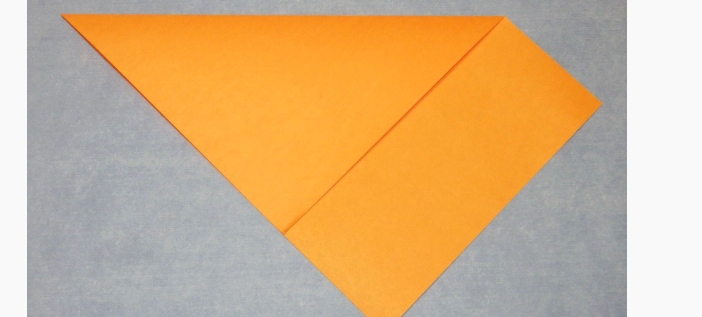
- Take a paper sheet of format A-4 And bend it as you can see in the photo above.
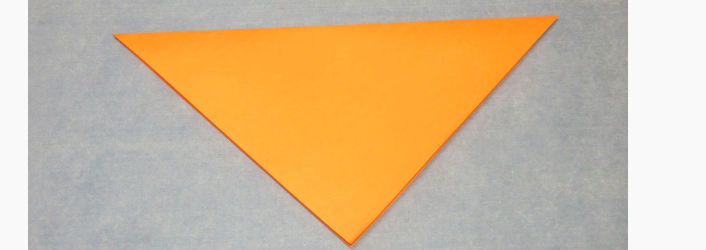
- Remove the lower part - it is superfluous. As a result, you will get a square, folded twice.
- Fold it in half again.
- Now in half again.

- The last stroke - fold the resulting triangle twice again.
- Now cut off the angle of the geometric figure with scissors.

- With the help of scissors, cut the angle of paper so that it resembles a fringe.
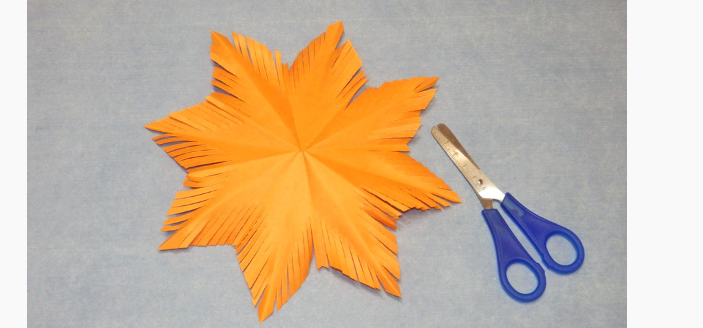
- Expand the snowflake.
You can be content with the figure received, or improve it. To do this, do smaller snowflakes according to the above scheme. Glue them to the main craft using liquid or dry glue for paper. A white fluffy snowflake is done according to the same principle. To make the product look more voluminous, you can slightly “twist” its edges with scissors.
Video: fluffy paper from paper with your own hands
Fluffy folded snowflake for cutting from napkins: instruction, photo, video
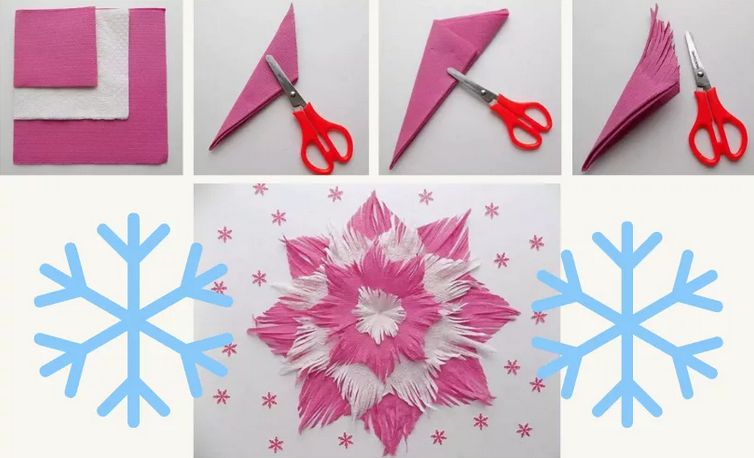
A fluffy snowflake from napkins is made on almost the same principle. The number of twisting consumables depends on which size you want to get to the craft. Here are the instructions with the photo for the decor - a fluffy folded snowflake for cutting from napkins:
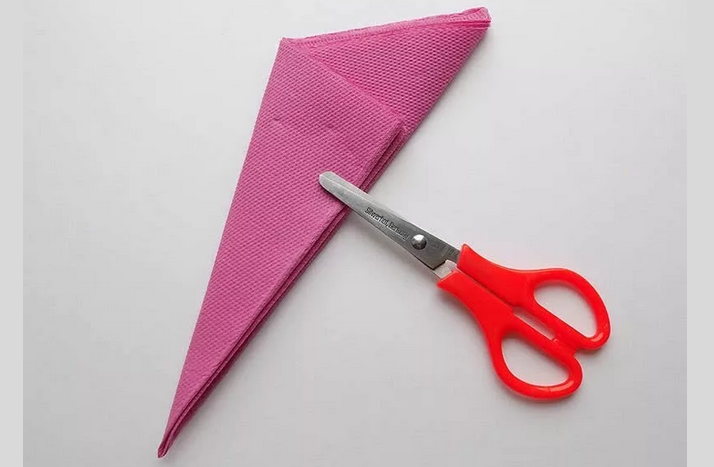
- Fold the square of the napkin in half to get a triangle.
- After that, once again bend the resulting figure.
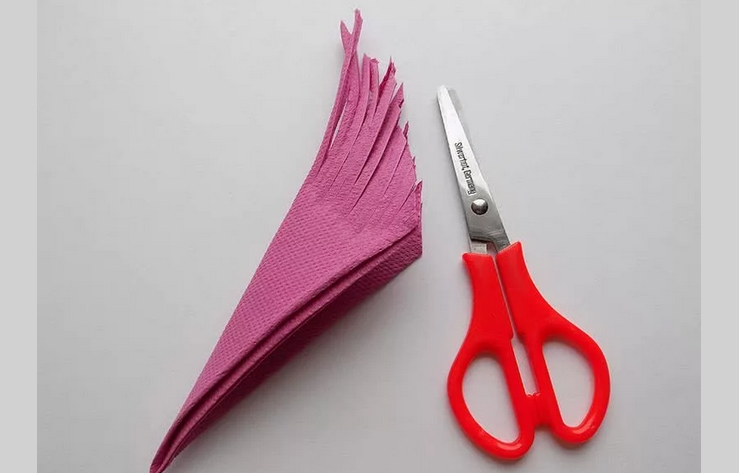
- Along the edge of the resulting triangle, make many incisions.
- As in the previous case, you should get colored fringe.
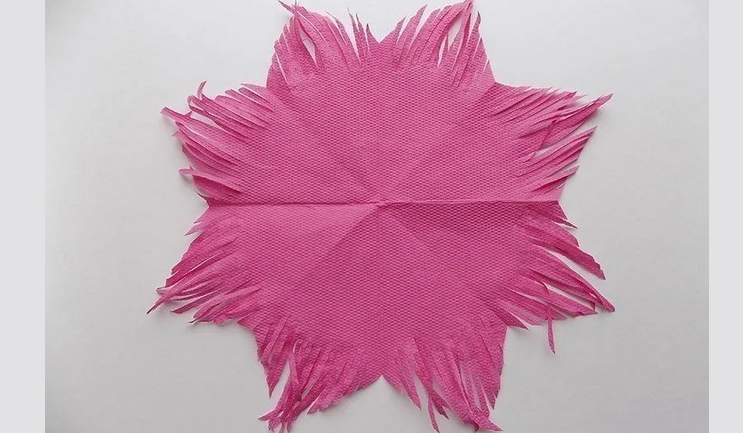
- Expand the product - your beautiful fluffy snowflake from a napkin is ready.
You can also glue different decorating elements to it. You can ask the child to write something or draw on the product. But take into account the fact that the snowflake from the napkin is less durable than the one made of paper.
As you can see, there is nothing complicated to make a snowflake of paper or napkins on your own. In fact, this is a very interesting activity, especially for children of preschool and primary school age. The help of parents turns this occupation into a real quest, and it is also useful for the development of imagination and fine motor skills in children. Therefore, such crafts can be made even just for entertainment. Good luck!

