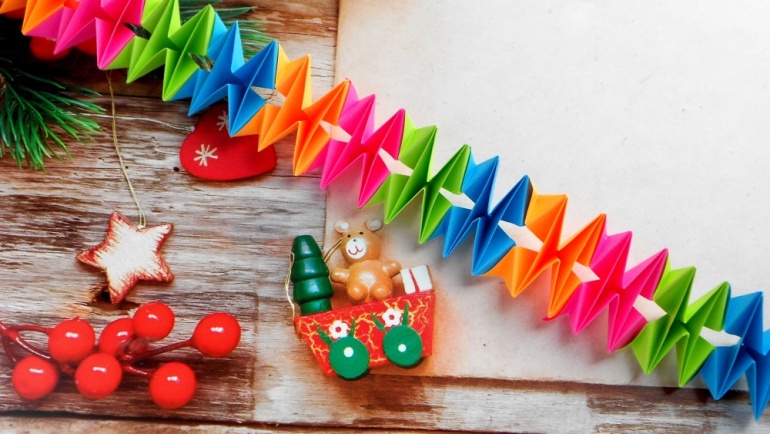
If you want to unusual and stylishly decorate the interior for the New Year, then make a garland with your own hands. This article has many interesting ideas that will help create original jewelry.
Contents
- New Year's garland from paper from paper - flashlight: interesting ideas, photo
- DIY New Year's garland - connecting paper figures: interesting ideas, templates
- DIY New Year's garland - double star: templates
- New Year's garland from paper stripes with your own hands: simple idea
- New Year's garland of paper - voluminous balls, snowmen: with your own hands
- DIY garland for the New Year: Air bows
- DIY garland: New Year's extension from flags
- Brilliant stars: an interesting idea of \u200b\u200bgarlands for the New Year with your own hands
- Girlands for the New Year from fabric or felt: with your own hands
- Girlyanda from cotton wool for the New Year: an interesting and simple idea with your own hands
- New Year's decoration from cotton pads: original garland with your own hands
- Balls of threads: garland for the New Year with your own hands
- Fit decoration: garland for the New Year with your own hands
- DIY Girlyanda from salt dough: decor ideas for the New Year
- Garland from pasta for New Year: with your own hands
- Decor for the New Year from brushes and fringe: DIY garland
- Video: How to make a garland of paper? DIY crafts for the New Year
On the most fabulous holiday, I really want the house to be filled with special magic. In addition to the green beauty, you can choose the original decor made with your own hands. We bring to your attention several master classes on creating a New Year's garland.
Also study on our website an article on how to make garlands for all lovers Day. Such decoration will add romance and tenderness to the room.
Let's make a beautiful design for the living room, hallway, children's room for the New Year. The process is fascinating, and the result is an unusual decor that will be admired by all your households and those who come to visit. Read further.
New Year's garland from paper from paper - flashlight: interesting ideas, photo
Paper is the simplest and most popular basis for creating New Year's decor. This method of design is great for creativity with children. It is immediately worth making a reservation that col. Paper needs two -sided, medium density (or cardboard). In this case, your decoration will look best. Here are the interesting ideas of the New Year's garland with your own hands from paper with templates and photos:
Paper flashlights

A familiar and beloved decor option since childhood. We bring to your attention two options. Do both, or choose one - closer to you.
Option 1 - That's what you need:

The course of work is a photo of the stages:
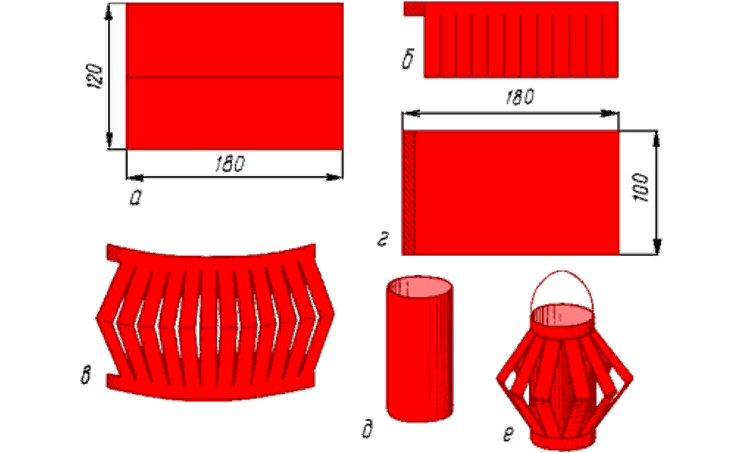
- Prepare 2 details - The first should be the size 180 by 120 millimetersThe second - 180 per 100 millimeters.
- Fold the first workpiece in half. Where the fold, make parallel cuts without reaching the edge 1 centimeter.
- Make a tube from the second workpiece. To do this, glue the edge whose size 100 millimeters.
- Next, wrap the first part around the obtained tube, smear the edges with glue.
- Glue the cord to the resulting flashlight to attach it to the right place.
- Decor can be used in the form of garlands or as a single decoration.
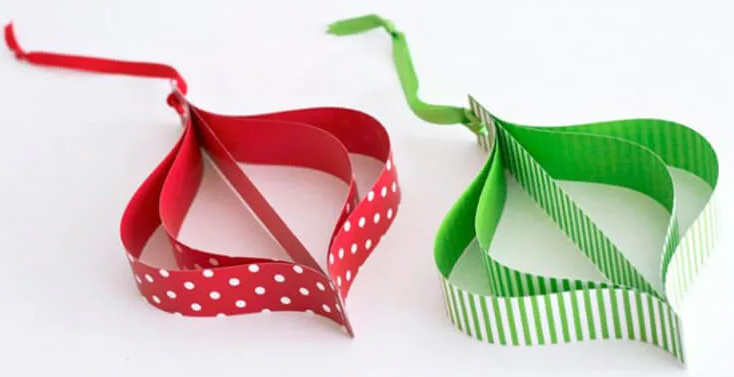
Method 2 - That's what comes in handy:

How to do:
- Create from col. stripes width stripes 2 centimeters.
- Now make these stripes of different lengths - 12, 10 and 8 centimeters. Two stripes will go to one flashlight in one flashlight 12 and 10 centimetersand one 8 centimeters.
- Next, take the strip 8 centimeters, on both sides, attach the strip in 10 centimeters, and then in 12 centimeters. Fold all the strips evenly and puncture them with a stapler on one side.
- After that, lay out the strips so that the long strips end clearly in the shortest length.
- As a result, you will get a voluminous flashlight.
- At the end, fasten the lower part of the decoration with a stapler.
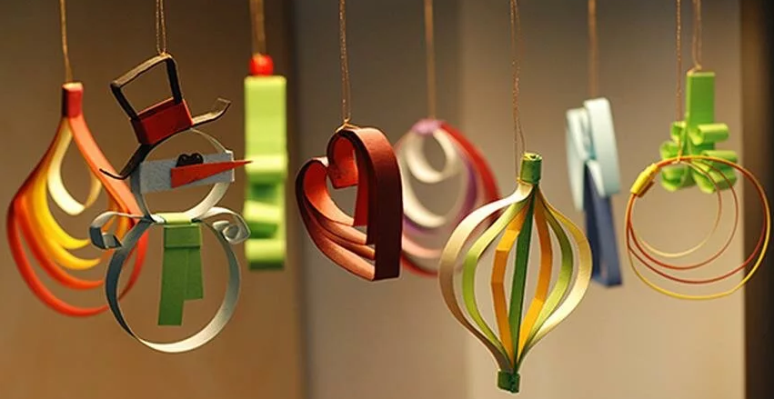
Make many multi -colored lanterns. On the one hand, make a hole with a hole punch, and pride the twine - the garland is ready. You can fold such strips differently and make a round flashlight, in the form of a heart, a bow, as in the picture above.
DIY New Year's garland - connecting paper figures: interesting ideas, templates
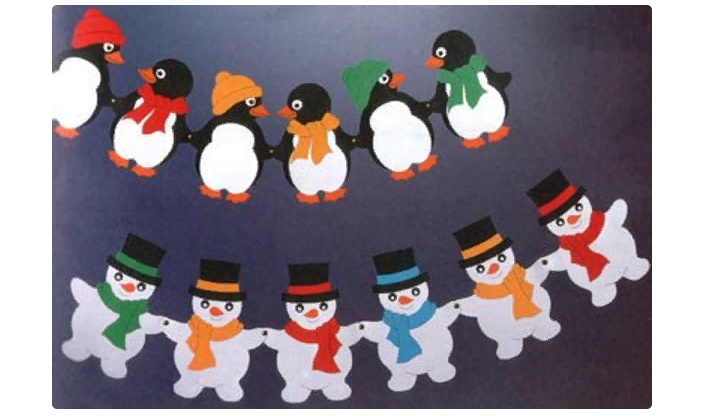
Such a New Year's illumination is performed in a couple of steps. Just print (draw) a template. Then cut the desired amount of elements, connecting them with threads or wire. Here are the templates of paper figures that you will cut and connect for the garland for the New Year with your hands are interesting ideas:
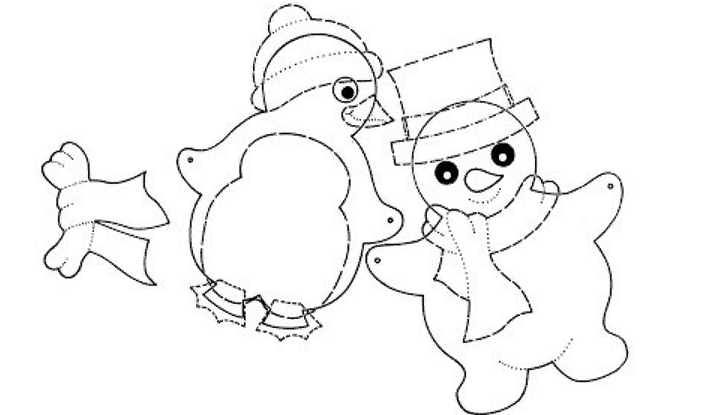

It is necessary for the process:
- Tsv. sheets of paper
- Stencil
- Pencils
- Scissors
- Any adhesive base
- Thread (wire)
How to do:
- Print or draw a template of New Year's illumination. Suppose it will be: snowman, Santa Claus, Snowflakes, Penguin, Leaves, Essays of houses, mittens, light bulbs, boots, Christmas trees, deer and gnomes. Do everything that you will like.
- Now you need to create from a color. There are a lot of workpieces.
- Then fasten them together. You can arrange and connect either closely with each other (using a thread or thin wire), or glue it on a lace, alternating various decor elements.
It remains only to hang the illumination in the right place - the New Year's decor is ready.
DIY New Year's garland - double star: templates
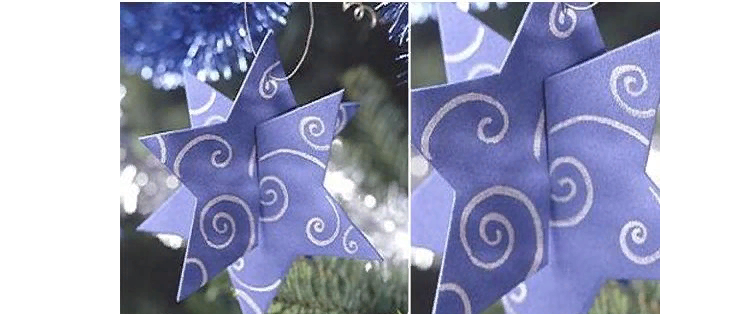
Star decor is so new. It will look great as an independent decoration for New Year's spruce.
What will be needed:

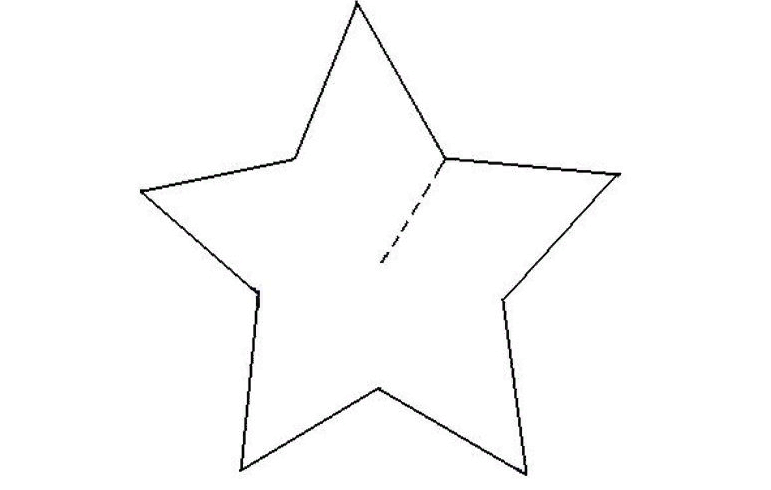
Here is a template To perform such a double star for garland for the New Year with your own hands:
Progress:
- Make the stars according to the prepared template.
- We take it 2 stars, on one you need to make a cut.
- With its help, fasten the products with each other - the decoration is ready.
- It remains only in one place to make a hole and pass the thread into it. Now you can decorate the house.
Advice: Try combining colors, drawings, paper texture. You can use white cardboard and paint it. It will be very unusual.
New Year's garland from paper stripes with your own hands: simple idea
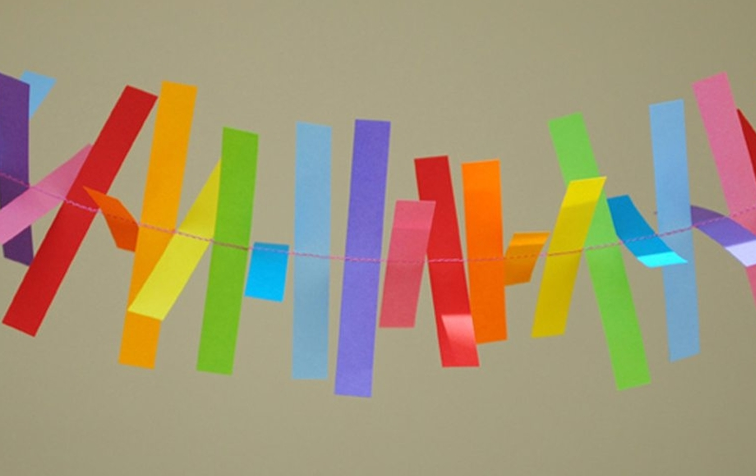
We offer you an incredibly simple idea for creating a New Year's garland of paper stripes with your own hands. To perform it, only paper strips of different lengths are needed.
Materials that are needed for the process:

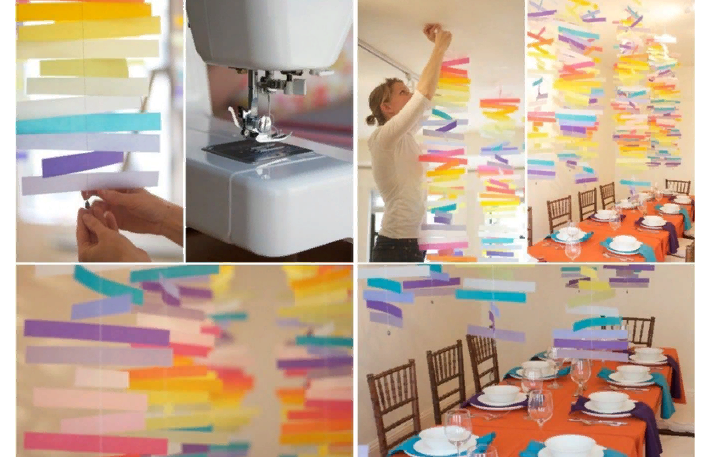
How to do:
- First cut a piece of paper into narrow ribbons 1.5 -2 centimeters. Make both strips of one length and different, from the largest to small.
- Then lay out the strips and sew them on a typewriter, but you can manually with a needle with a thread.
- At one end of the thread, attach a weighting agent, for example, a small ball of plasticine so that the decoration does not dangle much.
- Piece the illumination vertically and enjoy your work.
Such decoration is used to decorate for any celebration - simple, but beautiful.
New Year's garland of paper - voluminous balls, snowmen: with your own hands
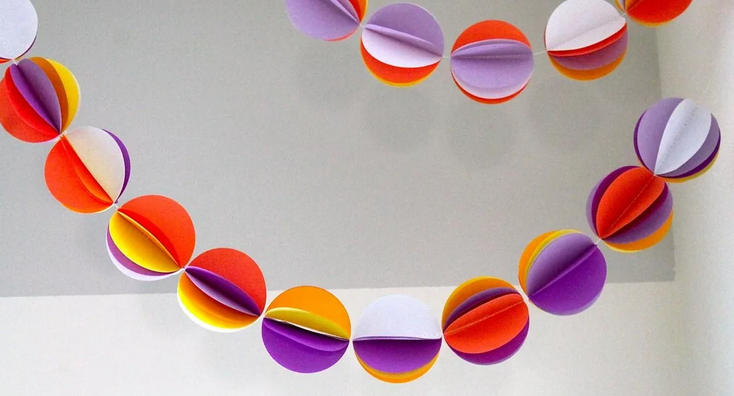
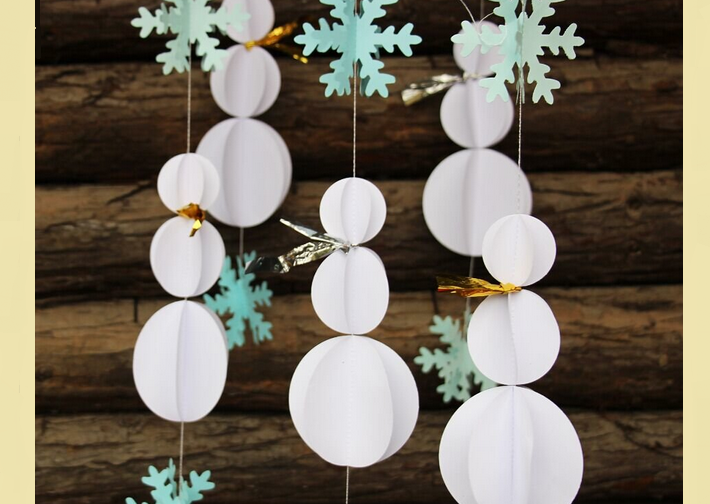
It is also one of the simplest ways of New Year's decor. You can make either balls soaring on the thread, or cut circles of different diameters and collect a snowman from them.
What will be needed:

Progress:
- First of all, prepare a circuit template in the amount 5.5 centimeters.
- Using the template, make circles in even quantity.
- Then take it 2 circlesPut on the sewing machine platform and make a line in the center. By analogy, do the rest of the circles.
- If you want to make a garland more voluminous, then you can sew it not 2, for example, 4 or even 6 circles.
- After that, straighten the half of each circle to the sides. So in the end, in the course of work, a voluminous ball will come out.
By the same method, you can make snowmen. In this case, take 2-3 templates diameter: 3.5, 5.5 and 7.5 centimeters. Sweet them on the SHV. a typewriter one after another. Decorate your taste, hang them vertically.
DIY garland for the New Year: Air bows
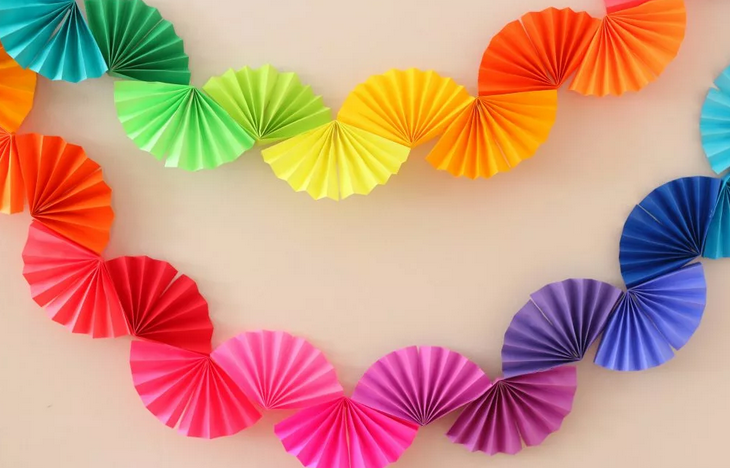
The sweetest illumination of paper bows will be an excellent decoration of the children's room for the New Year. Perform it with your own hands simply - take the paper and put it in an accordion.
Materials that are useful in the process:

Progress:
- First prepare a lot of identical small squares.
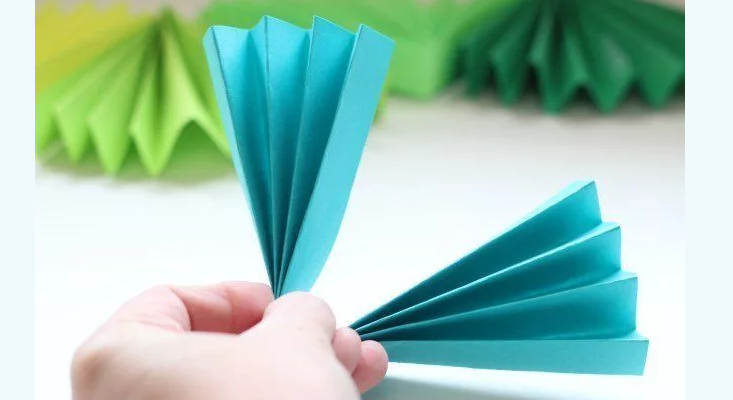
- Next, take one square and fold it with an accordion.
- In the center, bandage with a thread, and glue to get a bow.
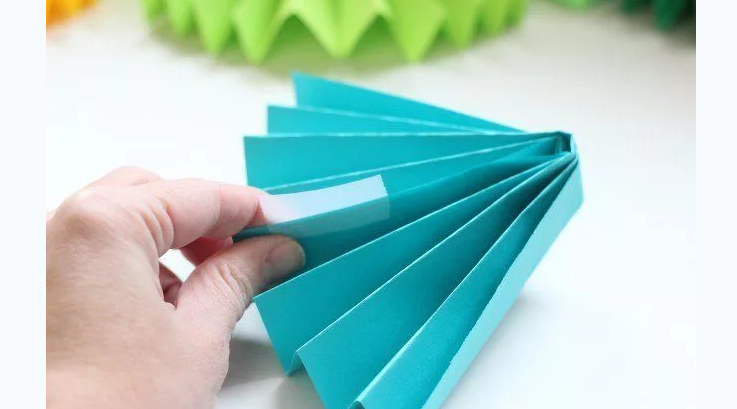
- Then hang each product on a rope.
Try to make this jewelry with the children. The result will definitely please.
DIY garland: New Year's extension from flags
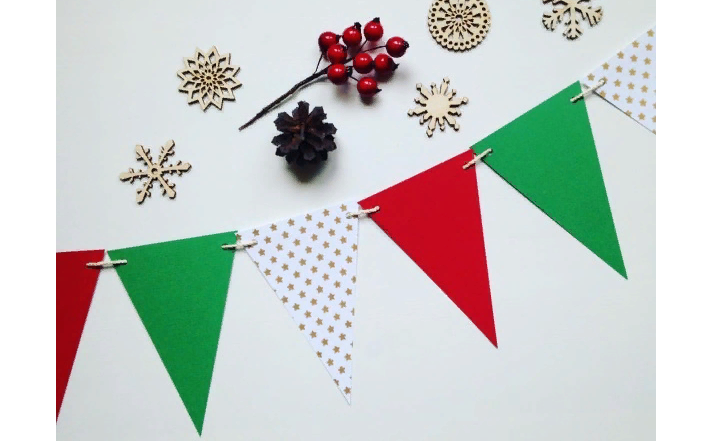
This element of the decor is easy to make, but it looks bright and stylish. You can make a clog for garlands with your own hands of a classic shape, or you can in the form of a triangle of a square or other geometric figure. Show fantasy - this is always very interesting.
What will be needed:

Progress:
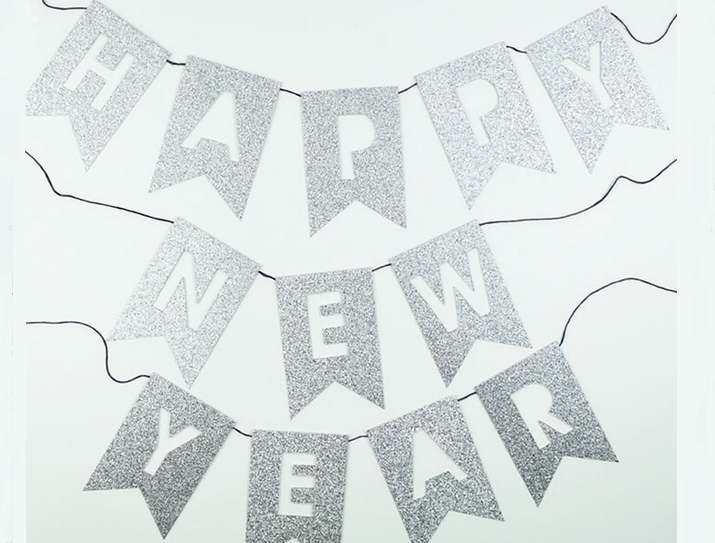
- First, cut the same flags in such an amount that one letter is placed on one flag from the inscription "HAPPY NEW YEAR!" Or any other phrase.
- Separately cut the letters for the inscription. Combine the flag and letter with glue.
- You can cut the letters on each flag using a special stapler.
- At the end, place the flags on the thread (twine) and hang such a stretch-illumination in the right place.
She will be a great way to decorate your home.
Brilliant stars: an interesting idea of \u200b\u200bgarlands for the New Year with your own hands
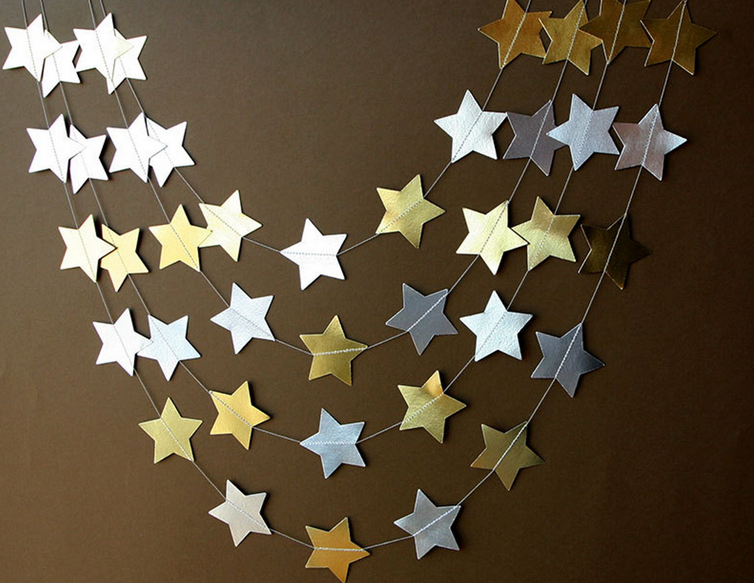
Try to perform a festive winter decor with brilliant stars. It will turn out, as if they went down to you from heaven. This is an interesting idea of \u200b\u200billuminating the New Year with your own hands.
What will be needed:
- Cardboard
- Pencil
- Scissors
- Food foil
- A thread
- Needle
Progress:
- You can use not only food foil, but also buy special for crafts in a store for creative people. Then you can make silver and gold stars to illuminate.
- First cut the stars sizes 7.5 centimeters.
- Apply it to the cardboard sheet, circle and cut it off.
- Glue cardboard and foil together.
- Next, spread with glue the other side and cover with the next foil sheet.
- Press until the contour appears. Then cut out.
- At the end, connect the stars through a short distance with a thread.
Here is a stars template:
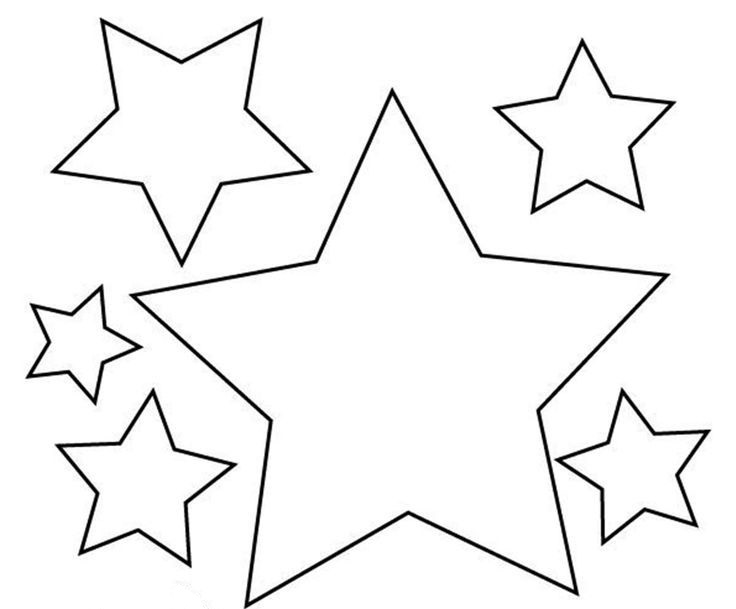
You can make a garland of stars of the same size, or you can make different products. Print the template on the printer or attach a sheet of paper to the monitor screen and circle. Cut the stars and get to work.
Girlands for the New Year from fabric or felt: with your own hands
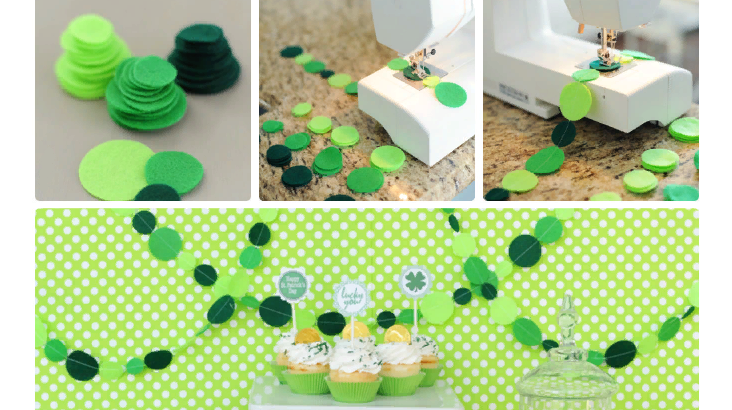
You can create New Year's decoration of fabric (felt) by analogy with paper. But the fabric has an advantage - it looks initially more completed and beautiful. Choose any shape, create snowmen, Christmas trees.
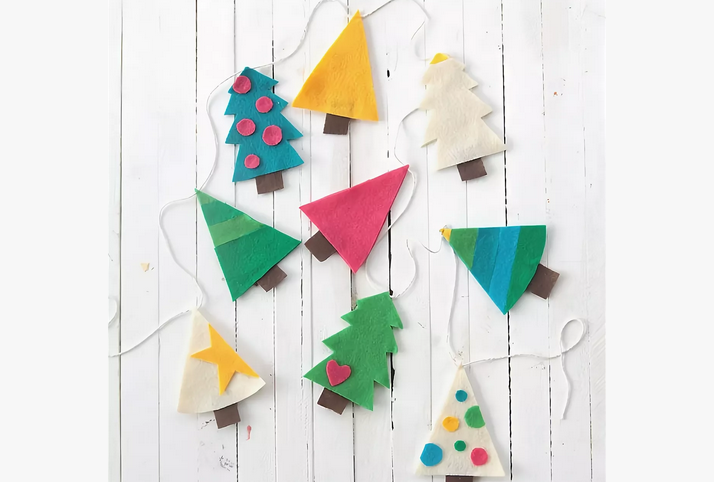
Decorate with beads, ribbons and buttons. We recommend using the thread denser to fasten the elements. You can use fabric colors that are suitable for the color of the interior, or you can use those that are associated only with the holiday - red, brilliant, etc.
Fabric flags
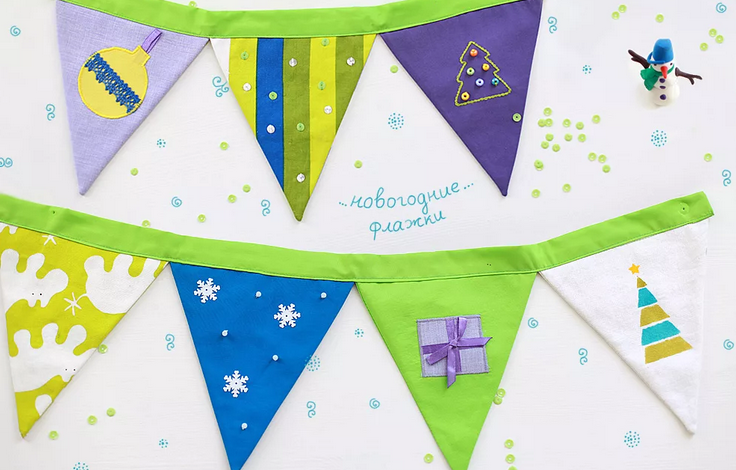
The flags can be both square and triangular. Try to make both options. The flags do not have to be sewn on a strip of fabric, you can use a regular thread or twine.
What will be needed:
- Fabric (felt)
- Sample
- Pencil
- Scissors
- Hair straightener
- Dense thread
- Double-sided tape
Progress:
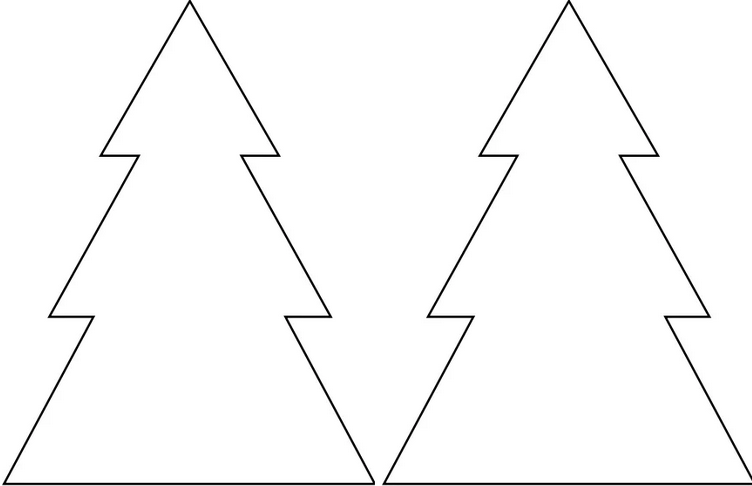
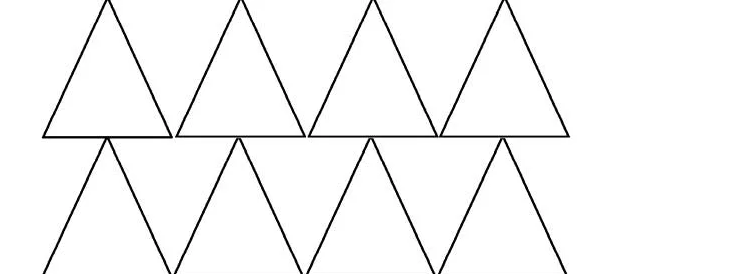
- The first step will be the preparation of a cardboard template. Using it, cut the blanks of fabric (felt).
- The second stage is the preparation of the thread. It should be flattened.
- Now take the workpiece of fabric and put it exactly in the middle, dividing it with a thread into 2 triangles.
- Fix the thread in the center with a small piece of tape.
- Next, distribute the tape along the edges of one part of the flag.
After that, connect the two halves and reward with an iron. At the end, decorate the resulting flags with the decor.
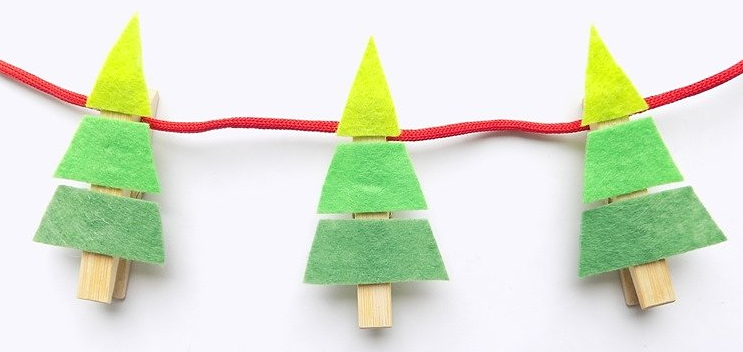
Fettle illumination on the clothespin
What will be needed:

Progress:
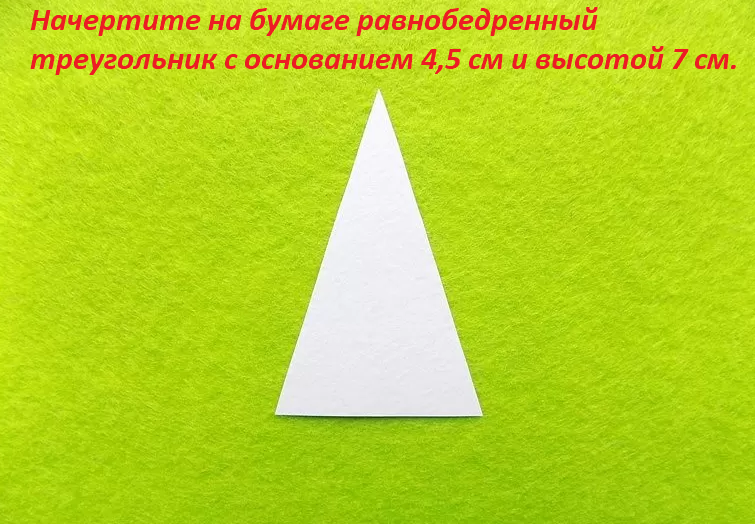
- First of all, prepare a template, it should not be much more clothespin. It will be an isosceles triangle. Above the picture describes its size.
- Cut the paper template.
- Then take the felt tissue of different shades, fold it together and attach the template. Circle it and cut off the parts.
- After that, divide the workpiece by color.
- Glue the details to the clothespin. A Christmas tree with insignificant passes between the parts will look especially interesting.
In the end, just attach the finished jewelry to the twine. An interesting decor for the New Year holidays is ready.
Girlyanda from cotton wool for the New Year: an interesting and simple idea with your own hands
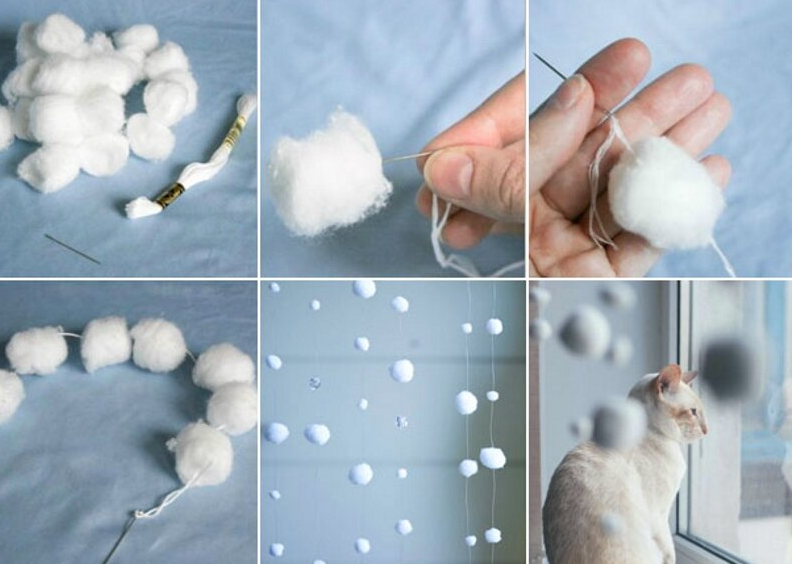
Vata is always used to give a festive mood during the winter holidays. It is light as snow and looks very stylish. Below is a very cool, but the simplest thing to fulfill the idea of \u200b\u200bcreating a garland from cotton wool for the New Year with your own hands.
What will be needed:
- Vata
- A thread
- Needle
- PVA glue
Progress:
- Take a cotton wool and start tearing small pieces from it.
- The prepared material must be rolled into a tight ball. You can specially make different sizes.
- Pour the glue into the container and dip in it made out of cotton blanks. Leave them for a while to dry.
- While the balls dry, prepare a thread with a needle.
- After cotton pompom is ready, string them on a thread.
- Distribute the balls randomly on the thread and hang on the cornice or upper part of the window.
The more such strings you succeed, the better.
New Year's decoration from cotton pads: original garland with your own hands
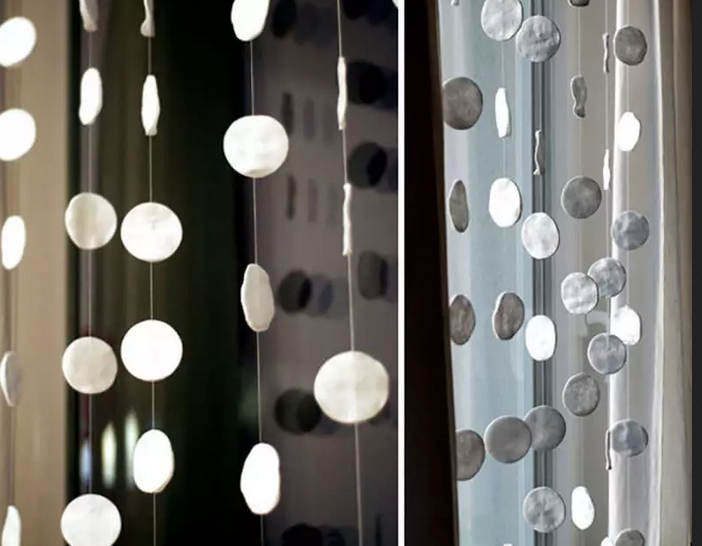
Cotton wheels are so similar to the winter snowball. That's a ready -made workpiece for creativity. Buy a couple of packs of cotton pads and get to work.
White circles on the thread:
What will be needed:
- Cotton wheels
- Sewing machine
Progress:
- Take cotton wheels and stitch them on the SHV. car through small distances.
- Hang such decoration near the window vertically.
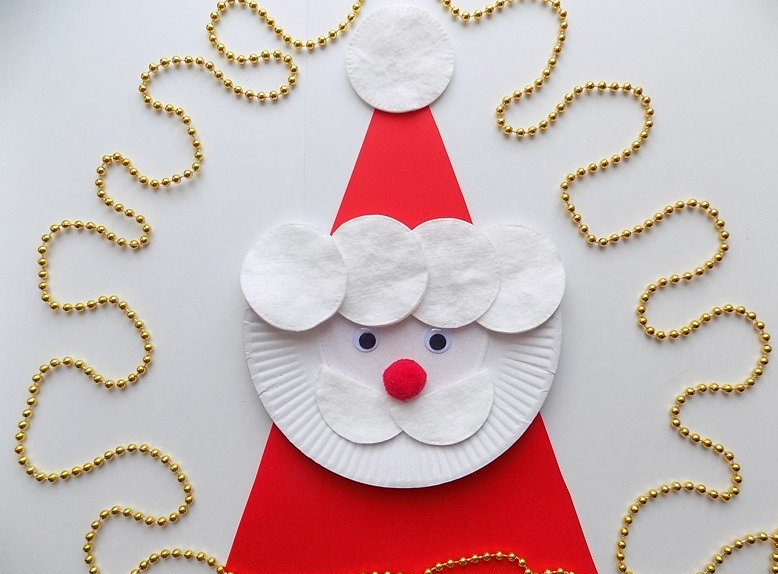
SANTA CLAUS
What will be needed:
- Cotton wheels
- PVA glue
- Tsv. paper
- Cardboard sheets
- Flomaster
- Shpagat (dense thread)
Progress:
- Take a cotton pad and glue a small circle of white or pink on it. It can be a paper disposable plate or you can make a circle of colored paper. The face of Santa Claus turned out.
- Then, from small segments of a cotton pad, make a mustache on which glue your nose - a small circle of red color.
- Cut the hat to Santa Claus also cut off red cardboard sheets.
- At the end of the image, draw your eyes on your face.
Attach the workpiece to the thread with glue and hang vertically. Such elegant illumination will look very cute and festive.
Balls of threads: garland for the New Year with your own hands

We bring to your attention the idea of \u200b\u200buniversal illumination. Make balls of threads of different lengths and colors, connect them in groups and decorate the interior for any holiday. You can insert bright “lights” inside the balls and you get a very interesting garland for the New Year with your own hands.
What will be needed:
- Balloons
- PVA glue
- Threads (cotton yarn)
- Cardboard
- Flomaster
- Dense thread
- If desired, LED garland

How to do:
- Inflate balloons of the desired size.
- Lower the threads in PVA glueLeave there. They should be well soaked in glue.
- Next, you should wrap the balloon with threads and leave until it is completely dry.
- After the parts of the decor are dry, you need to pierce the rubber ball and extract it.
- In conclusion, skip the balls through the thread.
You can take LED illumination and gently let the light bulb inside the balls. It will look very impressive.
Fit decoration: garland for the New Year with your own hands
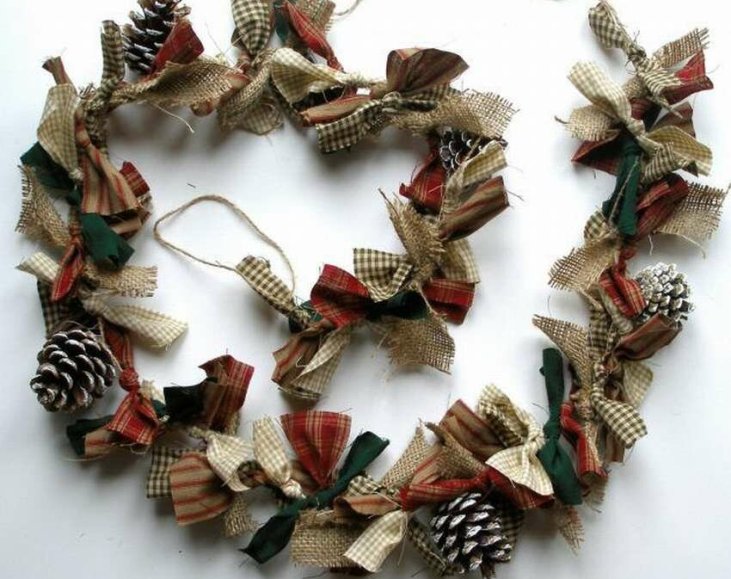
The illumination of cones looks unusual and stylish. You can paint it in any color that is suitable for you, and add decor to your liking. It is worth noting that such an illumination will perfectly decorate the spruce, entrance doors or walls of the house and on the street.
Materials that are necessary to create decoration for the New Year with your own hands:

Progress:
- The very first stage will be painting cones. Take paint and cover them outside. Gold and silver colors look good.
- Then prepare the twine and glue it on it with the adhesive pistol of the cone. Do this with minimal passes.
- Fill the voids with bows from a satin ribbon or from segments of bright fabric.
- Decorate with beads, rhinestones, sparkles.
- Instead of bows, you can use small Christmas balls in size.
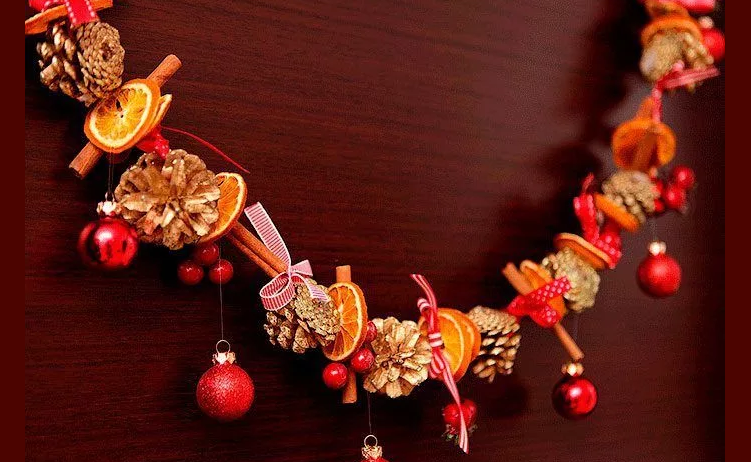
After that, make less bows and decorate the top of the cones. You can make fruit decoration and supplement the garland with them. How to dry oranges and others correctly fruits for garlandsRead in another article on the pages of our site.
DIY Girlyanda from salt dough: decor ideas for the New Year
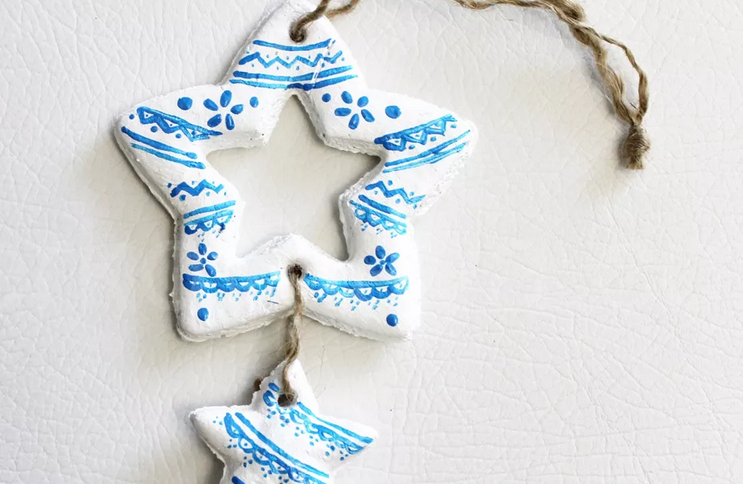
Create something truly unusual and beautiful. Nice shock your guests with elegant illuminations from salty dough with your own hands. This is a good and suitable material for creativity with children. It is environmentally friendly and allows you to create different products for the New Year and other days. Make salty dough according to the following recipe:
What is required:
- 1 stack. small food salt
- 1 stack. flour
- 1/2 stack. water
Progress:
- Mix salt and flour in dishes, add water a little.
- Hard the test workpiece until a homogeneous and soft consistency. Please note that the dough should not stick to your hands.
- If you want the dough to be a white shade, add to the composition 3/4 parts White acrylic paint.
How to dry products from salt dough? There are 2 ways:
Option 1 - a natural way:
- You will need to leave jewelry from the dough for a couple of days in a dry, warm place.
- On the 1 cmthe test leaves 24 hours. Drying. The thicker the product, the longer it will dry.
Option 2 - drying in the oven:
- To do this, heat it to the maximum temperature and turn it off.
- Then put the products on a baking sheet covered with parchment paper.
- Leave the jewelry there until it cools the oven.
Painting balls, stars from salty dough:
- For painting crafts, you can use different types of kner: oil, gouache, acrylic.
- If you add food dyes to the dough, get the dough of the desired shade.
Important: You need to paint the dried dough.
Now you can make beautiful and festive products from the dough.
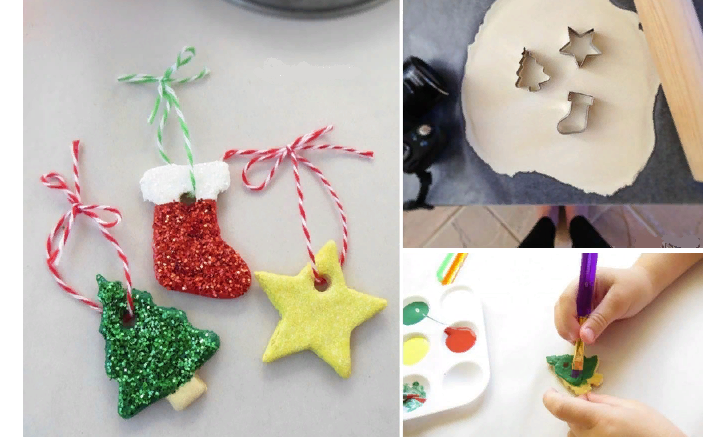
Illumination using baking forms:
Materials that are useful for the process:
- Ready dough
- Rockbrush
- Baking forms (stars, hearts, animals, mittens, circle)
- Lace (twine)
- Awl
- Paints and decor
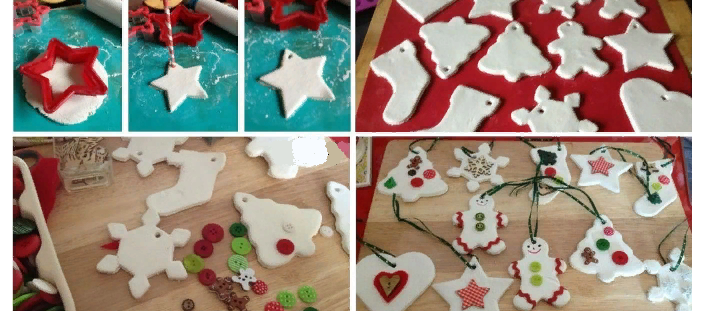
Progress:
- The finished dough is thinly roll out and cut off any figure with the help of baking forms.
- Then make holes under the thread with an awl and send the blanks to the oven.
- If you used the painted dough, then decorate after drying to taste and hang on a thread.
- If the dough was not painted - decorate the finished crafts and only then connect in the garland.
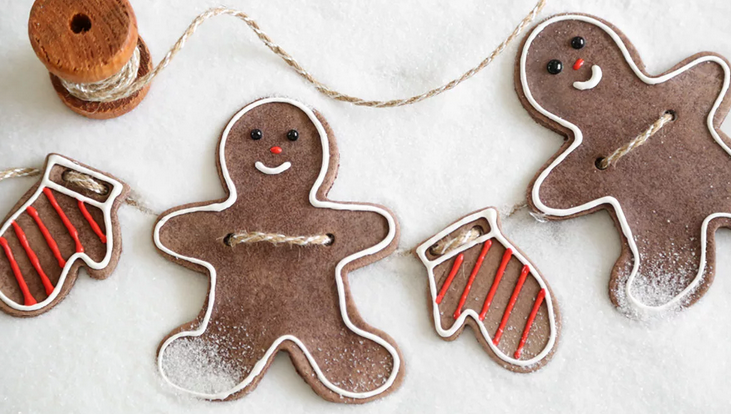
GINGERBREAD MAN
For work, take the same salty dough, which was in the previous master class. The difference will be only in the form and color of the product.
Progress:
- Roll out a test workpiece and cut a gingerbread man out of it.
- Take the dough immediately painted brown.
- It will be best done using a special form, but you can do it by hand.
- Be sure, while the dough is raw, make holes for the twine in the upper part of the figure.
- After the dough has dried, make a strip of white paint along the contour, and then draw the face of the man.
At the end, connect the figures together.
Garland from pasta for New Year: with your own hands

One of the fastest and simplest decor options. Great for families with children. Collect in the evening at the table of all households, prepare materials and take care of joint creativity.
What is required:
- Pasta (bows, feathers, horns)
- Dye
- Lace (twine)
Progress:
- Paint raw pasta in any bright color and let it dry.
- After drying, connect the workpieces in the garland.
- If you took the bows, then bandage them in the center with a thread. Strew horns and feathers on a thread, alternating colors.
You will get stylish decoration for the design of the New Year spruce.
Decor for the New Year from brushes and fringe: DIY garland
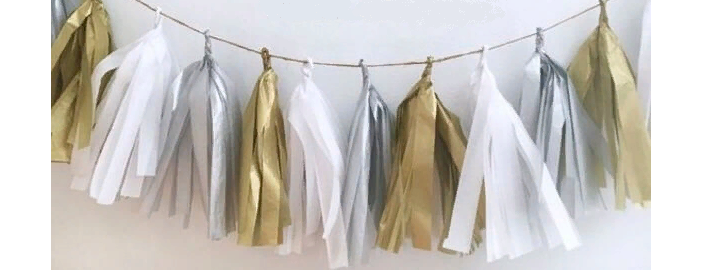
Such a decor for the New Year from brushes and fringe looks very interesting. They can decorate the walls and some kind of interior items. It is simple to make such an elegant illumination with your own hands. Buy materials and start working.
Festive illumination from fringe
What will be needed:

Progress:
- Take two shades of paper (fabric) and fold it in half.
- Then make cuts on 2/3 of the length approximately by 2-3 centimeters.
- After that, expand the workpiece and spread the center with glue, put the twine and connect the parts well.
- Continue so as long as you have measured the length of the twine.
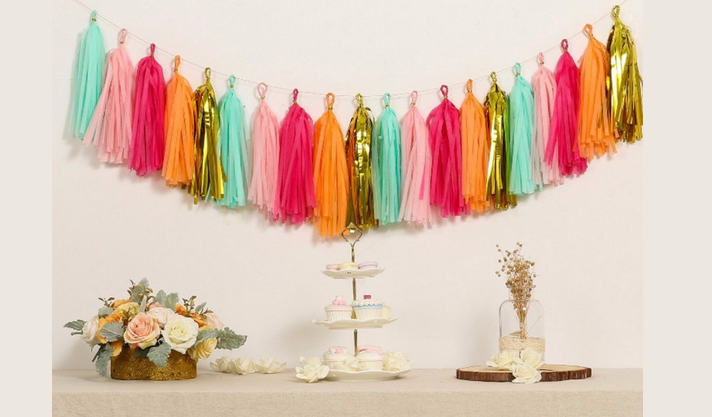
Girlynda from brushes
What will be needed:

Progress:
- Fold the b. boom. in half and make cuts on 2/3 The lengths are approximately by 1-1.5 cm.
- Next, turn the sheet so that the cuts are on both sides.
- Turn the leaf into a tube, and then a tourniquet.
- As a result, you will get a loop on one side, and on the other there will be cuts.
- Turn the loop with a thread.
- Make a lot of different brushes, and then string the loop on the thread.
As you can see, there are many options for making New Year's illumination, and this is only a small part. Your imagination and imagination will be able to complement any of these garlands. We hope you will pleasantly spend New Year's days in the family circle, mastering New Year's garlands. Good luck!

